Ampache is an open-source and web-based audio/video streaming application that allows you to access your music & videos from anywhere over the internet. Ampache provides a platform to host and manage your digital music collection on your own server. With Ampache, you can stream your music to your smartphone, tablet, and smart TV.
In this post, we will show you how to install the Ampache Music Streaming server on Debian 12.
Step 1 – Install LAMP Server
Ampache requires an Apache web server, Database server, PHP. So you will need to install the LAMP server and other PHP dependencies in your server. You can install all of them with the following commands:
apt-get update -y
apt-get install apache2 mariadb-server php libapache2-mod-php php-cli php-common php-json php-gd php-xmlrpc php-curl php-intl php-imagick php-mysql php-zip php-xml php-mbstring php-bcmath unzip ffmpeg -y
After installing all packages, edit the php.ini file and make some changes:
nano /etc/php/8.2/apache2/php.ini
Change the following lines:
short_open_tag = On
memory_limit = 256M
cgi.fix_pathinfo = 0
max_execution_time = 360
upload_max_filesize = 64M
post_max_size = 64M
Save and close the file then restart the Apache service to apply the changes:
systemctl restart apache2
Step 2 – Configure MariaDB Database
Next, you will need to create a database and user for Ampache.
First, connect to MariaDB with the following command:
mysql
Next, create a database and user with the following command:
CREATE DATABASE ampachedb;
CREATE USER 'ampache'@'%' IDENTIFIED BY 'password';
Next, grant all the privileges to ampachedb with the following command:
GRANT ALL PRIVILEGES ON ampachedb.* TO 'ampache'@'%' WITH GRANT OPTION;
Next, flush the privileges and exit from MariaDB with the following command:
FLUSH PRIVILEGES;
EXIT;
Step 3 – Install Ampache
Next, download the latest version of Ampache from the Git repository:
wget https://github.com/ampache/ampache/releases/download/7.7.2/ampache-7.7.2_all_php8.2.zip
Once the download is completed, unzip the downloaded file to the Apache web root directory:
unzip ampache-7.7.2_all_php8.2.zip -d /var/www/html/ampache
Next, change the directory to the extracted directory and rename some sample .htaccess files.
cd /var/www/html/ampache
cp config/ampache.cfg.php.dist config/ampache.cfg.php
Next, edit the ampache.cfg.php file.
nano config/ampache.cfg.php
Define your database settings:
database_hostname = "localhost"
database_name = "ampachedb"
database_username = "ampache"
database_password = "password"
Next, set proper ownership and permission to the Ampache directory:
chown -R www-data:www-data /var/www/html/ampache
chmod -R 775 /var/www/html/ampache
Next, create a directory to store your music and set proper ownership:
mkdir -p /data/
chown -R www-data:www-data /data/
Next, enable the Apache expires and rewrite module with the following command:
a2enmod expires rewrite
Finally, restart the Apache service to apply the changes:
systemctl restart apache2
Step 4: Configure Apache
Next, create an Apache configuration file for Ampache.
nano /etc/apache2/sites-available/ampache.conf
Add the following configuration:
<VirtualHost *:80>
ServerName ampache.example.com.com
DocumentRoot /var/www/html/ampache/public

<Directory /var/www/html/ampache/public>
Options Indexes FollowSymLinks
AllowOverride All
Require all granted
</Directory>

ErrorLog ${APACHE_LOG_DIR}/ampache_error.log
CustomLog ${APACHE_LOG_DIR}/ampache_access.log combined
</VirtualHost>
Save and close the file then activate the Apache virtual host.
a2ensite ampache.conf
Finally, restart the Apache to apply the changes.
systemctl restart apache2
Step 5 – Access Ampache Web Interface
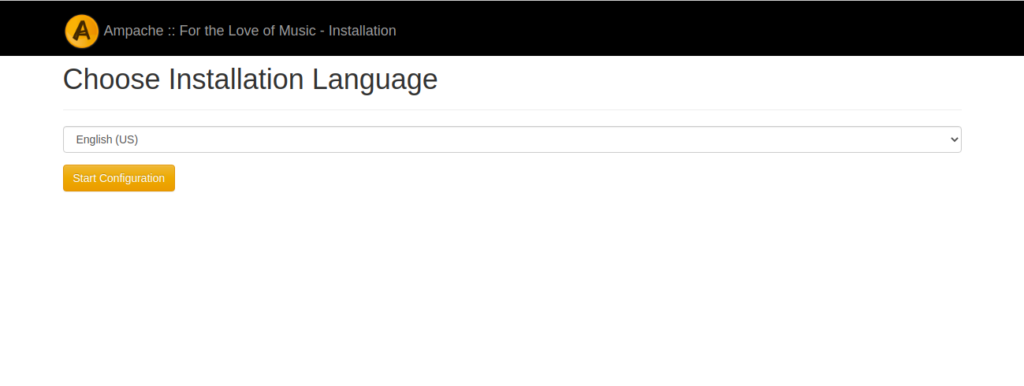
Now, open your web browser and access the Ampache web interface using the URL http://ampache.example.com/install.php. You should see the following page:
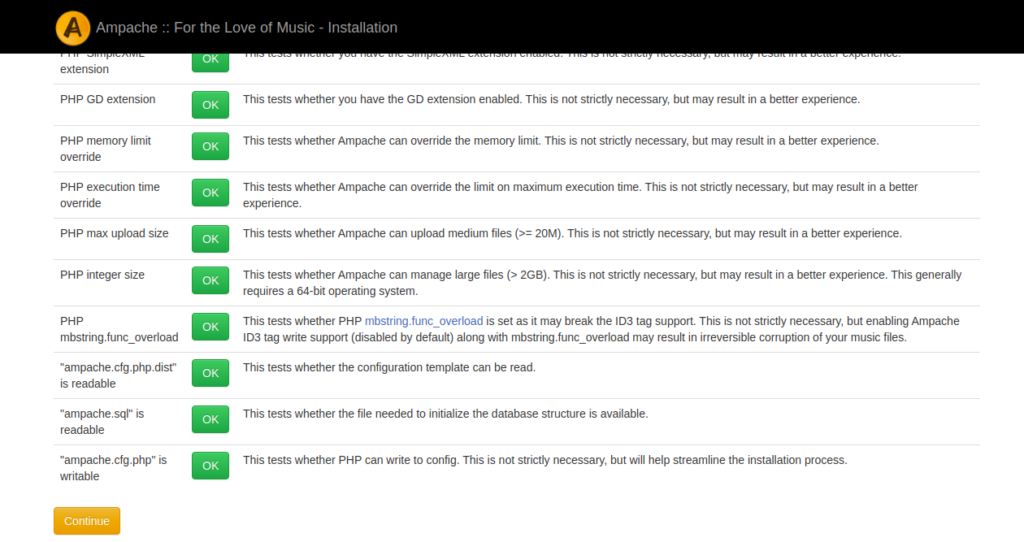
Select your language and click on Start Configuration. You should see the following page:
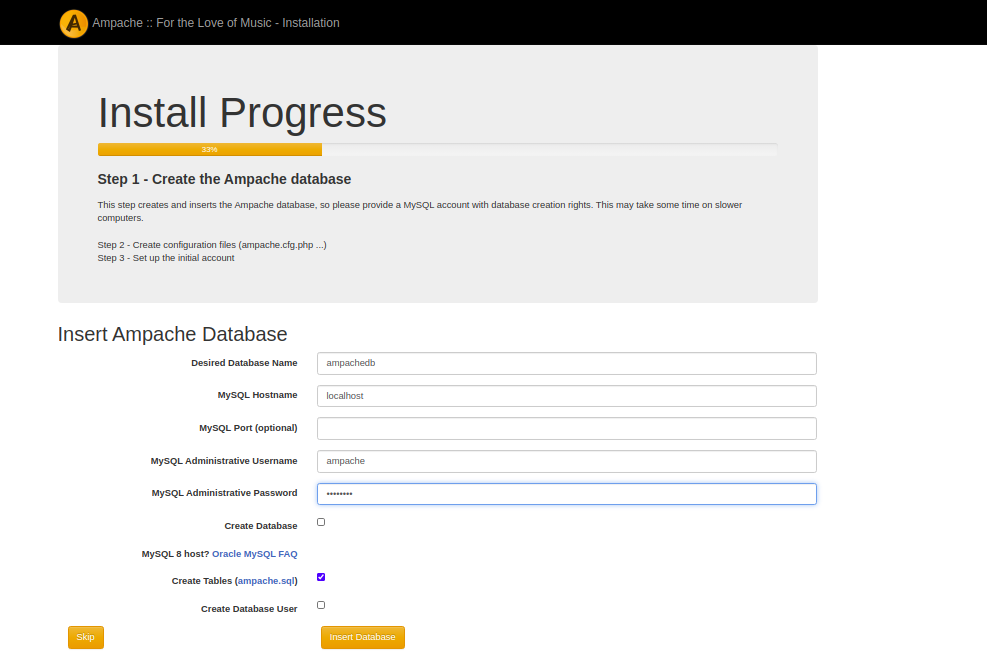
Make sure all the PHP dependencies are installed then click on the Continue button. You should see the following page:
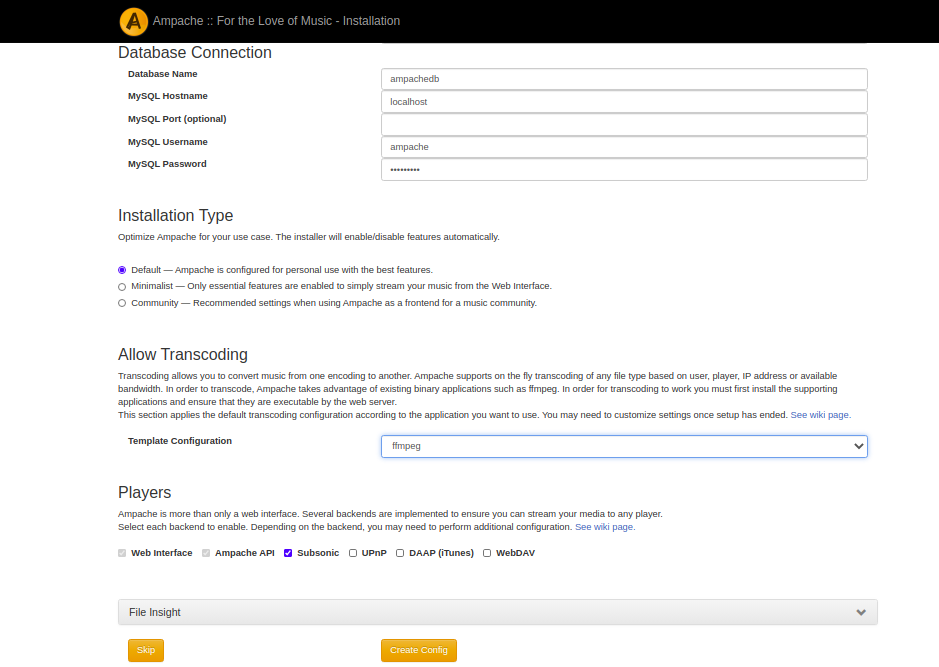
Provide your database details, uncheck “Create Database” and click on the Insert Database. You should see the following page:
Select the FFmpeg template and click on the Create Config button. You should see the following page:
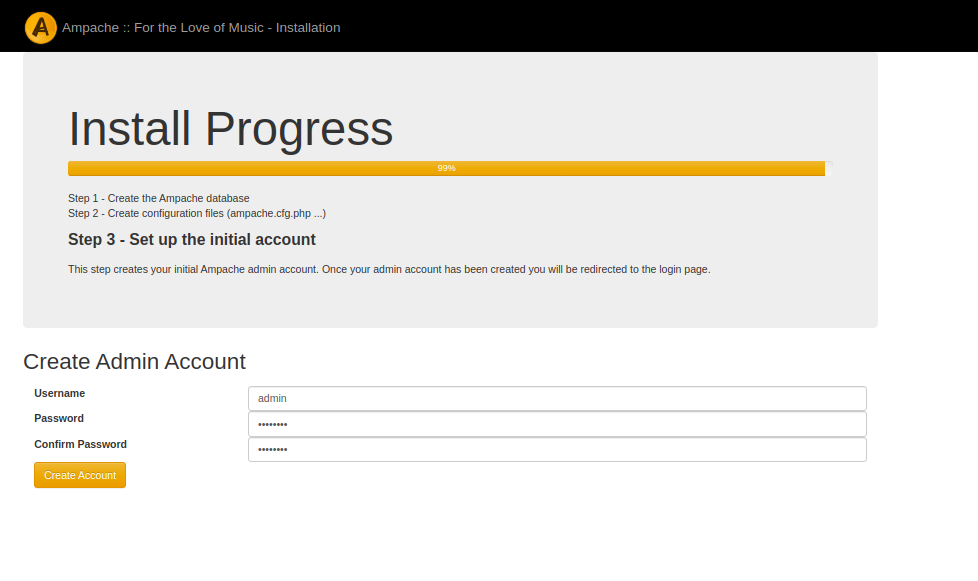
Set your admin password and click on the Create Account button. You should see the following page:
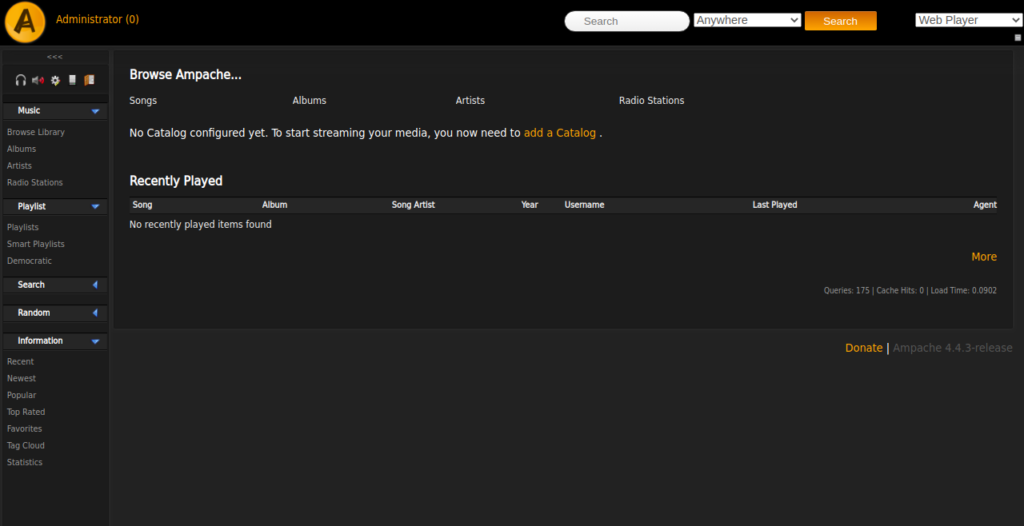
Provide your admin username, password and click on the Login button. You should see the Ampache dashboard on the following page:
Conclusion
Congratulations! You have successfully installed the Ampache music streaming server on Debian 12. You can now store your music and audio on the Ampache server and stream them over the internet from any device. Try it on your dedicated server from Atlantic.Net.
