Squid is a free, open-source, widely used proxy server for Linux and Unix operating systems. It acts as an intermediary between clients and servers for web objects accessed through HTTP and HTTPS. It is also used as a proxy caching server to improve web server speed by caching frequently requested pages. Squid also allows you to control web access via access control rules.
In this post, we will show you how to install the Squid proxy server on Fedora Linux.
Step 1 – Install Squid Proxy
By default, the Squid package is included in the Fedora operating system. You can install it by simply running the following command.
dnf install squid -y
After installing the Squid proxy package, start and enable the Squid service to start it at system reboot.
systemctl start squid
systemctl enable squid
By default, the Squid proxy listens on port 3128. You can verify it using the following command.
ss -antpl | grep -i squid
Output.
LISTEN 0 4096 *:3128 *:* users:(("squid",pid=65118,fd=13))
Step 2 – Create a Squid User
You will need to create a user for Squid if you want to control Internet access. First, install the Apache tools package with the following command.
dnf install httpd-tools -y
Next, create a password file and change its ownership.
touch /etc/squid/squid_passwd
chown squid /etc/squid/squid_passwd
Next, create a Squid user and set a password with the following command.
htpasswd /etc/squid/squid_passwd client1
Set your user’s password as shown below.
New password:
Re-type new password:
Adding password for user client1
Step 3 – Configure Squid Proxy Server
In this section, we will configure user-based authentication in Squid proxy so that only the Squid user can access the internet.
Edit the Squid configuration file.
nano /etc/squid/squid.conf
Add the following lines at the top of the file:
auth_param basic program /usr/lib64/squid/basic_ncsa_auth /etc/squid/squid_passwd
acl ncsa_users proxy_auth REQUIRED
http_access allow ncsa_users
Save and close the file when you are done. Then, restart the Squid service to apply the changes.
systemctl restart squid
Step 4 – Verify Squid Proxy Server
At this point, your Squid proxy server is installed and configured. Now you will need to define your proxy server on the client’s machine.
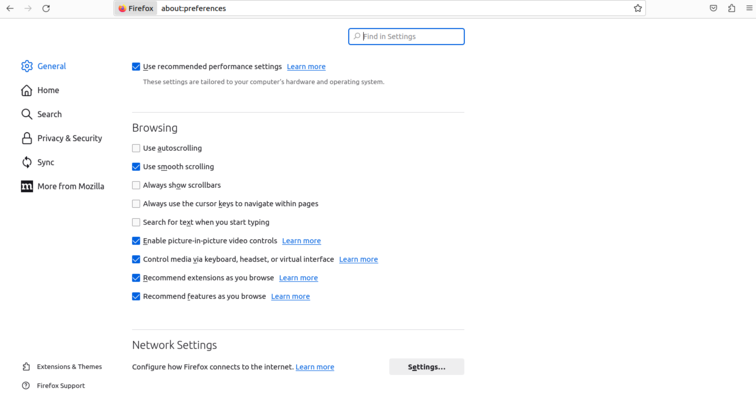
First, open the Firefox web browser on the client machine and open the settings. You will see the following screen.
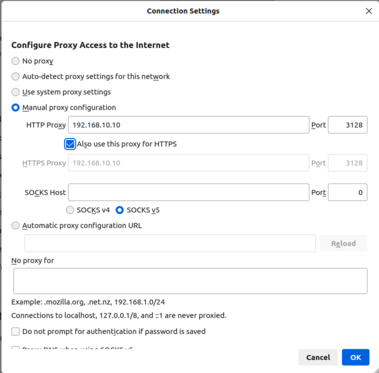
Scroll down the page and click on Settings. You will see the following screen.
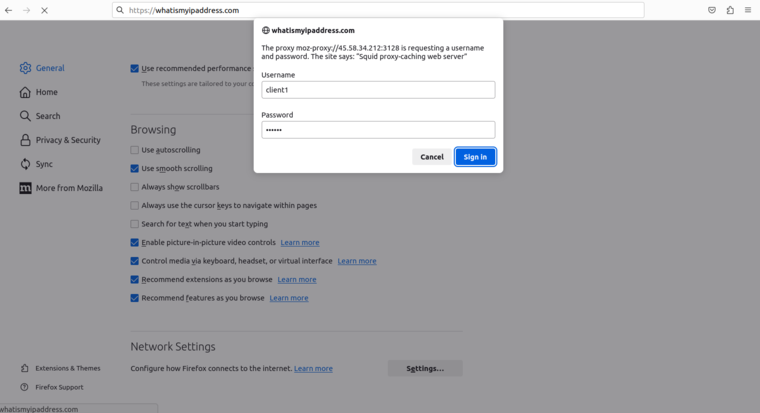
Define your proxy server IP and port, and click on OK to save the changes. Now, open a new tab in your browser and access the whatismyip.com website. You will be asked to authenticate the Squid server.
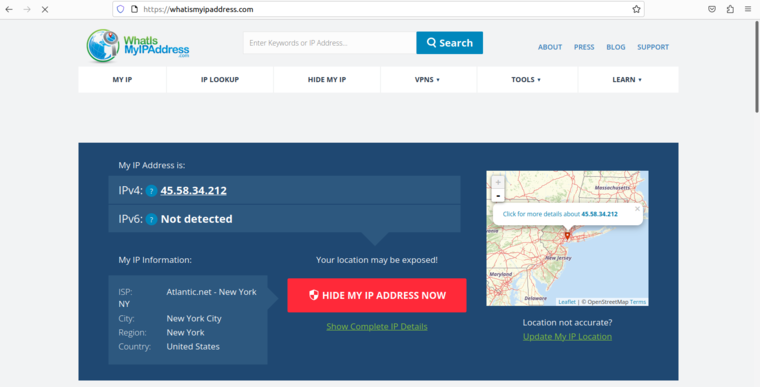
Provide your Squid username and password and click on Sign in. After the successful authentication, you will be able to access the website.
Conclusion
In this post, you learned how to install and configure the Squid proxy server on Fedora Linux. You can now hide your identity and control Internet access using the Squid proxy server. Try out Squid proxy on dedicated server hosting from Atlantic.Net!


