Arkime (formerly known as Moloch) is an open-source, large-scale, full packet capturing, indexing, and database system. It allows organizations to capture and index network traffic, providing a web-based interface for browsing, searching, and analyzing packet data. Arkime is highly scalable and can handle massive amounts of data, making it suitable for use in large networks or data centers.
This tutorial will guide you through the step-by-step process of installing Arkime on an Ubuntu 24.04 server.
Step 1 – Install Necessary Packages
First, we need to install some prerequisite packages. These packages ensure that your system has the necessary tools for downloading, managing, and verifying software from external sources. Open your terminal and run the following command:
apt install apt-transport-https ca-certificates curl gnupg2 software-properties-common -yStep 2 – Add Elasticsearch GPG Key and Repository
Now, let’s add the GPG key for the Elasticsearch package to ensure the packages you download are authentic and haven’t been tampered with. Then, we’ll add the Elasticsearch repository.
First, add the GPG key:
wget -qO - https://artifacts.elastic.co/GPG-KEY-elasticsearch | gpg --dearmor -o /etc/apt/trusted.gpg.d/elastic.gpgThen, add the repository:
echo "deb https://artifacts.elastic.co/packages/8.x/apt stable main" |tee /etc/apt/sources.list.d/elastic-8.x.listStep 3 – Install Elasticsearch
Next, update your package list and install Elasticsearch. Elasticsearch is a powerful search engine based on the Lucene library, designed for horizontal scalability, reliability, and real-time search capabilities.
apt update
apt install elasticsearch
During the installation, a password for the elastic user is generated. Make sure to note this password because you’ll need it later. For example, the output might be:
The generated password for the elastic built-in superuser is : jUz*X+1f5gyw4Oz8OR2jTo make sure Elasticsearch runs continuously and starts automatically on boot, you need to start the service and enable it.
systemctl start elasticsearch
systemctl enable elasticsearch
Let’s check if Elasticsearch is running correctly. Use curl to verify the installation. The -k flag allows curl to perform insecure SSL connections and transfers.
curl https://localhost:9200 -k -u elastic -pYou will be prompted to enter the password for the elastic user. After entering the password, you should see a response confirming Elasticsearch is running, similar to this:
{
  "name" : "ubuntu",
  "cluster_name" : "elasticsearch",
  "cluster_uuid" : "BviykehYSvig56i9fmShlw",
  "version" : {
    "number" : "8.18.1",
    "build_flavor" : "default",
    "build_type" : "deb",
    "build_hash" : "df116ec6455476a07daafc3ded80e2bb1a3385ed",
    "build_date" : "2025-04-30T10:07:44.026929518Z",
    "build_snapshot" : false,
    "lucene_version" : "9.12.1",
    "minimum_wire_compatibility_version" : "7.17.0",
    "minimum_index_compatibility_version" : "7.0.0"
  },
  "tagline" : "You Know, for Search"
}
Step 4 – Download and Install Arkime
It’s time to download the Arkime package specific to Ubuntu 22.04. Arkime provides tools to index and search captured packet data, integrating with Elasticsearch for data storage and retrieval.
First, use the wget command to download the latest Arkime package from its official website.
wget https://github.com/arkime/arkime/releases/download/v5.6.4/arkime_5.6.4-1.ubuntu2404_amd64.debOnce the package is downloaded, install it using the following command.
apt install ./arkime_5.6.4-1.ubuntu2404_amd64.debStep 5 – Configure Arkime
Now, let’s configure Arkime by running the configuration script. This script will help you specify which network interfaces to monitor, the Elasticsearch server details, and other settings.
/opt/arkime/bin/ConfigureYou will be asked several questions as shown below:
Found interfaces: lo;eth0;eth1
Semicolon ';' seperated list of interfaces to monitor [eth1] eth0
Install Elasticsearch server locally for demo, must have at least 3G of memory, NOT recommended for production use (yes or no) [no]
OpenSearch/Elasticsearch server URL [https://localhost:9200]
OpenSearch/Elasticsearch user [empty is no user] elastic
OpenSearch/Elasticsearch password [empty is no password] jUz*X+1f5gyw4Oz8OR2j
Password to encrypt S2S and other things, don't use spaces [must create one] password
Arkime - Creating configuration files
Installing sample /opt/arkime/etc/config.ini
sed: can't read : No such file or directory
Arkime - Installing /etc/security/limits.d/99-arkime.conf to make core and memlock unlimited
Download GEO files? You'll need a MaxMind account https://arkime.com/faq#maxmind (yes or no) [yes] yes
Next, initialize the Arkime configuration in Elasticsearch. This step sets up the necessary indices and configurations in Elasticsearch for Arkime to function correctly.
/opt/arkime/db/db.pl --esuser elastic:'jUz*X+1f5gyw4Oz8OR2j' https://localhost:9200 initNext, add an admin user for Arkime. This user will have administrative privileges and can manage other users and configurations.
/opt/arkime/bin/arkime_add_user.sh admin "Arkime SuperAdmin" password --adminStep 6 – Start Arkime Services
To start capturing and analyzing network traffic, we need to enable and start the Arkime capture and viewer services. These services must be running for Arkime to function.
systemctl enable --now arkimecapture
systemctl enable --now arkimeviewer
Verify that both services are running:
systemctl status arkimecapture arkimeviewerOutput:
● arkimecapture.service - Arkime Capture
     Loaded: loaded (/etc/systemd/system/arkimecapture.service; enabled; preset: enabled)
     Active: active (running) since Tue 2025-05-27 05:41:26 UTC; 11s ago
   Main PID: 4540 (sh)
      Tasks: 7 (limit: 4609)
     Memory: 320.9M (peak: 321.3M)
        CPU: 446ms
     CGroup: /system.slice/arkimecapture.service
             ├─4540 /bin/sh -c "/opt/arkime/bin/capture -c /opt/arkime/etc/config.ini  >> /opt/arkime/logs/capture.log 2>&1"
             └─4546 /opt/arkime/bin/capture -c /opt/arkime/etc/config.ini

May 27 05:41:25 ubuntu systemd[1]: Starting arkimecapture.service - Arkime Capture...
May 27 05:41:26 ubuntu systemd[1]: Started arkimecapture.service - Arkime Capture.
May 27 05:41:26 ubuntu (sh)[4540]: arkimecapture.service: Referenced but unset environment variable evaluates to an empty string: OPTIONS

● arkimeviewer.service - Arkime Viewer
     Loaded: loaded (/etc/systemd/system/arkimeviewer.service; enabled; preset: enabled)
     Active: active (running) since Tue 2025-05-27 05:41:30 UTC; 7s ago
   Main PID: 4710 (sh)
      Tasks: 12 (limit: 4609)
     Memory: 99.5M (peak: 99.9M)
        CPU: 1.459s
     CGroup: /system.slice/arkimeviewer.service
             ├─4710 /bin/sh -c "/opt/arkime/bin/node viewer.js -c /opt/arkime/etc/config.ini  >> /opt/arkime/logs/viewer.log 2>&1"
             └─4711 /opt/arkime/bin/node viewer.js -c /opt/arkime/etc/config.ini

May 27 05:41:30 ubuntu systemd[1]: Started arkimeviewer.service - Arkime Viewer.
May 27 05:41:30 ubuntu (sh)[4710]: arkimeviewer.service: Referenced but unset environment variable evaluates to an empty string: OPTIONS
Step 7 – Access Arkime Web Interface
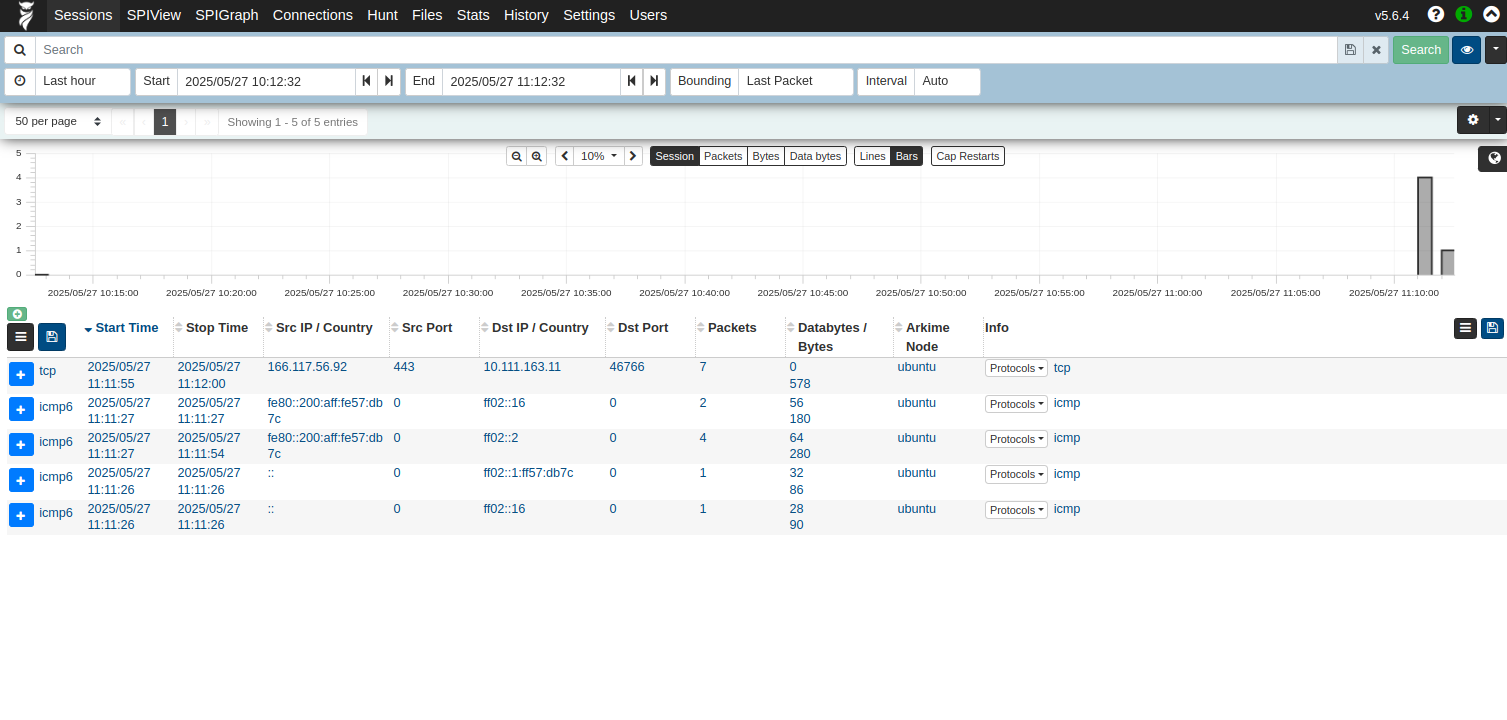
You can now access the Arkime web interface by navigating to http://your-server-ip:8005 in your web browser.
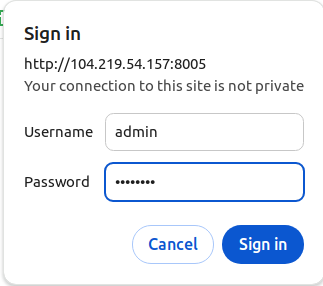
Use your admin credentials to log in.
It’s always a good idea to check the Arkime logs for any errors. This helps in troubleshooting any issues that might arise during the setup process.
tail -f /opt/arkime/logs/viewer.log
tail -f /opt/arkime/logs/capture.log
Conclusion
You have successfully installed Arkime on Ubuntu 24.04. You can now start capturing and analyzing network traffic using its powerful web interface. Arkime’s capabilities enable you to monitor, search, and analyze network packets in real time, providing deep insights into your network’s activity. This tool is invaluable for network administrators, security professionals, and anyone needing comprehensive network visibility. Try to install Arkime on dedicated server hosting from Atlantic.Net!
* This post is for informational purposes only and does not constitute professional, legal, financial, or technical advice. Each situation is unique and may require guidance from a qualified professional.
Readers should conduct their own due diligence before making any decisions.