Craft CMS is an open-source, flexible, and user-friendly content management system for creating custom digital experiences on the web. Craft doesn’t have a website builder, so you will need to write your own HTML code to build a website. It is designed with web developers in mind and helps them to build beautiful websites in a modern fashion.
In this post, we will show you how to install Craft CMS with Apache on Arch Linux.
Step 1 – Configure Repository
By default, the default repository is outdated in Arch Linux, so you will need to modify the default mirror list. You can do it by editing the mirror list configuration file:
nano /etc/pacman.d/mirrorlist
Remove all lines and add the following lines:
## Score: 0.7, United States
Server = http://mirror.us.leaseweb.net/archlinux/$repo/os/$arch
## Score: 0.8, United States
Server = http://lug.mtu.edu/archlinux/$repo/os/$arch
Server = http://mirror.nl.leaseweb.net/archlinux/$repo/os/$arch
## Score: 0.9, United Kingdom
Server = http://mirror.bytemark.co.uk/archlinux/$repo/os/$arch
## Score: 1.5, United Kingdom
Server = http://mirrors.manchester.m247.com/arch-linux/$repo/os/$arch
Server = http://archlinux.dcc.fc.up.pt/$repo/os/$arch
## Score: 6.6, United States
Server = http://mirror.cs.pitt.edu/archlinux/$repo/os/$arch
## Score: 6.7, United States
Server = http://mirrors.acm.wpi.edu/archlinux/$repo/os/$arch
## Score: 6.8, United States
Server = http://ftp.osuosl.org/pub/archlinux/$repo/os/$arch
## Score: 7.1, India
Server = http://mirror.cse.iitk.ac.in/archlinux/$repo/os/$arch
## Score: 10.1, United States
Server = http://mirrors.xmission.com/archlinux/$repo/os/$arch
Save and close the file, then update all the package indexes with the following command:
pacman -Syu
Step 2 – Install Apache and PHP
First, you will need to install the Apache web server and PHP on your server. First, install the Apache package using the following command.
pacman -Sy apache
After installing the Apache web server, start and enable the Apache service with the following command:
systemctl start httpd
systemctl enable httpd
Next, install PHP and other required extensions using the following command:
pacman -Sy php php-gd php-cgi php-intl php-apache unzip
Next, edit the PHP configuration file and enable the required extensions:
nano /etc/php/php.ini
Add/modify the following lines:
extension=pdo_mysql
extension=gd
extension=json
extension=mysqli
extension=intl
extension=xml
extension=bcmath
Save and close the file when you are finished.
Step 3 – Create a Database for Craft CMS
Craft CMS uses a MariaDB as a database backend. Install the MariaDB server with the following command:
pacman -S libmariadbclient mariadb mariadb-clients
Next, initialize the MariaDB database with the following command:
mysql_install_db --user=mysql --basedir=/usr --datadir=/var/lib/mysql
Next, start and enable the MariaDB service with the following command:
systemctl start mysqld
systemctl enable mysqld
Next, connect to the MariaDB console using the following command:
mysql
Once you are connected, create a database and user for Craft CMS:
CREATE DATABASE craft;
GRANT ALL ON craft.* TO craft@localhost IDENTIFIED BY 'password';
Next, flush the privileges and exit from the MariaDB shell with the following command:
FLUSH PRIVILEGES;
EXIT;
Step 4 – Install Craft CMS
First, install the Composer package using the following command.
pacman -S composer
Next, change the directory to the Apache web root and install Craft CMS using the following command.
cd /srv/http
composer create-project craftcms/craft
Answer all the questions as shown below to install and configure Craft CMS on your server.
See https://craftcms.com/knowledge-base/craft-console-root for details on why that’s a bad idea.
Proceed anyway? (yes|no) [no]:yes

   ______ .______          ___       _______ .___________.
  /      ||   _  \        /   \     |   ____||           |
 |  ,----'|  |_)  |      /  ^  \    |  |__   `---|  |----`
 |  |     |      /      /  /_\  \   |   __|      |  |
 |  `----.|  |\  \----./  _____  \  |  |         |  |
  \______|| _| `._____/__/     \__\ |__|         |__|

     A       N   E   W       I   N   S   T   A   L   L
               ______ .___  ___.      _______.
              /      ||   \/   |     /       |
             |  ,----'|  \  /  |    |   (----`
             |  |     |  |\/|  |     \   \
             |  `----.|  |  |  | .----)   |
              \______||__|  |__| |_______/


Craft commands should not be run as the root/super user.
See https://craftcms.com/knowledge-base/craft-console-root for details on why that’s a bad idea.
Proceed anyway? (yes|no) [no]:yes
Craft commands should not be run as the root/super user.
See https://craftcms.com/knowledge-base/craft-console-root for details on why that’s a bad idea.
Proceed anyway? (yes|no) [no]:yes
Generating an application ID ... done (CraftCMS--f4491c3a-22ba-4fd1-ba62-53f69cb52c42)
Craft commands should not be run as the root/super user.
See https://craftcms.com/knowledge-base/craft-console-root for details on why that’s a bad idea.
Proceed anyway? (yes|no) [no]:yes
Generating a security key ... done (Ca1TEYLF_a-rixBWMFoeXgK9GledS5qD)


Welcome to Craft CMS!

Are you ready to begin the setup? (yes|no) [no]:yes

Craft commands should not be run as the root/super user.
See https://craftcms.com/knowledge-base/craft-console-root for details on why that’s a bad idea.
Proceed anyway? (yes|no) [no]:yes
Craft commands should not be run as the root/super user.
See https://craftcms.com/knowledge-base/craft-console-root for details on why that’s a bad idea.
Proceed anyway? (yes|no) [no]:yes
Craft commands should not be run as the root/super user.
See https://craftcms.com/knowledge-base/craft-console-root for details on why that’s a bad idea.
Proceed anyway? (yes|no) [no]:yes
Which database driver are you using? (mysql or pgsql) [mysql]
Database server name or IP address: [127.0.0.1]
Database port: [3306]
Database username: [root] craft
Database password:
Database name: craft
Database table prefix:
Testing database credentials ... success!
Saving database credentials to your .env file ... done

Install Craft now? (yes|no) [yes]:yes

Craft commands should not be run as the root/super user.
See https://craftcms.com/knowledge-base/craft-console-root for details on why that’s a bad idea.
Proceed anyway? (yes|no) [no]:yes
Craft commands should not be run as the root/super user.
See https://craftcms.com/knowledge-base/craft-console-root for details on why that’s a bad idea.
Proceed anyway? (yes|no) [no]:yes
Username: [admin]
Email: [email protected]
Password:
Confirm:
Site name: MY Site
Site URL: http://craft.example.com
Site language: [en-US]
Next, change the ownership of the Craft CMS directory to Apache:
chown -R http:http /srv/http/craft/
chmod -R 775 /srv/http/craft/
Step 5 – Configure Apache for Craft CMS
Next, you will need to create an Apache virtual host configuration file for Craft CMS.
nano /etc/httpd/conf/extra/craft.conf
Add the following lines:
<VirtualHost *:80>
    ServerAdmin [email protected]
    DocumentRoot "/srv/http/craft/web"
    ServerName craft.example.com
    DirectoryIndex index.php
    <Directory "/srv/http/craft/web">
        Options Indexes FollowSymLinks
        AllowOverride All
        Require all granted
    </Directory>
ErrorLog /var/log/httpd/error.log
CustomLog /var/log/httpd/access.log combined

</VirtualHost>
Next, edit the Apache main configuration file.
nano /etc/httpd/conf/httpd.conf
Uncomment the following line:
Include conf/extra/httpd-vhosts.conf
LoadModule mpm_prefork_module modules/mod_mpm_prefork.so
LoadModule rewrite_module modules/mod_rewrite.so
Comment the following line:
#LoadModule mpm_event_module modules/mod_mpm_event.so
Add the following lines:
LoadModule php_module modules/libphp.so
AddHandler php-script .php
Include conf/extra/php_module.conf
Include conf/extra/craft.conf
Save and close the file. Next, restart the Apache service to apply the changes:
systemctl restart httpd
Step 6 – Access Craft CMS
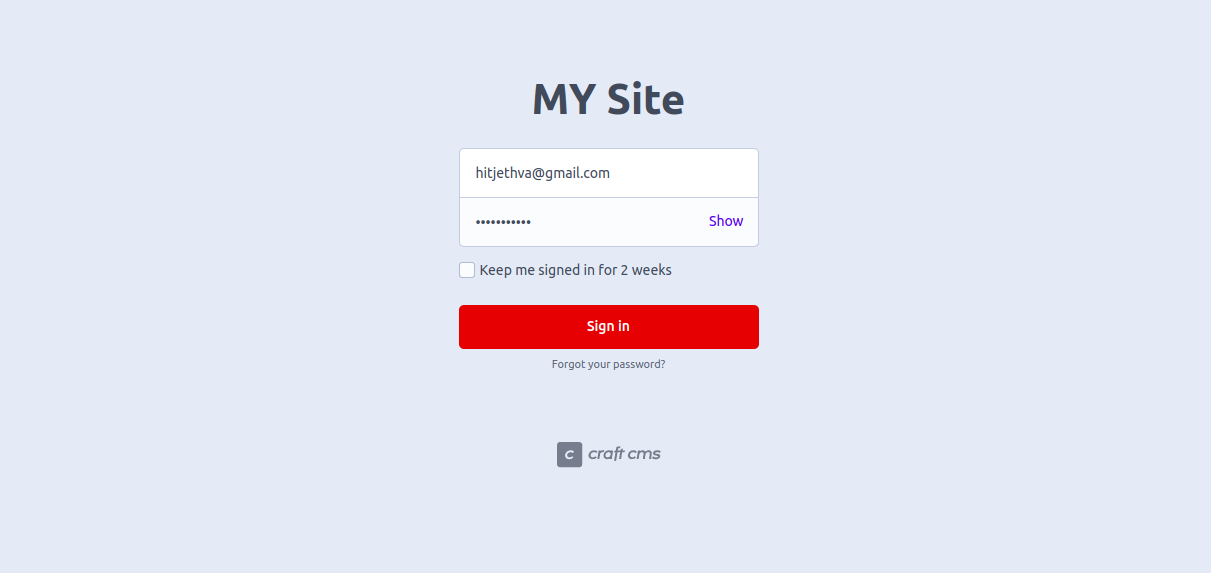
Now, open your web browser and access the Craft CMS admin page using the URL http://craft.example.com/admin/login. You should see the Craft CMS login page.
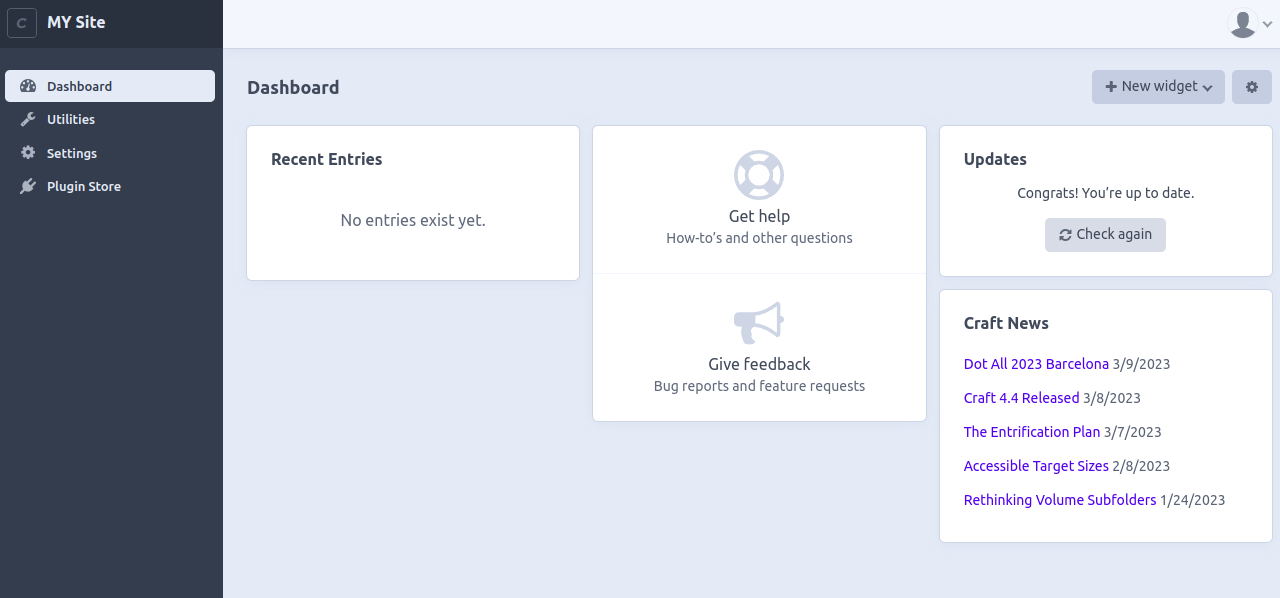
Provide your admin user name and password and click on the Sign in button. You should see the Craft CMS dashboard on the following page.
Conclusion
Congratulations! You have successfully installed Craft CMS on Arch Linux. You have now enough knowledge to host your own website with Craft CMS. You can now try Craft CMS on one of our dedicated server hosting plans from Atlantic.Net!

