Intrusion Detection Systems (IDS) play a crucial role in safeguarding your network by monitoring and analyzing traffic for suspicious activities and potential threats. CrowdSec is an open-source, collaborative security platform leveraging community-driven threat intelligence’s power to provide robust protection. It offers an efficient and scalable way to detect and mitigate a wide range of security threats, from brute force attacks to more sophisticated exploits.
In this guide, we will walk you through the process of installing CrowdSec IDS on Ubuntu 22.04.
Step 1 – Install CrowdSec
First, you need to add the CrowdSec repository to install CrowdSec.
curl -s https://packagecloud.io/install/repositories/crowdsec/crowdsec/script.deb.sh | bashThis command downloads and runs a script to add the CrowdSec repository to your system.
Next, install CrowdSec.
apt install crowdsecYou will be asked to select the service that you want to monitor.
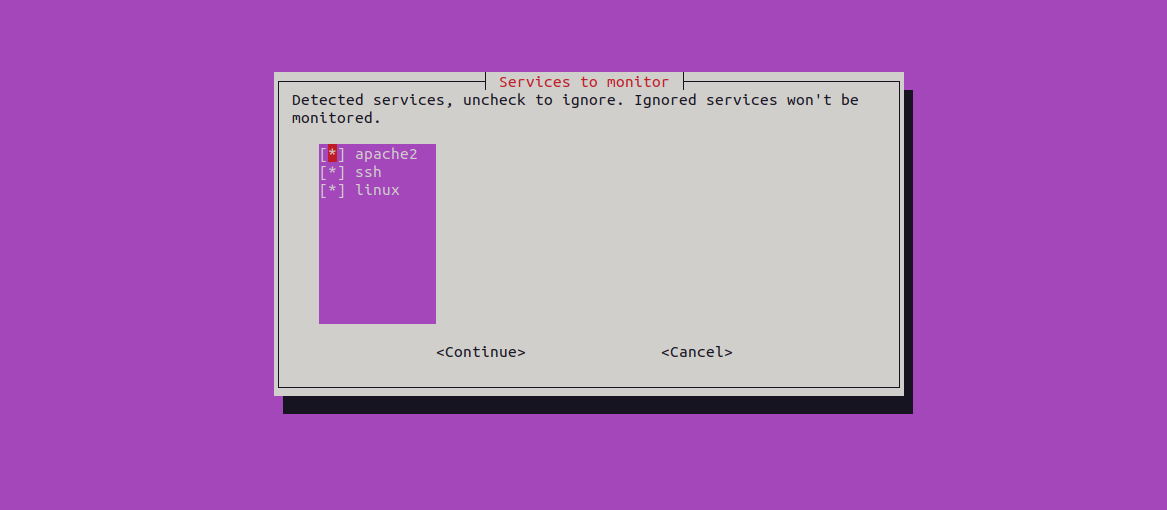
Select any service and click on Continue. You will see the following page.
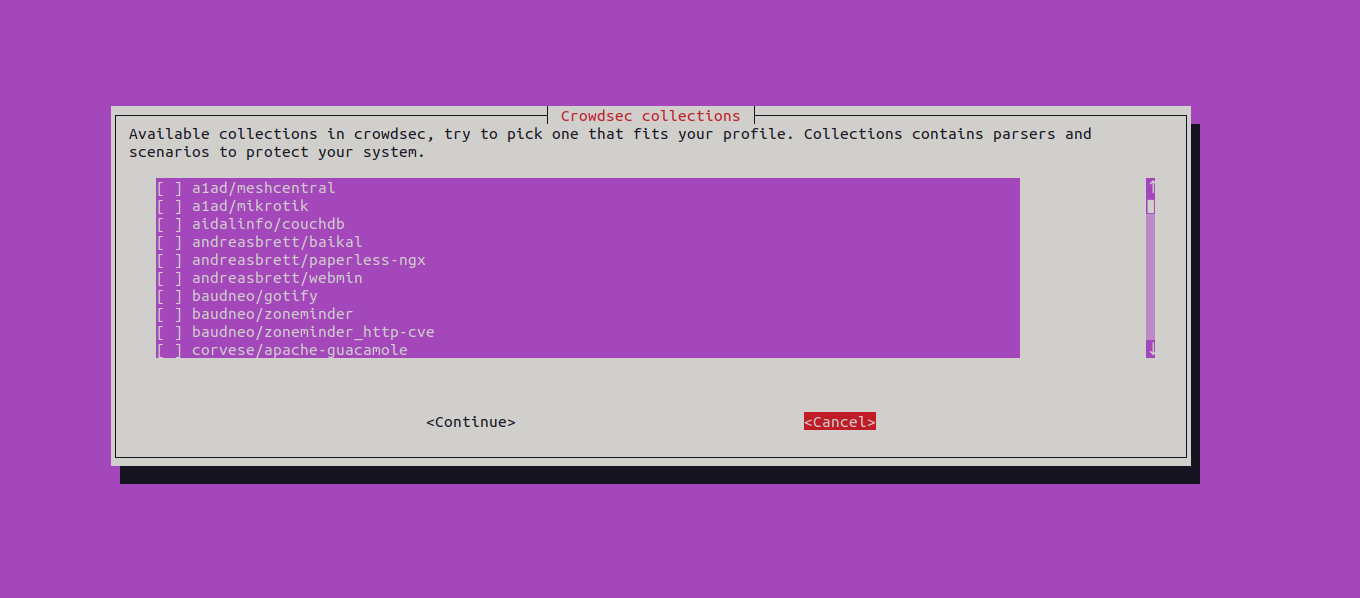
Select any service from the above list or click on Cancel to finish the installation.
Step 2 – Install Firewall Bouncer
Next, install the CrowdSec Firewall Bouncer for IPTables. This will enable CrowdSec to interact with your firewall to block malicious IPs.
apt install -y crowdsec-firewall-bouncer-iptablesStep 3 – Verify Installation
To verify that CrowdSec is installed and running correctly, use the following command:
cscli collections listThis will display a list of installed collections:
COLLECTIONS
─────────────────────────────────────────────────────────────────────────────────────────────────────────────
 Name                               📦 Status    Version  Local Path
─────────────────────────────────────────────────────────────────────────────────────────────────────────────
 crowdsecurity/apache2              ✔️  enabled  0.1      /etc/crowdsec/collections/apache2.yaml
 crowdsecurity/base-http-scenarios  ✔️  enabled  1.0      /etc/crowdsec/collections/base-http-scenarios.yaml
 crowdsecurity/http-cve             ✔️  enabled  2.6      /etc/crowdsec/collections/http-cve.yaml
 crowdsecurity/linux                ✔️  enabled  0.2      /etc/crowdsec/collections/linux.yaml
 crowdsecurity/sshd                 ✔️  enabled  0.3      /etc/crowdsec/collections/sshd.yaml
─────────────────────────────────────────────────────────────────────────────────────────────────────────────
Step 4 – Set Up Dashboard
To set up the CrowdSec dashboard, you will need Docker. First, install Docker:
apt install -y docker.ioThen, set up the CrowdSec dashboard:
cscli dashboard setupYou will be prompted to accept the security responsibility for the Metabase instance and to add a new group called ‘crowdsec’. Accept these prompts by typing Yes. The setup process will pull the necessary Docker image and start the Metabase container. Once it’s ready, you will see the following information:
? CrowdSec takes no responsibility for the security of your metabase instance. Do you accept these responsibilities ? Yes
? For metabase docker to be able to access SQLite file we need to add a new group called 'crowdsec' to the system, is it ok for you ? Yes
INFO Pulling docker image metabase/metabase:v0.46.6.1
INFO creating container 'crowdsec-metabase'
INFO waiting for metabase to be up (can take up to a minute)
............
INFO Metabase is ready

	URL       : 'http://127.0.0.1:3000'
	username  : '[email protected]'
	password  : 'cmC3d6ynmhKqopnY'
Note down the username and password from the above output.
Step 5 – Accessing the Dashboard
By default, the CrowdSec dashboard can be accessed only from the local host. To access the dashboard from a remote machine, you need to forward the local port 3000 to the CrowdSec server’s port 3000 using SSH:
ssh -L 3000:127.0.0.1:3000 your_username@remote_server_ipReplace your_username with your actual username on the remote server and remote_server_ip with the IP address or hostname of the remote server.
Open your web browser and navigate to http://127.0.0.1:3000. This will forward your local port 3000 to port 3000 on the remote server, allowing you to access the remote web application as if it were running locally.
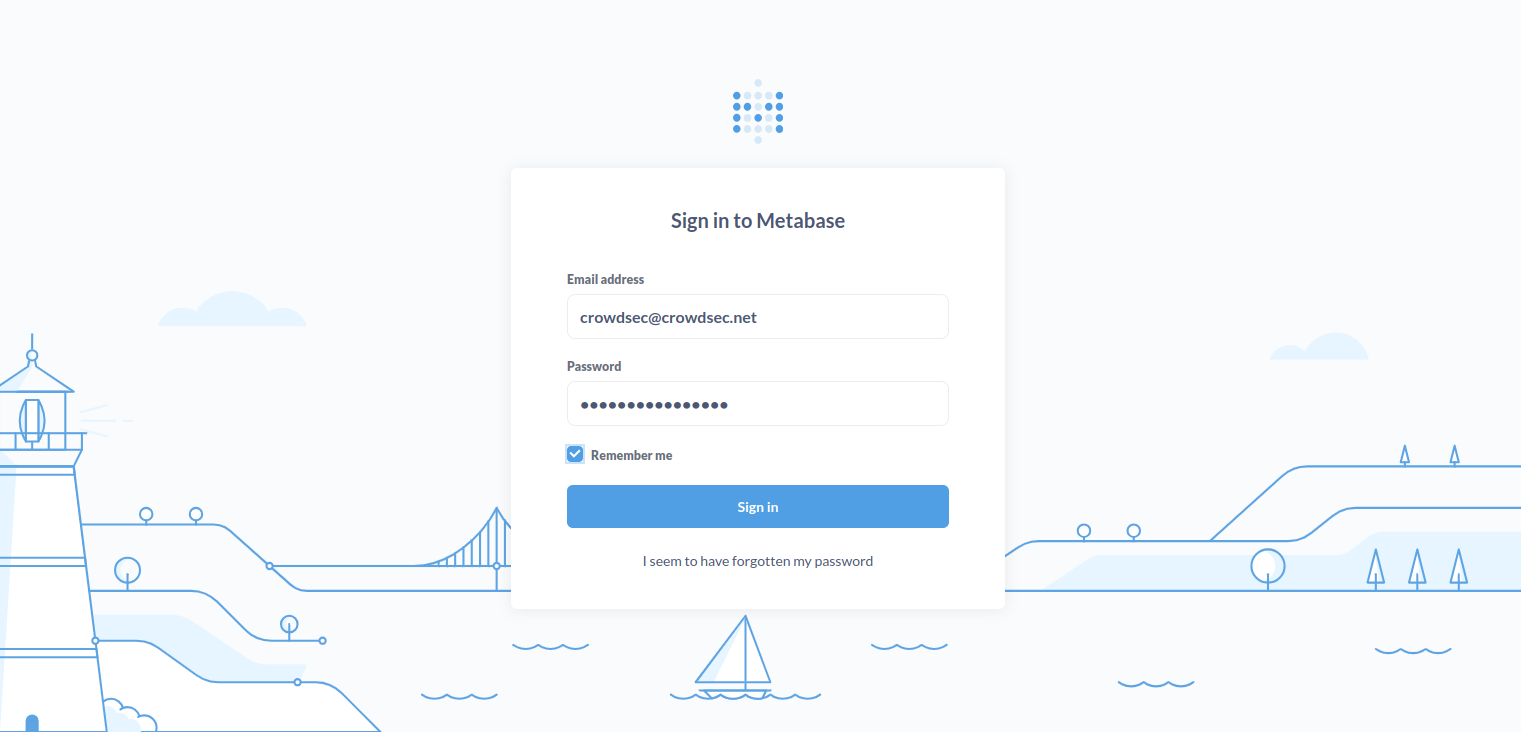
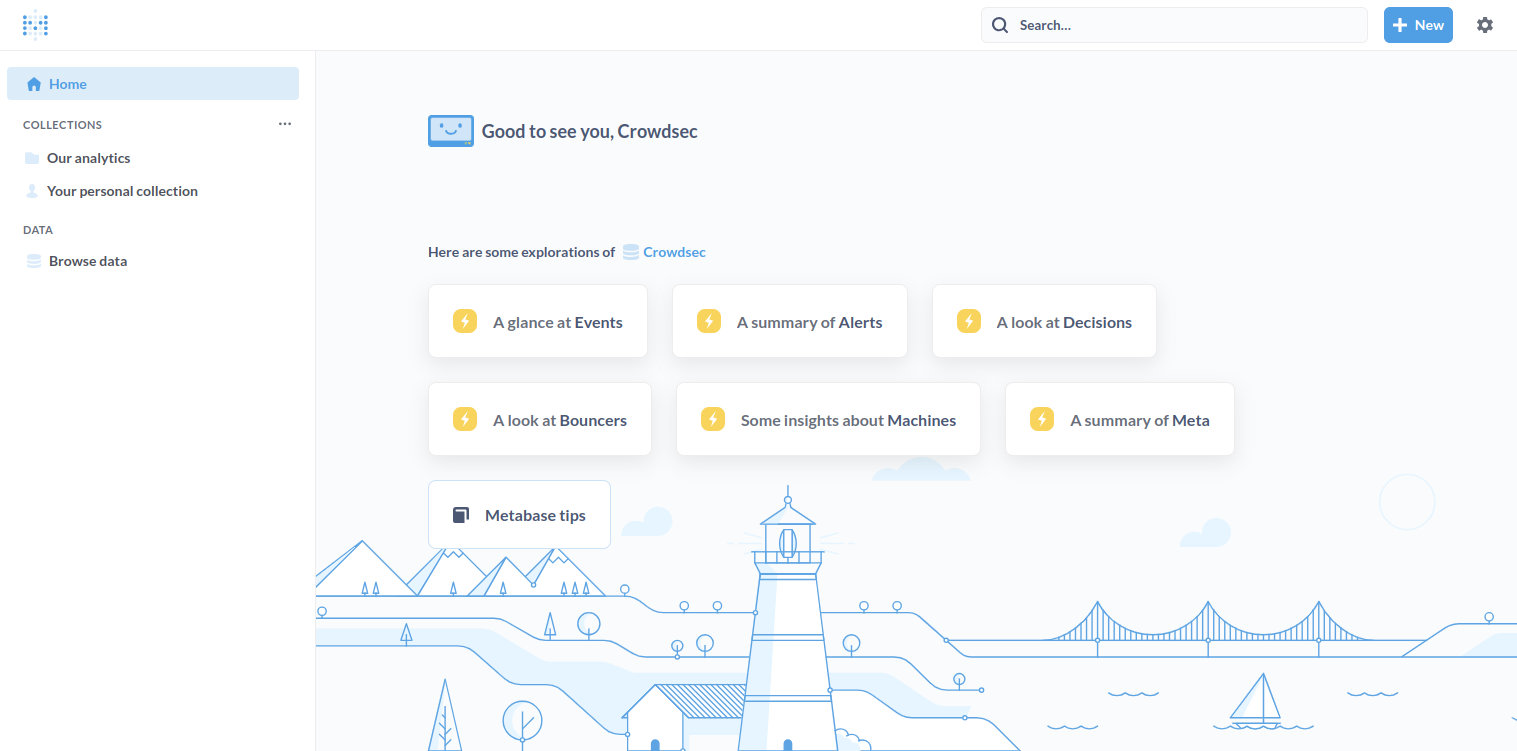
Provide your CrowdSec credential and click on Sign In. The CrowdSec dashboard will appear on the following page.
Step 5 – Enable and Disable Scenarios
You can enable or disable specific scenarios using the cscli command. For example, to enable the SSH brute-force scenario in simulation mode:
cscli simulation enable crowdsecurity/ssh-bf
systemctl reload crowdsec
To disable the SSH brute-force scenario:
cscli simulation disable crowdsecurity/ssh-bf
systemctl reload crowdsec
Conclusion
Congratulations! You have successfully installed and configured CrowdSec IDS on Ubuntu 22.04. With CrowdSec, you now have a powerful tool to protect your server from various cyber threats. The dashboard provides an intuitive interface for monitoring and managing security incidents. Regularly check for updates and new scenarios to keep your system secure. You can start deploying CrowdSec IDS on dedicated server hosting from Atlantic.Net!
* This post is for informational purposes only and does not constitute professional, legal, financial, or technical advice. Each situation is unique and may require guidance from a qualified professional.
Readers should conduct their own due diligence before making any decisions.