Drupal is an open-source content management software used by millions of people and organizations around the world. Drupal has a large and supportive community and can be used to host simple websites or complex web applications. It gives you the tools to structure and manage your content via a web browser. Drupal is written in PHP and allows non-technical users to add and edit content without any coding knowledge.
In this post, we will show you how to install Drupal CMS on Arch Linux.
Step 1 – Configure Repository
By default, the default repository is outdated in Arch Linux, so you will need to modify the default mirror list. You can do it by editing the mirrorlist configuration file:
nano /etc/pacman.d/mirrorlist
Remove all lines and add the following lines:
## Score: 0.7, United States
Server = http://mirror.us.leaseweb.net/archlinux/$repo/os/$arch
## Score: 0.8, United States
Server = http://lug.mtu.edu/archlinux/$repo/os/$arch
Server = http://mirror.nl.leaseweb.net/archlinux/$repo/os/$arch
## Score: 0.9, United Kingdom
Server = http://mirror.bytemark.co.uk/archlinux/$repo/os/$arch
## Score: 1.5, United Kingdom
Server = http://mirrors.manchester.m247.com/arch-linux/$repo/os/$arch
Server = http://archlinux.dcc.fc.up.pt/$repo/os/$arch
## Score: 6.6, United States
Server = http://mirror.cs.pitt.edu/archlinux/$repo/os/$arch
## Score: 6.7, United States
Server = http://mirrors.acm.wpi.edu/archlinux/$repo/os/$arch
## Score: 6.8, United States
Server = http://ftp.osuosl.org/pub/archlinux/$repo/os/$arch
## Score: 7.1, India
Server = http://mirror.cse.iitk.ac.in/archlinux/$repo/os/$arch
## Score: 10.1, United States
Server = http://mirrors.xmission.com/archlinux/$repo/os/$arch
Save and close the file then update all the package indexes with the following command:
pacman -Syu
Step 2 – Install Apache and PHP
First, install the Apache web server with the following command:
pacman -Sy apache
After successful installation, start and enable the Apache service with the following command:
systemctl start httpd
systemctl enable httpd
Next, install PHP and other required extensions using the following command:
pacman -Sy php php-gd php-cgi php-apache php-sqlite
Next, edit the PHP configuration file and enable the required extensions:
nano /etc/php/php.ini
Add the following lines:
extension=pdo_mysql
extension=gd
extension=pdo_sqlite
extension=mysqli
zend_extension=opcache
Save and close the file when you are finished.
Step 3 – Install and Configure MariaDB Database
First, install the MariaDB server with the following command:
pacman -S libmariadbclient mariadb mariadb-clients
Next, initialize the MariaDB database with the following command:
mysql_install_db --user=mysql --basedir=/usr --datadir=/var/lib/mysql
Next, start and enable the MariaDB service with the following command:
systemctl start mysqld
systemctl enable mysqld
Next, connect to the MariaDB console using the following command:
mysql
Once you are connected, create a database and user for drupal:
CREATE DATABASE drupal;
GRANT ALL ON drupal.* TO drupal@localhost IDENTIFIED BY 'password';
Next, flush the privileges and exit from the MariaDB shell with the following command:
FLUSH PRIVILEGES;
EXIT;
Step 4 – Install Drupal CMS
First, download the latest version of Drupal with the following command:
wget https://www.drupal.org/download-latest/tar.gz -O drupal.tar.gz
Once Drupal is downloaded, extract the downloaded file with the following command:
tar xvf drupal.tar.gz
Next, move the Drupal content to the Apache default root directory:
mv drupal-*/ /srv/http/drupal
Next, set proper permissions and ownership with the following command:
chown -R http:http /srv/http/drupal
chmod -R 775 /srv/http/drupal
Step 5 – Configure Apache for Drupal
Next, you will need to create an Apache virtual host configuration file for Drupal. You can create it with the following command:
nano /etc/httpd/conf/extra/drupal.conf
Add the following lines:
<VirtualHost *:80>
ServerAdmin [email protected]
DocumentRoot "/srv/http/drupal"
ServerName drupal.example.com
ErrorLog "/var/log/httpd/drupal-error_log"
CustomLog "/var/log/httpd/drupal-access_log" common
# Alias /drupal "/usr/share/webapps/drupal"
<Directory "/srv/http/drupal">
AllowOverride All
Options FollowSymlinks
Require all granted
php_admin_value open_basedir "/srv/:/tmp/:/usr/share/webapps/:/etc/webapps:/usr/share/pear/:/var/lib/drupal"
</Directory>
</VirtualHost>
Save and close the file, then edit the Apache main configuration file:
nano /etc/httpd/conf/httpd.conf
Uncomment the following line:
Include conf/extra/httpd-vhosts.conf
LoadModule mpm_prefork_module modules/mod_mpm_prefork.so
Comment out the following line:
#LoadModule mpm_event_module modules/mod_mpm_event.so
Add the following lines:
LoadModule php_module modules/libphp.so
AddHandler php-script .php
Include conf/extra/php_module.conf
Include conf/extra/drupal.conf
Save and close the file.
Next, restart the Apache service to apply the changes:
systemctl restart httpd
Step 6 – Access Drupal Website
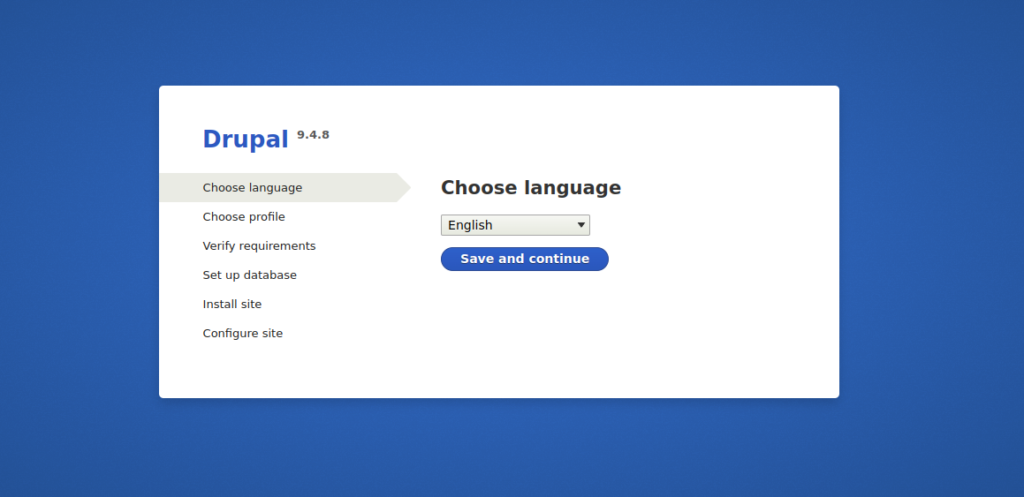
Now, open your web browser and access the Drupal web interface using the URL http://drupal.example.com. You should see the following screen:
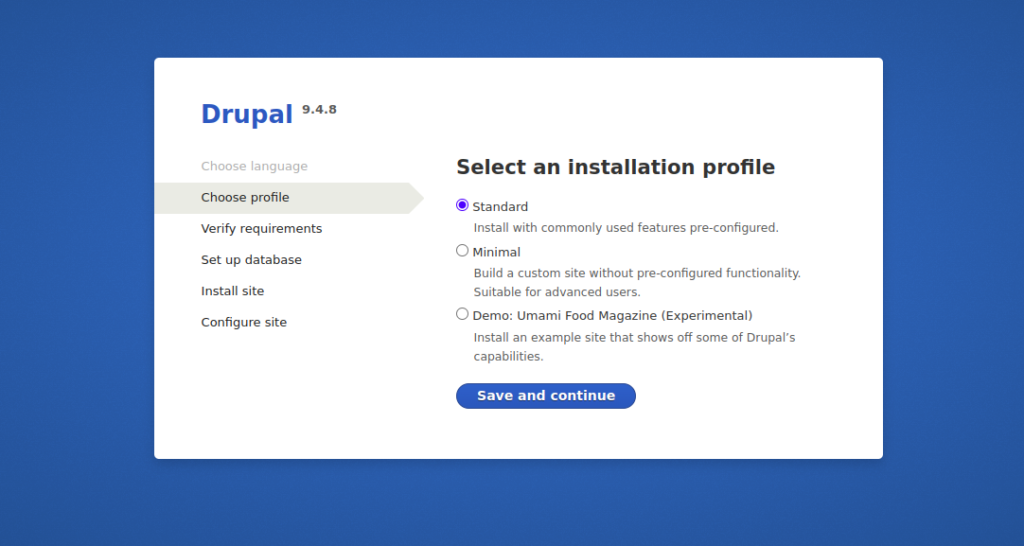
Select your language and click on the Save and continue button. You should see the following screen:
Select your installation profile and click on the Save and continue button. You should see the following screen:
Make sure all the PHP extensions are installed then click on continue anyway. You should see the following screen:
Define your database settings and click on the Save and continue button. You should see the following screen:
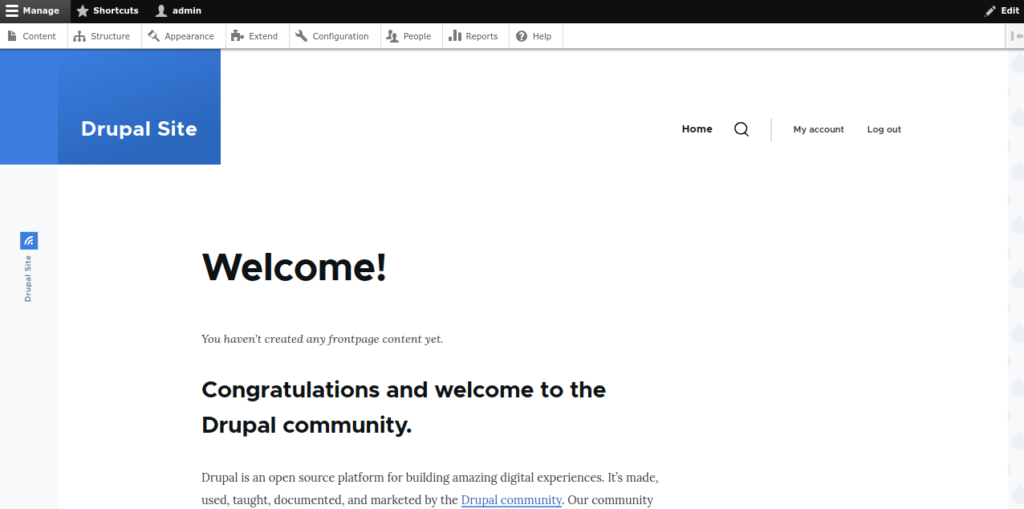
Define your site information, admin username, and password, and click on the Save and continue button. You should see the Drupal dashboard on the following screen:
Conclusion
In this tutorial, you learned how to install Drupal CMS on Arch Linux. You can now start creating your blog and website using the Drupal platform. You can choose one of our dedicated server hosting from Atlantic.Net! to test the Drupal installation.


