Gatsby is a free, open-source, React-based site generator built on top of Node.js using GraphQL. Gatsby offers 2500+ plugins and some great features that differentiate it from other static site generators. It has great components that simplify things like routing, linking, and handling images, which are not included in the core React library.
In this post, we will show you how to install Getsby.js on Arch Linux.
Step 1 – Configure Repository
By default, the default repository is outdated in Arch Linux, so you will need to modify the default mirror list. You can do it by editing the mirrorlist configuration file:
nano /etc/pacman.d/mirrorlist
Remove all lines and add the following lines:
## Score: 0.7, United States
Server = http://mirror.us.leaseweb.net/archlinux/$repo/os/$arch
## Score: 0.8, United States
Server = http://lug.mtu.edu/archlinux/$repo/os/$arch
Server = http://mirror.nl.leaseweb.net/archlinux/$repo/os/$arch
## Score: 0.9, United Kingdom
Server = http://mirror.bytemark.co.uk/archlinux/$repo/os/$arch
## Score: 1.5, United Kingdom
Server = http://mirrors.manchester.m247.com/arch-linux/$repo/os/$arch
Server = http://archlinux.dcc.fc.up.pt/$repo/os/$arch
## Score: 6.6, United States
Server = http://mirror.cs.pitt.edu/archlinux/$repo/os/$arch
## Score: 6.7, United States
Server = http://mirrors.acm.wpi.edu/archlinux/$repo/os/$arch
## Score: 6.8, United States
Server = http://ftp.osuosl.org/pub/archlinux/$repo/os/$arch
## Score: 7.1, India
Server = http://mirror.cse.iitk.ac.in/archlinux/$repo/os/$arch
## Score: 10.1, United States
Server = http://mirrors.xmission.com/archlinux/$repo/os/$arch
Save and close the file, then update all the package indexes with the following command:
pacman -Syu
Step 2 – Install Node.js and NPM
Gatsby is based on Node.js, so you will need to install Node.js and NPM on your server.
Run the following command to install both Node.js and NPM:
pacman -Sy nodejs npm
Once Node.js is installed, you can verify the Node.js version with the following command:
node --version
You will get the following output:
v19.0.0
To check the NPM version, run the following command:
npm --version
You should see the following output:
8.19.2
Step 3 – Install Gatsby.js
Gatsby offers a command-line tool that helps you create a site using the command-line interface.
You can install the Gatsby-cli using the following command:
npm -g install gatsby-cli
Once the installation is finished, you can verify the Gatsby version with the following command:
gatsby --version
You should see the following output:
╔════════════════════════════════════════════════════════════════════════╗
║                                                                        ║
║   Gatsby collects anonymous usage analytics                            ║
║   to help improve Gatsby for all users.                                ║
║                                                                        ║
║   If you'd like to opt-out, you can use `gatsby telemetry --disable`   ║
║   To learn more, checkout https://gatsby.dev/telemetry                 ║
║                                                                        ║
╚════════════════════════════════════════════════════════════════════════╝
Gatsby CLI version: 4.24.0
Step 4 – Create a Site with Gatsby.js
Next, run the following command to create a new site:
gatsby new
You will be asked several questions to create a site as shown below:
create-gatsby version 2.24.0


                                                              Welcome to Gatsby!


This command will generate a new Gatsby site for you in /root with the setup you select. Let's answer some questions:


What would you like to call your site?
What would you like to call your site?
✔ · My Gatsby Site
What would you like to name the folder where your site will be created?
✔ root/ my-gatsby-site
✔ Will you be using JavaScript or TypeScript?
· JavaScript
✔ Will you be using a CMS?
· No (or I'll add it later)
✔ Would you like to install a styling system?
· No (or I'll add it later)


Thanks! Here's what we'll now do:

    🛠  Create a new Gatsby site in the folder my-gatsby-site

  cd my-gatsby-site

Start the local development server with

  npm run develop

See all commands at

  https://www.gatsbyjs.com/docs/gatsby-cli/
Next, change the directory to your newly created site and run the development server using the following command:
cd my-gatsby-site
gatsby develop -H your-server-ip
You should see the following output:
You can now view my-gatsby-site in the browser.
⠀
  http://your-server-ip:8000/
⠀
View GraphiQL, an in-browser IDE, to explore your site's data and schema
⠀
  http://your-server-ip:8000/___graphql
⠀
Note that the development build is not optimized.
To create a production build, use gatsby build
⠀
success Building development bundle - 33.679s
success Writing page-data.json files to public directory - 0.222s - 3/4 18.01/s
Step 5 – Access Gatsby.js Web Interface
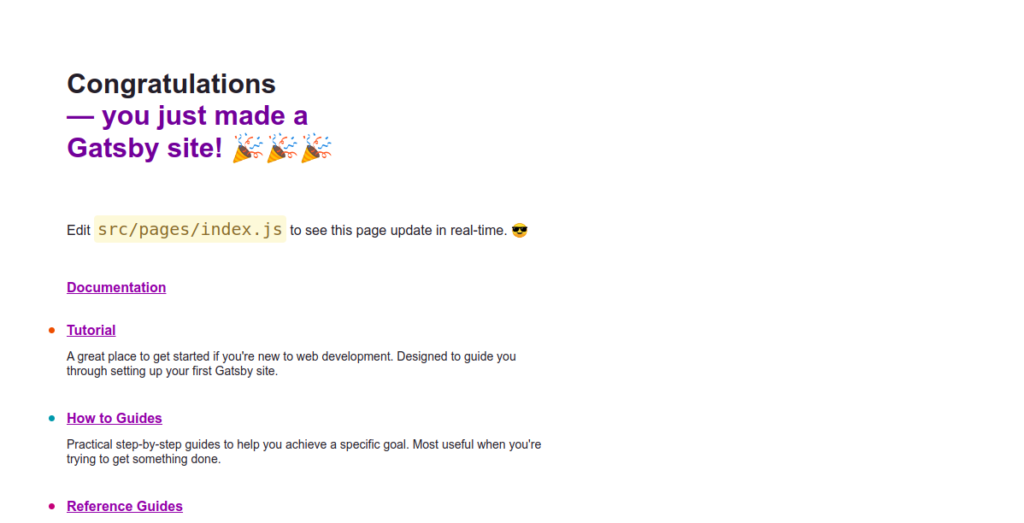
At this point, Gatsby is started and listens on port 8000. You can now access it using the URL http://your-server-ip:8000/. You should see the Gatsby site on the following screen:
Conclusion
In this post, we explained how to install the Gatsby.js framework on Arch Linux. We also explained how to create a static site using Gatsby.js. You can now start developing using the Gatsby.js framework. You can try Gatsby.js on dedicated servers from Atlantic.Net!
