Gitea is an open-source, self-hosted Git service that allows you to create and manage Git repositories on your own server. Installing Gitea on Ubuntu 22.04 gives you complete control over your Git repositories, offering features similar to other popular Git hosting platforms while allowing customization and integration with your existing infrastructure.
In this guide, we will walk you through the step-by-step process of installing Gitea on Ubuntu 22.04, ensuring you have a seamless experience setting up your own Git hosting solution.
Step 1 – Getting Started
Before starting, you must update all the system packages to the latest version. You can do it with the following command:
apt update -y
Next, install other required dependencies using the following command:
apt install curl wget nano software-properties-common dirmngr apt-transport-https ca-certificates lsb-release debian-archive-keyring gnupg2 ufw unzip -y
Once all the required dependencies are installed, you can proceed to the next step.
Step 2 – Install Docker CE
This section will install the Docker CE from their official repository.
First, create a directory to store the Docker GPG key.
mkdir -p /etc/apt/keyrings
Next, download the Docker GPG key.
curl -fsSL https://download.docker.com/linux/ubuntu/gpg | gpg --dearmor -o /etc/apt/keyrings/docker.gpg
Next, add the Docker repository to the APT file.
echo "deb [arch=$(dpkg --print-architecture) signed-by=/etc/apt/keyrings/docker.gpg] https://download.docker.com/linux/ubuntu $(lsb_release -cs) stable" | tee /etc/apt/sources.list.d/docker.list > /dev/null
Next, update the repository index.
apt update
Next, install Docker CE and other packages using the following command:
apt install docker-ce docker-ce-cli containerd.io docker-buildx-plugin docker-compose-plugin
Once the installation has been completed, you can verify the Docker service using the following command:
systemctl status docker
Output:
● docker.service - Docker Application Container Engine
     Loaded: loaded (/lib/systemd/system/docker.service; enabled; vendor preset: enabled)
     Active: active (running) since Fri 2024-02-09 07:48:16 UTC; 10s ago
TriggeredBy: ● docker.socket
       Docs: https://docs.docker.com
   Main PID: 27927 (dockerd)
      Tasks: 8
     Memory: 29.6M
        CPU: 206ms
     CGroup: /system.slice/docker.service
             └─27927 /usr/bin/dockerd -H fd:// --containerd=/run/containerd/containerd.sock
Step 3 – Create a Docker Compose File for Gitea
First, create a directory to store your Gitea configuration files.
mkdir ~/gitea-docker
Next, create other required directories:
cd ~/gitea-docker
mkdir {gitea,postgres}
Next, create a docker-compose.yml file.
nano docker-compose.yml
Add the following configurations:
services:
  server:
    image: gitea/gitea:1.21.0
    container_name: gitea
    environment:
      - USER_UID=105
      - USER_GID=111
      - GITEA__database__DB_TYPE=postgres
      - GITEA__database__HOST=db:5432
      - GITEA__database__NAME=gitea
      - GITEA__database__USER=gitea
      - GITEA__database__PASSWD=gitea
    restart: always
    networks:
      - gitea
    volumes:
      - ./gitea:/data
      - /root/.ssh/:/data/git/.ssh
      - /etc/timezone:/etc/timezone:ro
      - /etc/localtime:/etc/localtime:ro
    ports:
      - "3000:3000"
      - "2221:22"
    depends_on:
      - db

  db:
    image: postgres:15
    restart: always
    environment:
      - POSTGRES_USER=gitea
      - POSTGRES_PASSWORD=gitea
      - POSTGRES_DB=gitea
    networks:
      - gitea
    volumes:
      - ./postgres:/var/lib/postgresql/data

networks:
  gitea:
    external: false
Save and close the file when you are done.
Step 4 – Launch Gitea Container
At this point, the Docker Compose file is ready to launch the Gitea Docker container. You can run the following command to start all the containers:
docker compose up -d
Next, verify the running containers using the following command:
docker ps
You will see the following output:
CONTAINER ID   IMAGE                COMMAND                  CREATED          STATUS          PORTS                                                                              NAMES
e3a6eaac98d5   gitea/gitea:1.21.0   "/usr/bin/entrypoint…"   19 seconds ago   Up 18 seconds   0.0.0.0:3000->3000/tcp, :::3000->3000/tcp, 0.0.0.0:2221->22/tcp, :::2221->22/tcp   gitea
e8794d6c1a5e   postgres:15          "docker-entrypoint.s…"   19 seconds ago   Up 18 seconds   5432/tcp                                                                           gitea-docker-db-1
As you can see, the Gitea container is started and listens on port 3000.
Step 5 – Configure Nginx as a Reverse Proxy
Now, you must configure Nginx as a reverse proxy to access the Gitea from the remote machine.
First, install the Nginx package:
apt install nginx
Next, create an Nginx configuration file.
nano /etc/nginx/conf.d/gitea.conf
Add the following configurations:
# Connection header for WebSocket reverse proxy
map $http_upgrade $connection_upgrade {
    default upgrade;
    ""      close;
}

map $remote_addr $proxy_forwarded_elem {

    # IPv4 addresses can be sent as-is
    ~^[0-9.]+$ "for=$remote_addr";

    # IPv6 addresses need to be bracketed and quoted
    ~^[0-9A-Fa-f:.]+$ "for=\"[$remote_addr]\"";

    # Unix domain socket names cannot be represented in RFC 7239 syntax
    default "for=unknown";
}

map $http_forwarded $proxy_add_forwarded {

   # If the incoming Forwarded header is syntactically valid, append to it
    "~^(,[ \\t]*)*([!#$%&'*+.^_`|~0-9A-Za-z-]+=([!#$%&'*+.^_`|~0-9A-Za-z-]+|\"([\\t \\x21\\x23-\\x5B\\x5D-\\x7E\\x80-\\xFF]|\\\\[\\t \\x21-\\x7E\\x80-\\xFF])*\"))?(;([!#$%&'*+.^_`|~0-9A-Za-z-]+=([!#$%&'*+.^_`|~0-9A-Za-z-]+|\"([\\t \\x21\\x23-\\x5B\\x5D-\\x7E\\x80-\\xFF]|\\\\[\\t \\x21-\\x7E\\x80-\\xFF])*\"))?)*([ \\t]*,([ \\t]*([!#$%&'*+.^_`|~0-9A-Za-z-]+=([!#$%&'*+.^_`|~0-9A-Za-z-]+|\"([\\t \\x21\\x23-\\x5B\\x5D-\\x7E\\x80-\\xFF]|\\\\[\\t \\x21-\\x7E\\x80-\\xFF])*\"))?(;([!#$%&'*+.^_`|~0-9A-Za-z-]+=([!#$%&'*+.^_`|~0-9A-Za-z-]+|\"([\\t \\x21\\x23-\\x5B\\x5D-\\x7E\\x80-\\xFF]|\\\\[\\t \\x21-\\x7E\\x80-\\xFF])*\"))?)*)?)*$" "$http_forwarded, $proxy_forwarded_elem";

    # Otherwise, replace it
    default "$proxy_forwarded_elem";
}

server {
    listen 80;
    server_name gitea.example.com;

    access_log /var/log/nginx/gitea.access.log;
    error_log  /var/log/nginx/gitea.error.log;

    tcp_nopush on;

    # security headers
    add_header X-XSS-Protection "1; mode=block" always;
    add_header X-Content-Type-Options "nosniff" always;
    add_header Referrer-Policy "no-referrer-when-downgrade" always;
    add_header Content-Security-Policy "default-src 'self' http: https: ws: wss: data: blob: 'unsafe-inline'; frame-ancestors 'self';" always;
    add_header Permissions-Policy "interest-cohort=()" always;

    # . files
    location ~ /\.(?!well-known) {
        deny all;
    }

    location / {
        client_max_body_size 100M;
        proxy_pass  http://localhost:3000;
        proxy_http_version 1.1;
        proxy_cache_bypass $http_upgrade;
        proxy_set_header Upgrade $http_upgrade;
        proxy_set_header Connection $connection_upgrade;
        proxy_set_header Host $host;
        proxy_set_header X-Real-IP $remote_addr;
        proxy_set_header X-Forwarded-For $proxy_add_x_forwarded_for;
        proxy_set_header X-Forwarded-Proto $scheme;
        proxy_set_header X-Forwarded-Port $server_port;
        proxy_set_header Forwarded $proxy_add_forwarded;
        proxy_connect_timeout 60s;
        proxy_send_timeout 60s;
        proxy_read_timeout 60s;
    }
}
Save and close the file, then edit the Nginx main configuration file.
nano /etc/nginx/nginx.conf
Add the following line after the line http {:
server_names_hash_bucket_size 64;
Save the file, then reload the Nginx service to apply the changes:
systemctl reload nginx
Step 6 – Access Gitea Web Interface
Now, open your web browser and access the Gitea Web UI using the URL http://gitea.example.com. You will see the Gitea initial configuration page:
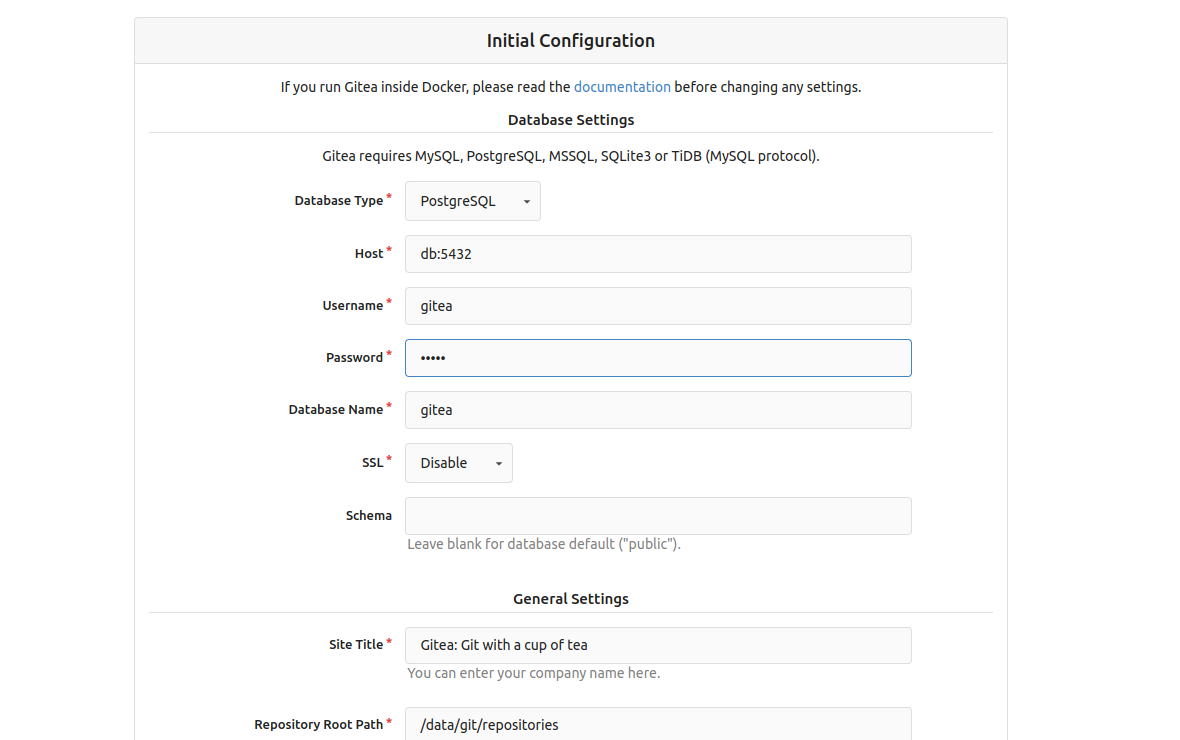
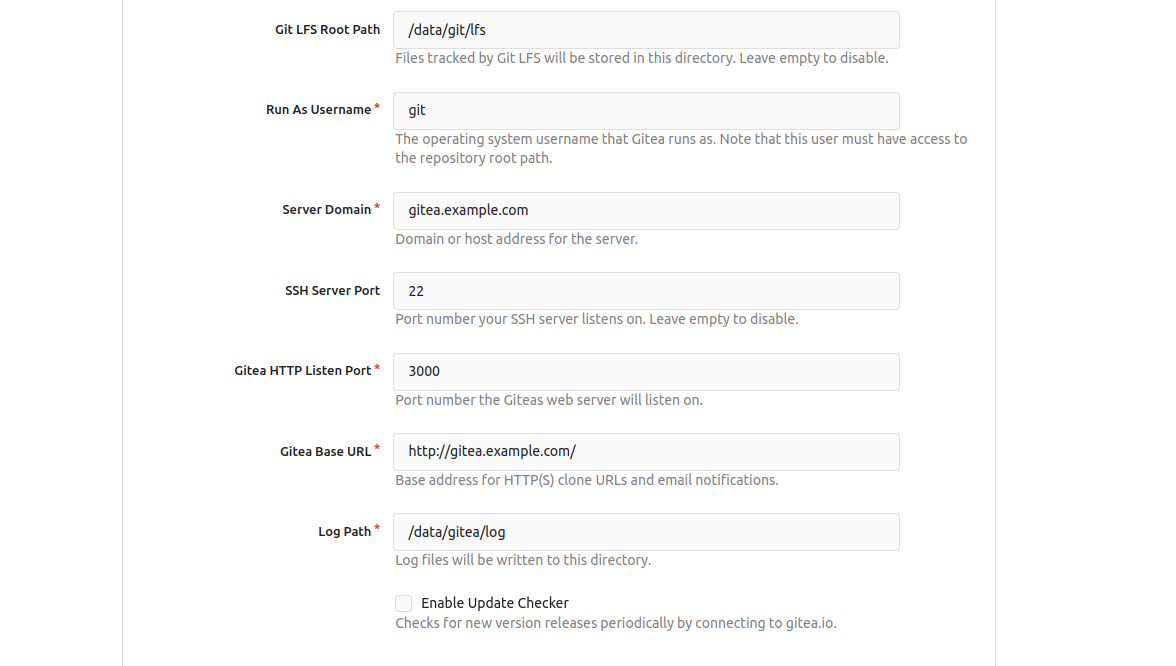
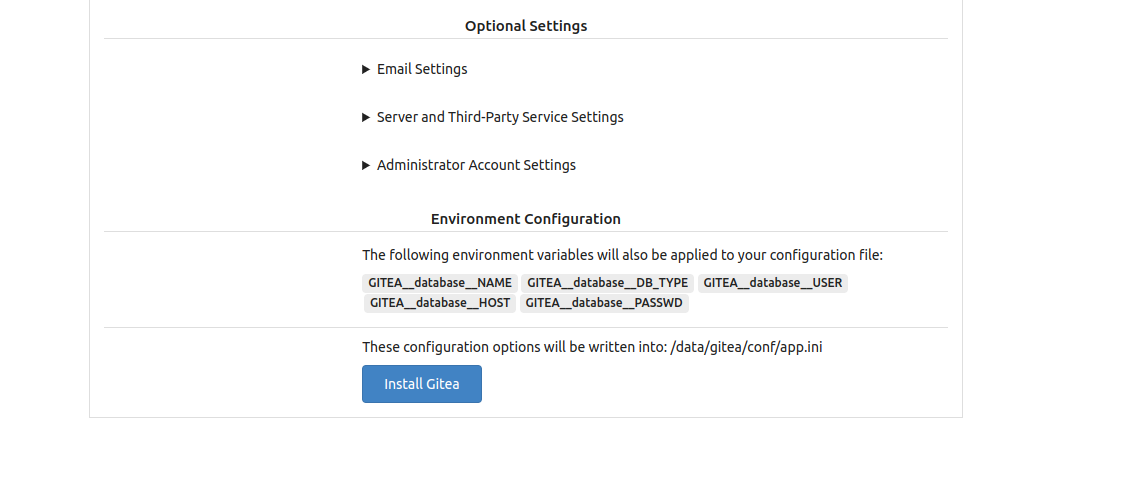
Provide all the required details and click on Install Gitea. You will see the following screen:
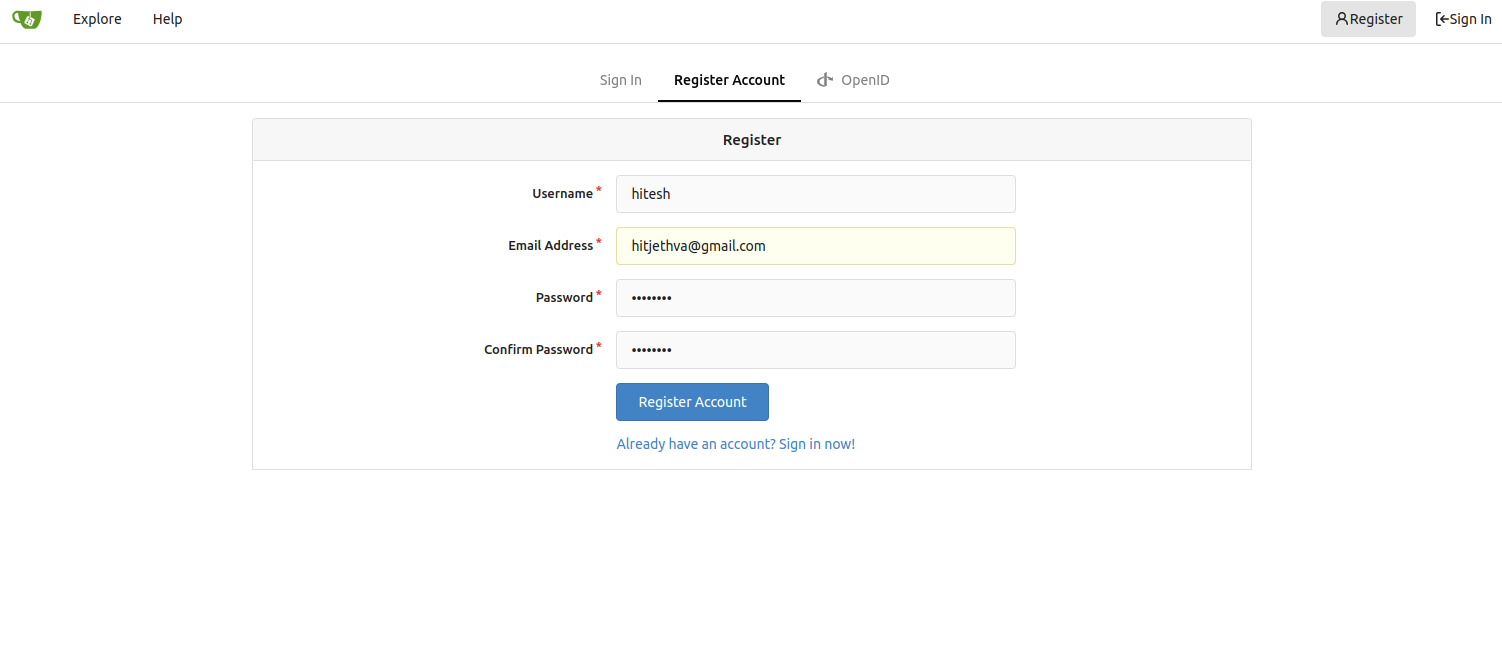
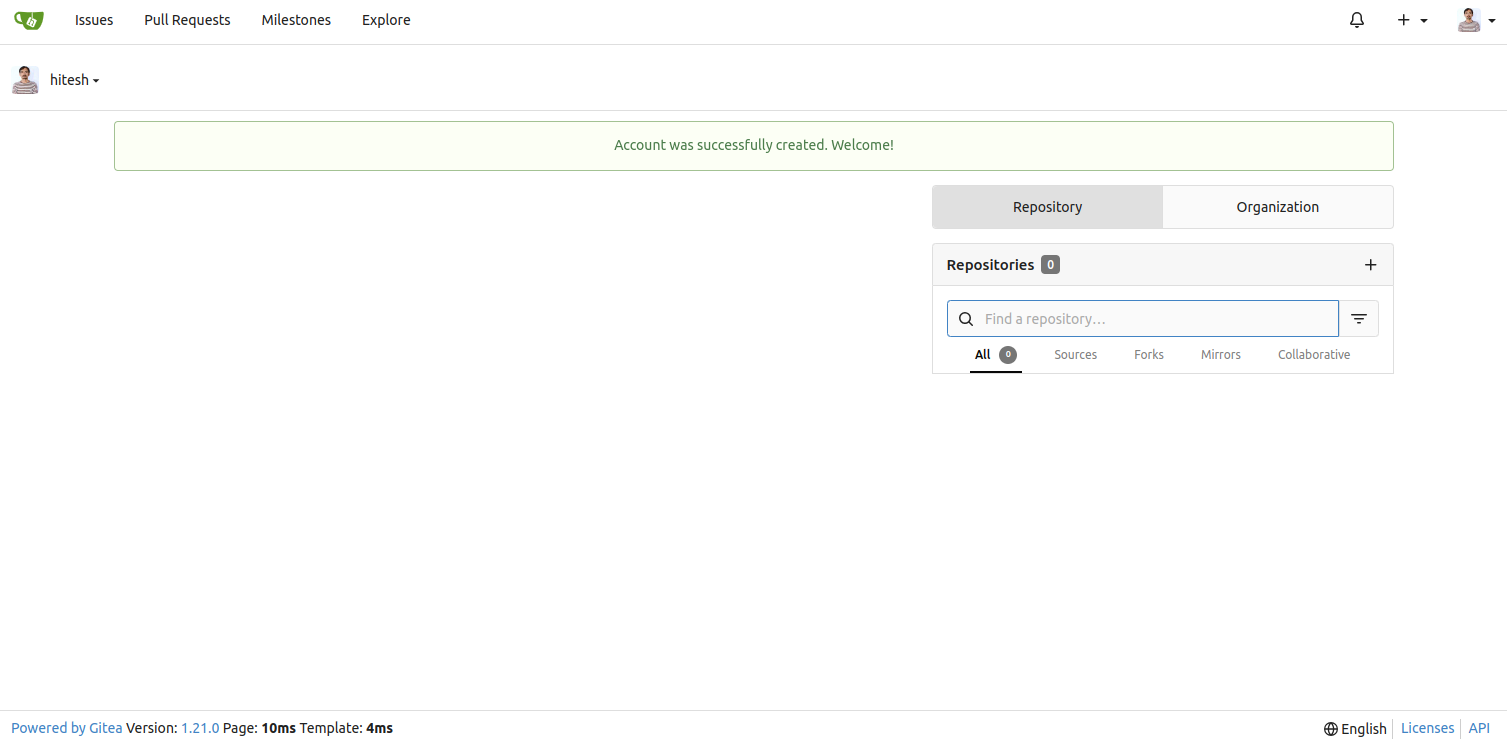
In the Register Account tab, provide your username, email, and password then click the Register Account button. You will see the Gitea dashboard on the following page:
Conclusion
By following the steps outlined in this guide, you have successfully set up Gitea, enabling you to collaborate with your team, manage version control, and maintain code integrity within your organization. As you explore the features and capabilities of Gitea, remember to regularly update the application and implement best practices for security and user management to ensure a reliable and robust Git hosting environment. With Gitea installed, you are well-equipped to streamline your development workflow and foster collaboration among your team members. You can now try to host your own repository using Gitea on dedicated server hosting from Atlantic.Net!
* This post is for informational purposes only and does not constitute professional, legal, financial, or technical advice. Each situation is unique and may require guidance from a qualified professional.
Readers should conduct their own due diligence before making any decisions.