Jupyter Lab is a powerful, open-source web-based interactive development environment for Python, R, and other programming languages. It provides a flexible and user-friendly environment for data science, machine learning, and scientific computing. In this tutorial, we’ll guide you through the step-by-step process of installing Jupyter Lab on Ubuntu 24.04.
Step 1 – Install Python
Jupyter Lab requires Python. You can install it using the following commands:
apt install python3 python3-pip python3-venv -y
Next, create and activate the Python virtual environment.
python3 -m venv jupyter_env
source jupyter_env/bin/activate
Step 2 – Install Jupyter Lab
Now, install the Jupyter Lab using the pip command.
pip3 install jupyterlab
This command installs Jupyter Lab and its dependencies.
Next, run the Jupyter Lab locally using the following command.
jupyter lab --allow-root --ip=your-server-ip --no-browser
You will see the following output.
[I 2025-12-05 15:09:31.372 ServerApp] jupyterlab | extension was successfully loaded.
[I 2025-05-12 15:09:31.373 ServerApp] Serving notebooks from local directory: /root
[I 2025-05-12 15:09:31.373 ServerApp] Jupyter Server 2.11.2 is running at:
[I 2025-05-12 15:09:31.373 ServerApp] http://ubuntu:8888/lab?token=aa67d76764b56c5558d876e56709be27446874dc810633ac [I 2025-05-12 15:09:31.373 ServerApp] http://127.0.0.1:8888/lab?token=aa67d76764b56c5558d876e56709be27446874dc810633ac
[I 2025-05-12 15:09:31.373 ServerApp] Use Control-C to stop this server and shut down all kernels (twice to skip confirmation).
[C 2025-05-12 15:09:31.378 ServerApp]

	To access the server, open this file in a browser: file:///root/.local/share/jupyter/runtime/jpserver-155660-open.html Or copy and paste one of these URLs: http://ubuntu:8888/lab?token=aa67d76764b56c5558d876e56709be27446874dc810633ac http://127.0.0.1:8888/lab?token=aa67d76764b56c5558d876e56709be27446874dc810633ac [I 2025-05-12 15:09:31.407 ServerApp] Skipped non-installed server(s): bash-language-server, dockerfile-language-server-nodejs, javascript-typescript-langserver, jedi-language-server, julia-language-server, pyright, python-language-server, python-lsp-server, r-languageserver, sql-language-server, texlab, typescript-language-server, unified-language-server, vscode-css-languageserver-bin, vscode-html-languageserver-bin, vscode-json-languageserver-bin, yaml-language-server
Press the CTRL+C to stop the server.
Shutdown this Jupyter server (y/[n])? y
[C 2023-12-19 06:47:05.798 ServerApp] Shutdown confirmed
[I 2023-12-19 06:47:05.800 ServerApp] Shutting down 4 extensions
Step 3 – Configure Jupyter Lab
By default, Jupyter Lab doesn’t require a password to access the web interface. To secure Jupyter Lab, generate the Jupyter Lab configuration using the following command.
jupyter-lab --generate-config
Output.
Writing default config to: /root/.jupyter/jupyter_lab_config.py
Next, set the Jupyter Lab password.
jupyter-lab password
Set your password as shown below:
Enter password:
Verify password:
[JupyterPasswordApp] Wrote hashed password to /root/.jupyter/jupyter_server_config.json
You can verify your hashed password using the following command.
cat /root/.jupyter/jupyter_server_config.json
Output.
{
  "IdentityProvider": {
    "hashed_password": "argon2:$argon2id$v=19$m=10240,t=10,p=8$zf0ZE2UkNLJK39l8dfdgHA$0qIAAnKiX1EgzFBbo4yp8TgX/G5GrEsV29yjHVUDHiQ"
  }
}
Make a note of this information, as you will need to add it to your config.
Next, edit the Jupyter Lab configuration file.
nano /root/.jupyter/jupyter_lab_config.py
Define your server IP, hashed password, and other configurations as shown below:
c.ServerApp.ip = 'your-server-ip'

c.ServerApp.open_browser = False

c.ServerApp.password = 'argon2:$argon2id$v=19$m=10240,t=10,p=8$zf0ZE2UkNLJK39l8dfdgHA$0qIAAnKiX1EgzFBbo4yp8TgX/G5GrEsV29yjHVUDHiQ'

c.ServerApp.port = 8888
Make sure you format the file exactly as above. For example, the port number is not in brackets, and the False boolean must have a capital F.
Save and close the file when you are done.
Step 4 – Create a Systemctl Service File
Next, create a systemd service file to manage the Jupyter Lab.
nano /etc/systemd/system/jupyter-lab.service
Add the following configuration:
[Service]
Type=simple
PIDFile=/run/jupyter.pid
WorkingDirectory=/root/
ExecStart=/root/jupyter_env/bin/jupyter lab --config=/root/.jupyter/jupyter_lab_config.py --allow-root
User=root
Group=root
Restart=always
RestartSec=10
[Install]
WantedBy=multi-user.target
Save and close the file, then reload the systemd daemon.
systemctl daemon-reload
Next, start the Jupyter Lab service using the following command.
systemctl start jupyter-lab
You can now check the status of Jupyter Lab service using the following command.
systemctl enable --now jupyter-lab.service
systemctl status jupyter-lab
Output.
● jupyter-lab.service
     Loaded: loaded (/etc/systemd/system/jupyter-lab.service; disabled; preset: enabled)
     Active: active (running) since Mon 2025-05-12 04:50:20 UTC; 5s ago
   Main PID: 23862 (jupyter-lab)
      Tasks: 1 (limit: 4609)
     Memory: 64.9M (peak: 65.0M)
        CPU: 1.179s
     CGroup: /system.slice/jupyter-lab.service
             └─23862 /root/jupyter_env/bin/python3 /root/jupyter_env/bin/jupyter-lab --config=/root/.jupyter/jupyter_lab_config.py --allow-root
Jupyter Lab is now started and listening on port 8888. You can verify it with the following command.
ss -antpl | grep jupyter
Output.
LISTEN 0 128 104.219.55.40:8888 0.0.0.0:* users:(("jupyter-lab",pid=156299,fd=6))
Step 5 – Access Jupyter Lab
Now, open your web browser and access the Jupyter Lab web interface using the URL http://your-server-ip:8888. You will see the Jupyter Lab on the following screen.

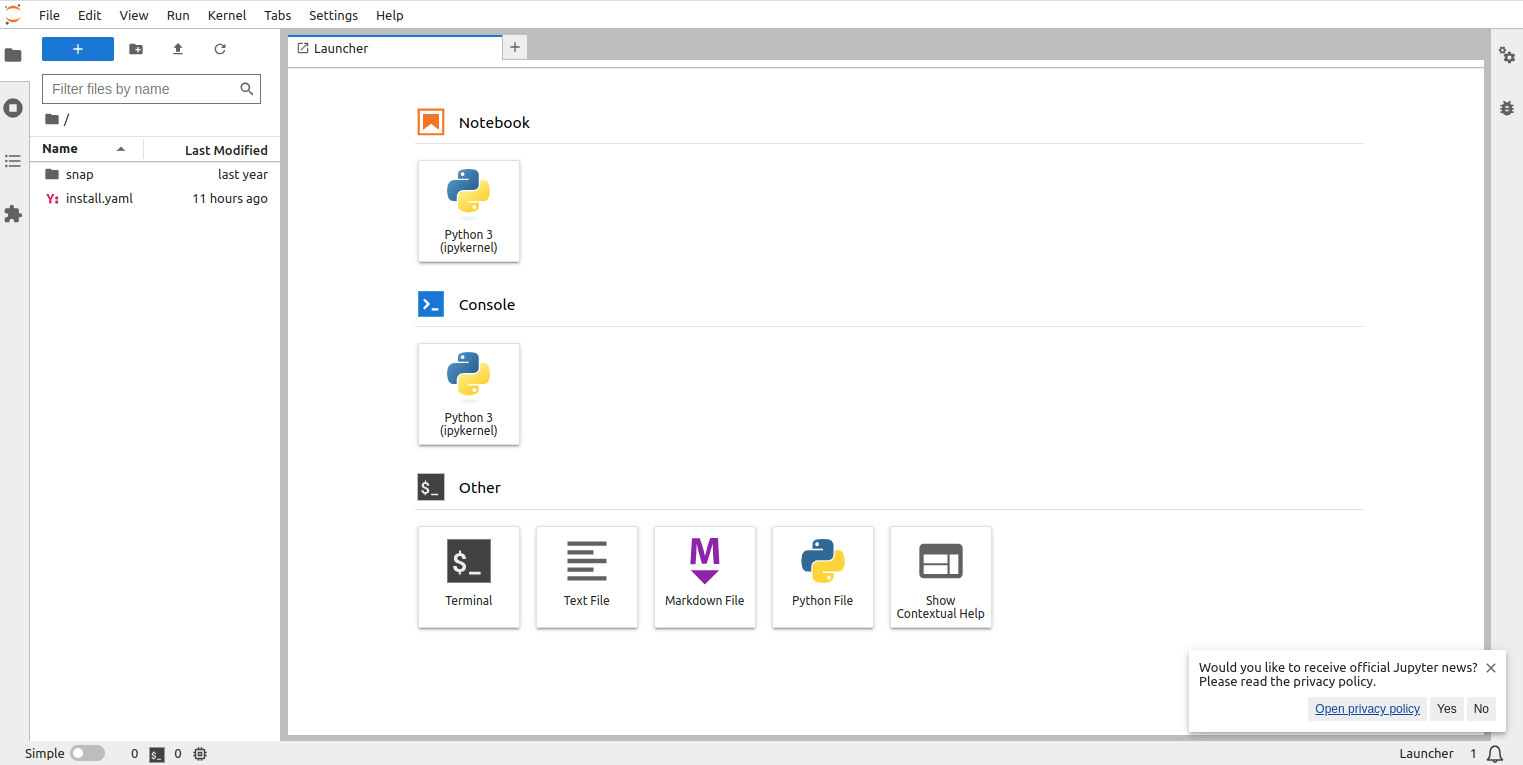
Provide the password you set during the installation and click on Log in. You will see Jupyter Lab dashboard on the following screen:
Conclusion
Congratulations! You have successfully installed and configured Jupyter Lab on Ubuntu 24.04. You can now leverage the power of this interactive development environment for data exploration, analysis, and visualization. Explore the various features of Jupyter Lab, such as support for different programming languages, interactive widgets, and integration with version control systems. Try to deploy Jupyter Lab on dedicated server hosting from Atlantic.Net!
* This post is for informational purposes only and does not constitute professional, legal, financial, or technical advice. Each situation is unique and may require guidance from a qualified professional.
Readers should conduct their own due diligence before making any decisions.