Nextcloud All-In-One (AIO) is a comprehensive solution that integrates various components into a single package, including the Nextcloud file hosting service, a web server, a database, and other necessary dependencies. Nextcloud AIO lets you set up a self-hosted cloud storage and collaboration platform quickly and efficiently. With Nextcloud AIO, you can store, sync, and share files securely, collaborate on documents in real-time, and access your data from anywhere, using any device.
This post will show you how to install Nextcloud AIO on Ubuntu 22.04.
Step 1 – Install Docker CE
By default, the latest Docker version is unavailable in the Ubuntu default repo, so,you will need to install it from their official repo.
First, install all the necessary dependencies:
apt update -y
apt install ca-certificates curl gnupg lsb-release -y
Next, create a directory to store the Docker GPG key.
mkdir -p /etc/apt/keyrings
Next, download the GPG key:
curl -fsSL https://download.docker.com/linux/ubuntu/gpg | gpg --dearmor -o /etc/apt/keyrings/docker.gpg
Next, add the Docker repository to the APT source file.
echo "deb [arch=$(dpkg --print-architecture) signed-by=/etc/apt/keyrings/docker.gpg] https://download.docker.com/linux/ubuntu $(lsb_release -cs) stable" | tee /etc/apt/sources.list.d/docker.list > /dev/null
Next, update the repository cache:
apt update
Finally, install the Docker CE and other required tools using the following command:
apt install docker-ce docker-ce-cli containerd.io docker-compose-plugin -y
You can verify the status of the Docker service using the following command:
systemctl status docker
Output:
● docker.service - Docker Application Container Engine
     Loaded: loaded (/lib/systemd/system/docker.service; enabled; vendor preset: enabled)
     Active: active (running) since Fri 2024-02-09 07:48:16 UTC; 1h 4min ago
TriggeredBy: ● docker.socket
       Docs: https://docs.docker.com
   Main PID: 27927 (dockerd)
      Tasks: 84
     Memory: 263.4M
        CPU: 1min 40.313s
     CGroup: /system.slice/docker.service
             ├─27927 /usr/bin/dockerd -H fd:// --containerd=/run/containerd/containerd.sock
             ├─34566 /usr/bin/docker-proxy -proto tcp -host-ip 0.0.0.0 -host-port 3478 -container-ip 172.21.0.4 -container-port 3478
             ├─34572 /usr/bin/docker-proxy -proto tcp -host-ip :: -host-port 3478 -container-ip 172.21.0.4 -container-port 3478
             ├─34586 /usr/bin/docker-proxy -proto udp -host-ip 0.0.0.0 -host-port 3478 -container-ip 172.21.0.4 -container-port 3478
             ├─34591 /usr/bin/docker-proxy -proto udp -host-ip :: -host-port 3478 -container-ip 172.21.0.4 -container-port 3478
             ├─35803 /usr/bin/docker-proxy -proto tcp -host-ip 0.0.0.0 -host-port 443 -container-ip 172.21.0.10 -container-port 443
             ├─35809 /usr/bin/docker-proxy -proto tcp -host-ip :: -host-port 443 -container-ip 172.21.0.10 -container-port 443
             ├─35825 /usr/bin/docker-proxy -proto udp -host-ip 0.0.0.0 -host-port 443 -container-ip 172.21.0.10 -container-port 443
             └─35833 /usr/bin/docker-proxy -proto udp -host-ip :: -host-port 443 -container-ip 172.21.0.10 -container-port 443
Step 2 – Install Nextcloud AIO
First, create a directory to store all configuration files.
mkdir nextcloud
Next, change the directory to the Nextcloud and create a Docker Compose file for Nextcloud AIO.
cd nextcloud
nano docker-compose.yml
Add the following configurations:
version: "3.8"

volumes:
  nextcloud_aio_mastercontainer:
    name: nextcloud_aio_mastercontainer # This line is not allowed to be changed

services:
  nextcloud:
    image: nextcloud/all-in-one:latest # Must be changed to 'nextcloud/all-in-one:latest-arm64' when used with an arm64 CPU
    restart: always
    container_name: nextcloud-aio-mastercontainer
    volumes:
      - nextcloud_aio_mastercontainer:/mnt/docker-aio-config # This line is not allowed to be changed
      - /var/run/docker.sock:/var/run/docker.sock:ro
    ports:
      - 80:80
      - 8080:8080
      - 8443:8443
Save and close the file, then launch the Nextcloud AIO container using the following command:
docker compose up -d
You can verify the status of all running containers using the following command:
docker compose ps
Output:
NAME                            IMAGE                         COMMAND       SERVICE     CREATED         STATUS                            PORTS
nextcloud-aio-mastercontainer   nextcloud/all-in-one:latest   "/start.sh"   nextcloud   8 seconds ago   Up 7 seconds (health: starting)   0.0.0.0:80->80/tcp, :::80->80/tcp, 0.0.0.0:8080->8080/tcp, :::8080->8080/tcp, 0.0.0.0:8443->8443/tcp, :::8443->8443/tcp, 9000/tcp
Step 3 – Access Nextcloud AIO
At this point, Nextcloud AIO is installed inside the Docker container. You can now access it using the URL http://nextcloud.example.com:8080. You will see the Nextcloud AIO setup page:
Note: You can also use http://your_server_ip/settings/admin/overview
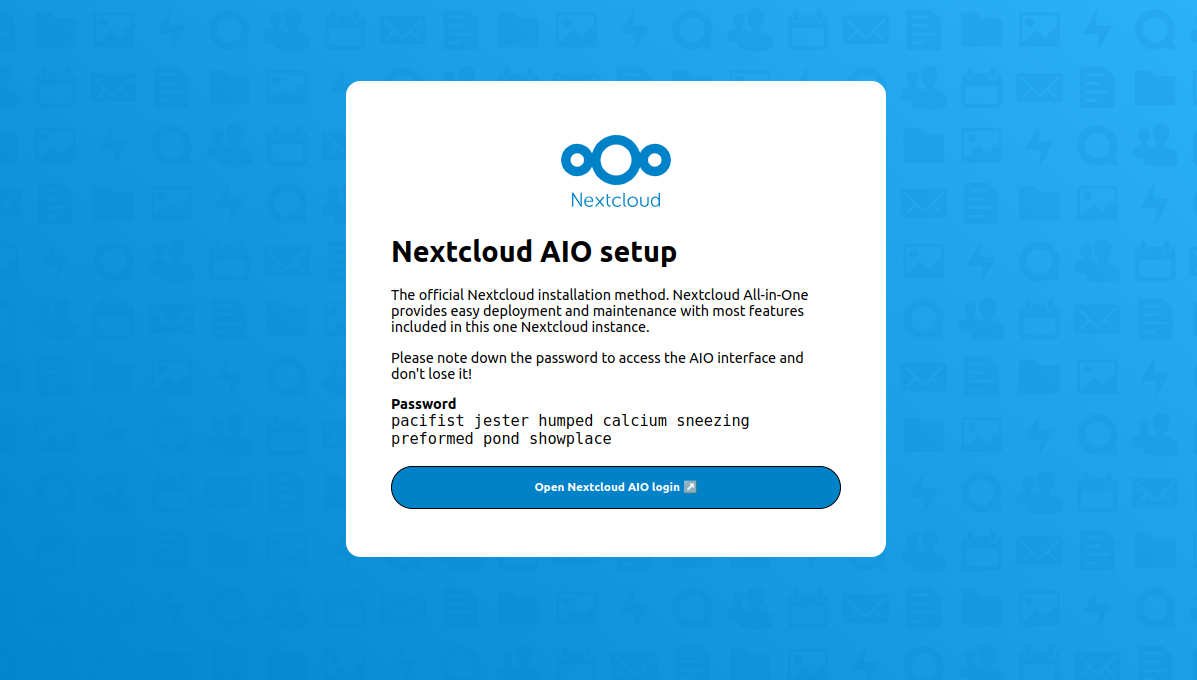
Copy the password from the above screen and click on Open Nextcloud AIO Login. You will see the following screen.
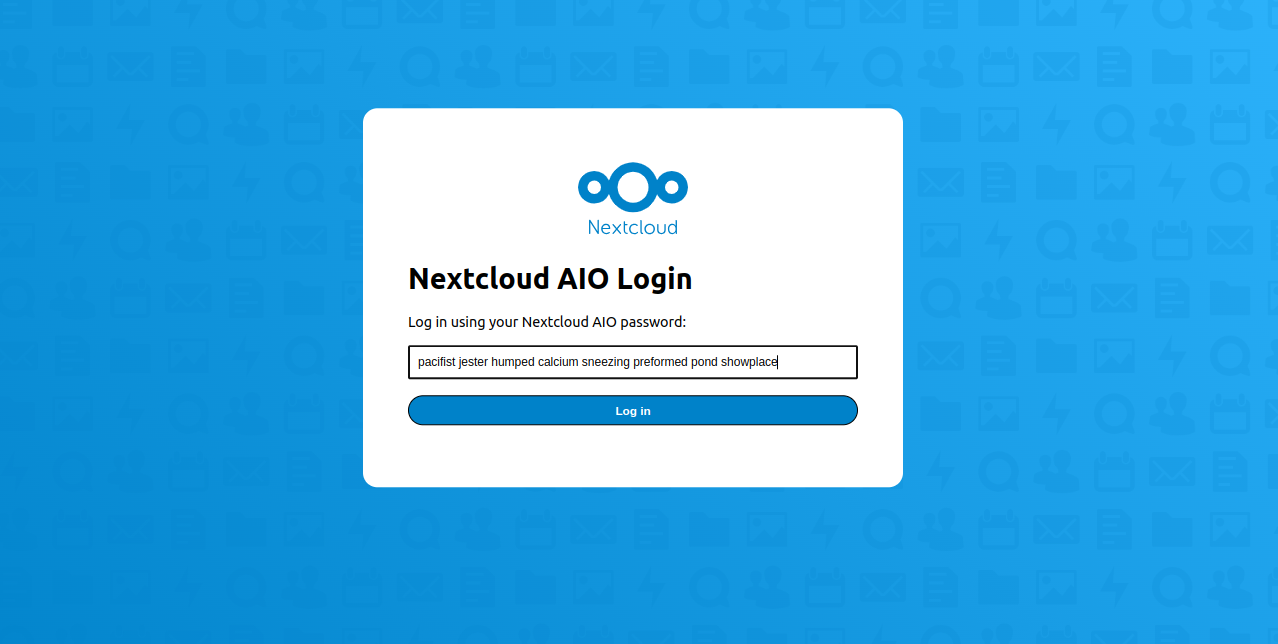
Paste your password and click on Log in. You will see the following page:
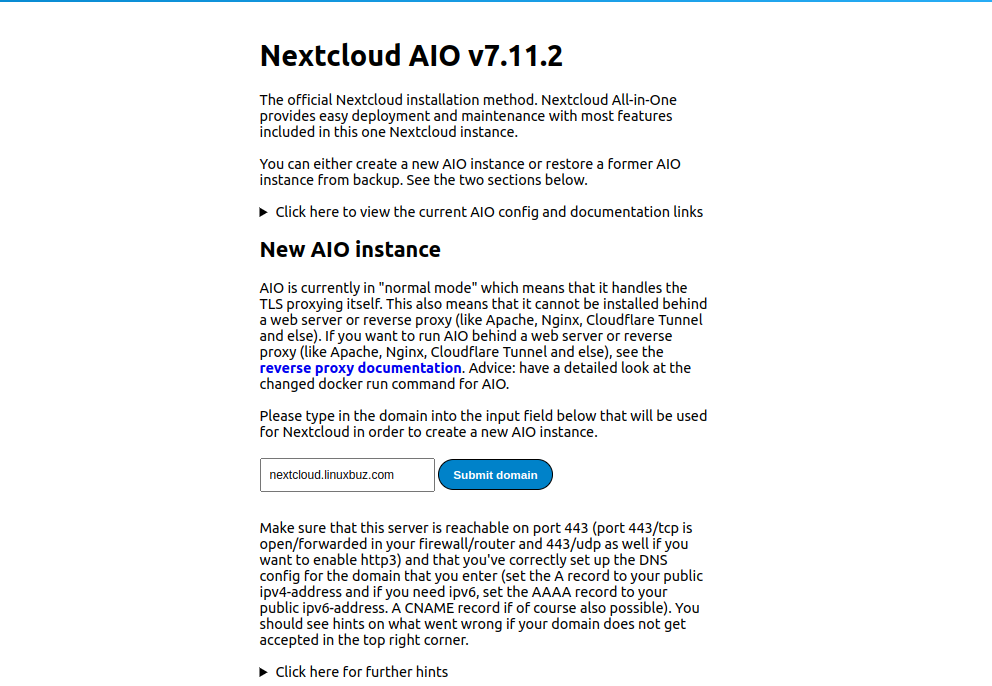
Provide your domain name and click on Submit domain. You will see the following page:
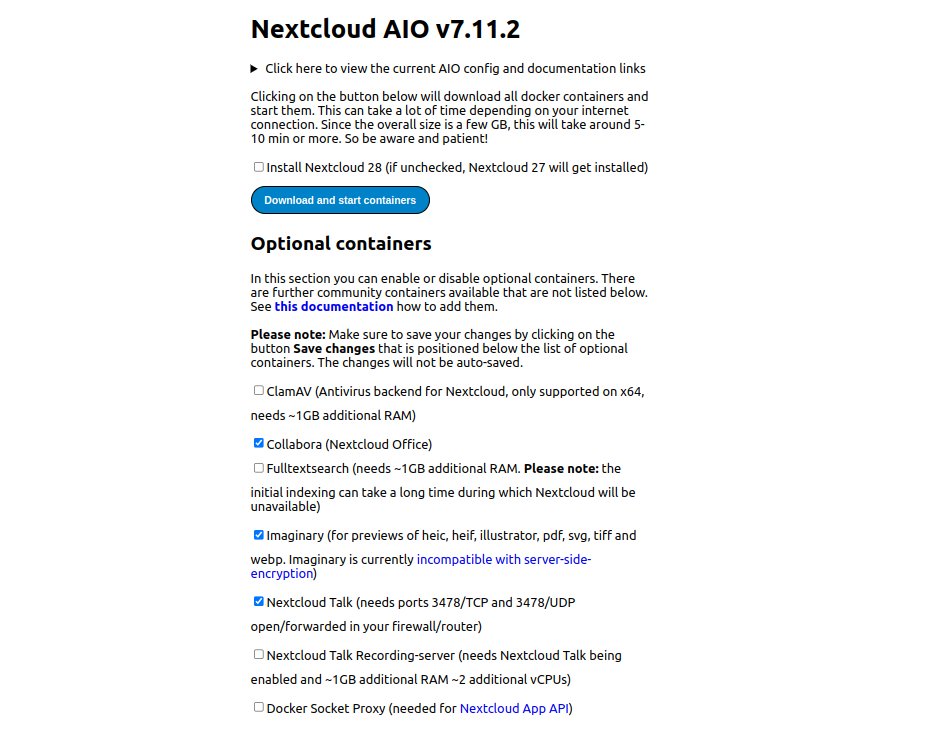
Click on Download and start containers. Once all the containers are started, you will see the following screen.
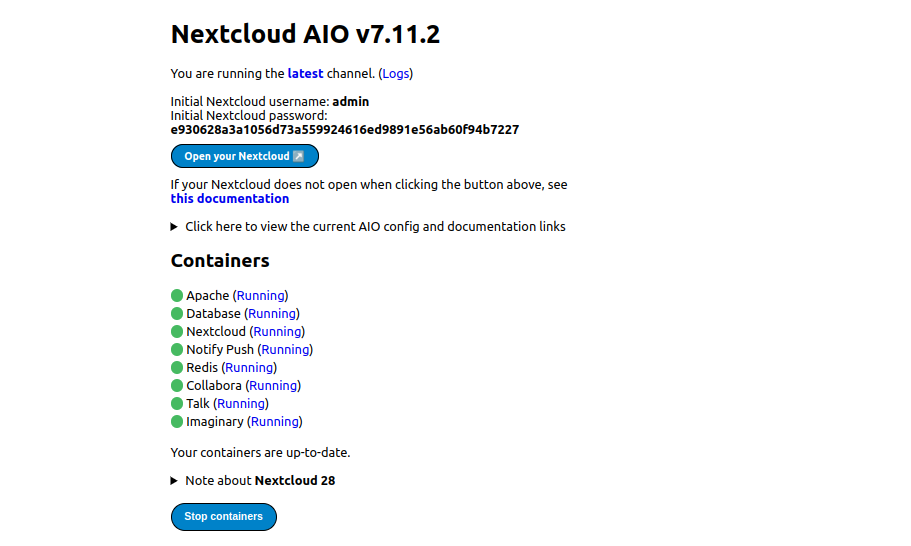
Copy the Nextcloud initial admin username and password and click on the Open your Nextcloud. You will see the following screen.
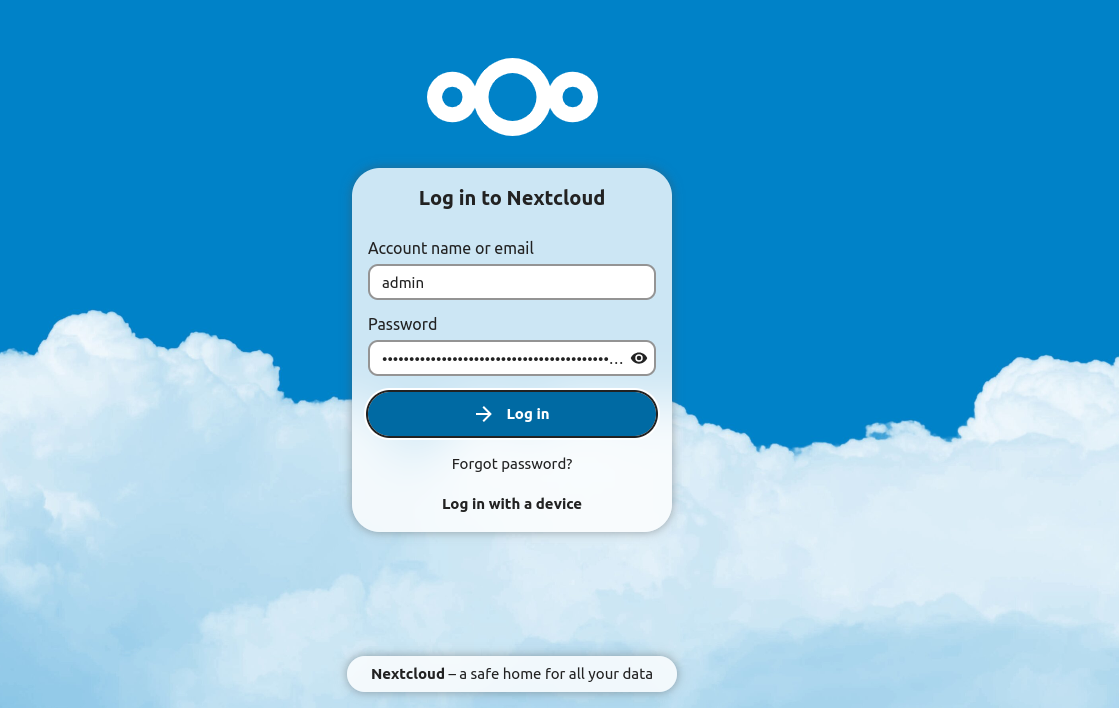
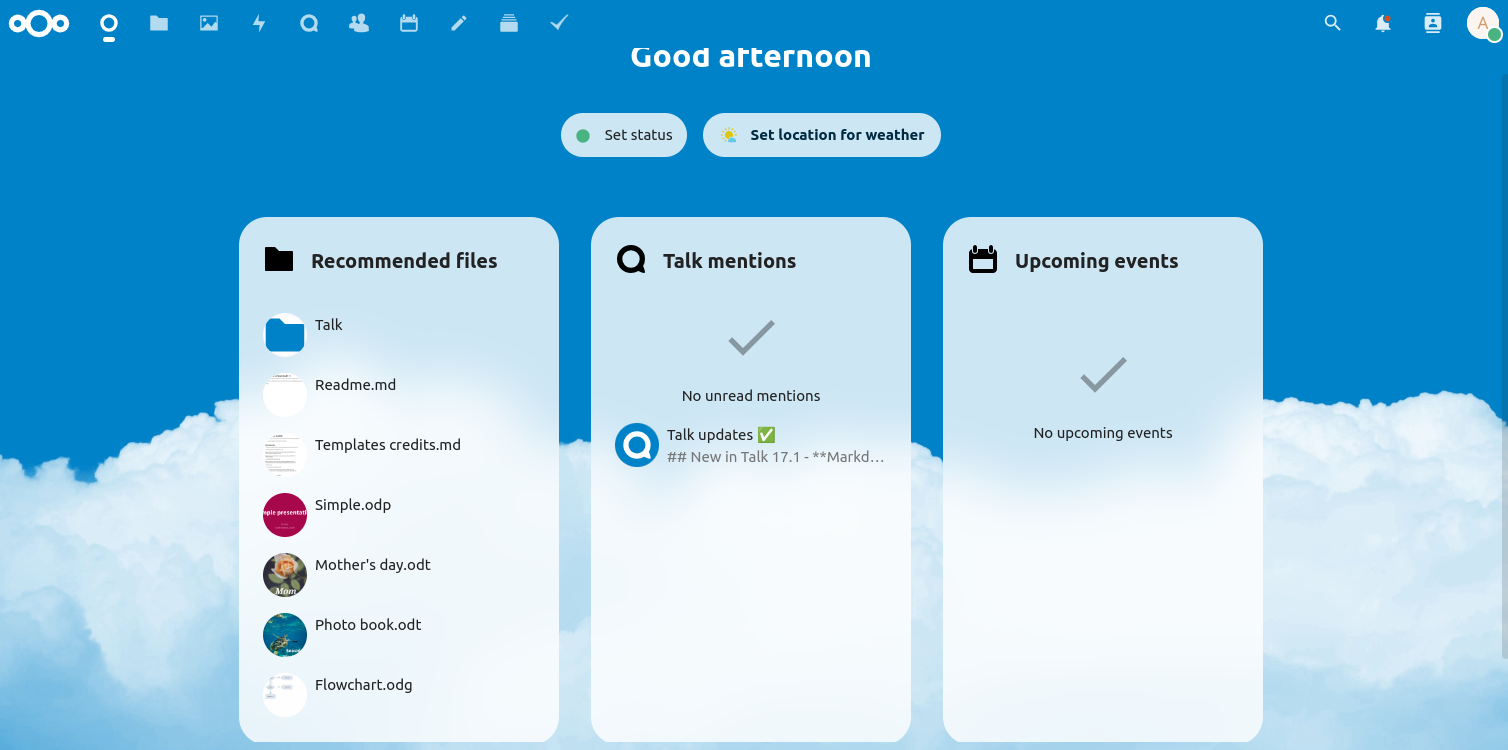
Provide your admin username and password and click on Log in. You will see the Nextcloud dashboard on the following screen.
Conclusion
In conclusion, installing Nextcloud All-In-One (AIO) on Ubuntu 22.04 provides a powerful and versatile platform for hosting your cloud storage and collaboration environment. This guide covered the steps to install Nextcloud AIO, configure its dependencies, set up the database, and access the Nextcloud web interface. You can test Nextcloud AIO on dedicated server hosting from Atlantic.Net!