React is an open-source JavaScript library used for building interactive user interfaces for web and mobile applications. It uses a virtual browser to act as an agent between a developer and a real browser. React was created and is maintained by Facebook, but is now used by many companies around the world. React consists of compiled HTML, CSS, and JavaScript files and is often used as a frontend for more complex applications.
In this tutorial, we will show you how to deploy React.js on Ubuntu 20.04.
Step 1 – Install Nodejs
React App is a JavaScript library, so Node.js must be installed in your server. By default, the latest version of Node.js is not available in the Ubuntu standard repository, so you will need to install it from NodeSource.
First, install the necessary dependencies using the following command.
apt-get install -y ca-certificates curl gnupg
Next, download the Node.js GPG key.
mkdir -p /etc/apt/keyrings
curl -fsSL https://deb.nodesource.com/gpgkey/nodesource-repo.gpg.key | gpg --dearmor -o /etc/apt/keyrings/nodesource.gpg
Next, add the NodeSource repo to the APT source list.
echo "deb [signed-by=/etc/apt/keyrings/nodesource.gpg] https://deb.nodesource.com/node_18.x nodistro main" | tee /etc/apt/sources.list.d/nodesource.list
Then, update the repository index and install the Ndoe.js with the following command.
apt update
apt-get install -y nodejs
Once Node.js is installed, update the NPM to the latest version using the following command:
npm install npm@latest -g
You can now verify the installed version of Node.js with the following command:
node -v
You should get the following output:
v18.19.0
Step 2 – Create a New Reactjs App
First, you will need to install the create-react-app tool to create a new project in React. You can install it using the following command:
npm install -g create-react-app
You should get the following output:
/usr/bin/create-react-app -> /usr/lib/node_modules/create-react-app/index.js
+ [email protected]
added 67 packages from 25 contributors in 3.605s
Next, create a new project with the following command:
create-react-app awesome-project
You should see the following output:
Success! Created awesome-project at /root/awesome-project
Inside that directory, you can run several commands:

npm start
Starts the development server.

npm run build
Bundles the app into static files for production.

npm test
Starts the test runner.

npm run eject
Removes this tool and copies build dependencies, configuration files
and scripts into the app directory. If you do this, you can’t go back!

We suggest that you begin by typing:

cd awesome-project
npm start

Happy hacking!
Once your project is created, change the directory to your project and start the application with the following command:
cd awesome-project
npm start
You should get the following output:
Compiled successfully!

You can now view awesome-project in the browser.

http://localhost:3000

Note that the development build is not optimized.
To create a production build, use npm run build.
Press CTRL+C to stop the application.
Step 3 – Create a Systemd Service File for React App
Next, you will need to create a systemd service file to manage the React service. You can create it with the following command:
nano /lib/systemd/system/react.service
Add the following lines:
[Service]
Type=simple
User=root
Restart=on-failure
WorkingDirectory=/root/awesome-project
ExecStart=npm start -- --port=3000
Save and close the file, then reload the systemd daemon with the following command:
systemctl daemon-reload
Next, start the React service and enable it to start at system reboot:
systemctl start react
systemctl enable react
You can verify the status of the React service with the following command:
systemctl status react
You should get the following output:
-
react.service
Loaded: loaded (/lib/systemd/system/react.service; static; vendor preset: enabled)
Active: active (running) since Sun 2020-12-06 10:11:04 UTC; 5s ago
Main PID: 18556 (node)
Tasks: 30 (limit: 4691)
Memory: 170.0M
CGroup: /system.slice/react.service
├─18556 npm
├─18583 sh -c react-scripts start "--port=3000"
├─18584 node /root/awesome-project/node_modules/.bin/react-scripts start --port=3000
└─18591 /usr/bin/node /root/awesome-project/node_modules/react-scripts/scripts/start.js --
port=3000

Dec 06 10:11:04 ubuntu2004 systemd[1]: Started react.service.
Dec 06 10:11:04 ubuntu2004 npm[18556]: > [email protected] start /root/awesome-project
Dec 06 10:11:04 ubuntu2004 npm[18556]: > react-scripts start "--port=3000"
Dec 06 10:11:07 ubuntu2004 npm[18591]: ℹ 「wds」: Project is running at http://0.0.0.0:3000/
Dec 06 10:11:07 ubuntu2004 npm[18591]: ℹ 「wds」: webpack output is served from
Dec 06 10:11:07 ubuntu2004 npm[18591]: ℹ 「wds」: Content not from webpack is served from
/root/awesome-project/public
Dec 06 10:11:07 ubuntu2004 npm[18591]: ℹ 「wds」: 404s will fallback to /
Dec 06 10:11:07 ubuntu2004 npm[18591]: Starting the development server...
Step 4 – Configure Nginx as a Reverse Proxy
At this point, your React App is started and listening on port 3000. Next, you will need to configure Nginx as a reverse proxy to access the React App through port 80.
First, install the Nginx web server with the following command:
apt-get install nginx -y
Once installed, create a new Nginx virtual host configuration file:
nano /etc/nginx/conf.d/react.conf
Add the following lines:
upstream react_backend {
server localhost:3000;
}

server {
listen 80;
server_name react.example.com;

location / {
proxy_pass http://react_backend/;
proxy_http_version 1.1;
proxy_set_header Upgrade $http_upgrade;
proxy_set_header Connection "upgrade";
proxy_set_header Host $http_host;

proxy_set_header X-Real-IP $remote_addr;
proxy_set_header X-Forward-For $proxy_add_x_forwarded_for;
proxy_set_header X-Forward-Proto http;
proxy_set_header X-Nginx-Proxy true;

proxy_redirect off;
}
}
Save and close the file then restart the Nginx service to apply the changes:
systemctl restart nginx
Step 5 – Access Reactjs Web UI
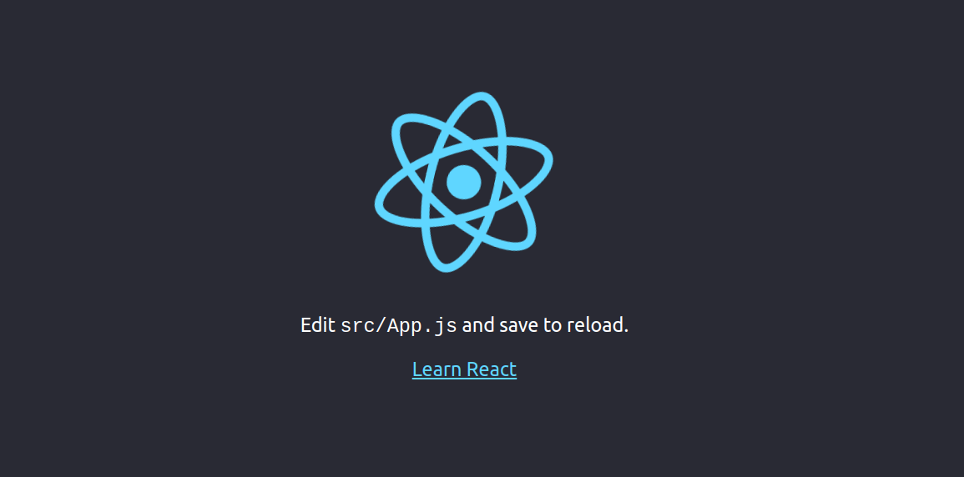
Now, open your web browser and access the React App using the URL http://react.example.com. You should see your React Application in the following screen:
Conclusion
Congratulations! You have successfully installed and deployed React App with Nginx as a reverse proxy on Ubuntu 20.04. You can now start exploring React App for more features. Try out React.js on dedicated server hosting from Atlantic.Net!
