Snipe-IT is an open-source web-based application designed for asset management. It is specifically focused on IT assets, making it a popular choice for managing and tracking hardware and software within an organization. The primary goal of Snipe-IT is to provide a centralized and efficient way for businesses to keep track of their assets, including computers, servers, software licenses, and other equipment.
In this tutorial, we will walk through the step-by-step process of installing Snipe-IT on a server running Ubuntu 24.04.
Step 1 – Install LEMP Stack
Snipe-IT requires a LEMP (Linux, NGINX, MySQL, PHP) stack. You can install it using the following commands:
apt update -y
apt install nginx mariadb-server php php-bcmath php-common php-ctype php-curl php-fileinfo php-fpm php-gd php-iconv php-intl php-mbstring php-mysql php-soap php-xml php-xsl php-zip git -y
Next, install PHP Composer using the following command.
apt install composer -y
After the successful installation, you can proceed to the next step.
Step 2 – Create a Database
You will also need to create a database and user for Snipe-IT. First, connect to the MySQL shell.
mysql
Once connected, create a database and user with the following command.
mysql> CREATE DATABASE snipeit;
mysql> GRANT ALL ON snipeit.* TO snipeit@localhost identified by 'password';
Next, flush the privileges and exit from the MySQL shell.
mysql> FLUSH PRIVILEGES;
mysql> \q
Step 3 – Install Snipe-IT
First, navigate to the NGINX web root directory and download the latest version of Snipe-IT using the following command.
cd /var/www/html
git clone https://github.com/snipe/snipe-it
Next, change the directory to Snipe-IT and copy the sample environment file.
cd snipe-it
cp .env.example .env
Next, edit the environment file.
nano .env
Define your app URL, database, and other information.
APP_URL=http://snipeit.example.com
APP_TIMEZONE='UTC'
DB_DATABASE=snipeit
DB_USERNAME=snipeit
DB_PASSWORD=password
Save and close the file, then set proper permissions and ownership.
chown -R www-data: /var/www/html/snipe-it
chmod -R 755 /var/www/html/snipe-it
Next, update and install plugins and other required dependencies.
composer update --no-plugins --no-scripts
composer install --no-dev --prefer-source --no-plugins --no-scripts
Next, generate the artisan key.
php artisan key:generate
Output.
**************************************
*     Application In Production!     *
**************************************

 Do you really wish to run this command? (yes/no) [no]:
 > yes

Application key set successfully.
Step 4 – Create an Nginx Virtual Host
Now, create a new Nginx virtual host for Snipe-IT.
nano /etc/nginx/conf.d/snipeit.conf
Add the following configuration.
server {
        listen 80;
        server_name snipeit.example.com;
        root /var/www/html/snipe-it/public;

        index index.php;

        location / {
                try_files $uri $uri/ /index.php?$query_string;

        }

        location ~ \.php$ {
include fastcgi.conf;
                include snippets/fastcgi-php.conf;
                fastcgi_pass unix:/run/php/php8.3-fpm.sock;
fastcgi_split_path_info ^(.+\.php)(/.+)$;
        fastcgi_param SCRIPT_FILENAME $document_root$fastcgi_script_name;
        include fastcgi_params;
        }

}
Save the file, then edit the Nginx main configuration file.
nano /etc/nginx/nginx.conf
Add the following line after the line http {:
server_names_hash_bucket_size 64;
Save the file, then restart the Nginx service to apply the changes.
systemctl restart nginx
Step 5 – Access Snipe-IT Web Interface
Now, open your web browser and access the Snipe-IT web interface using the URL http://snipeit.example.com. You will see the pre-flight check page.
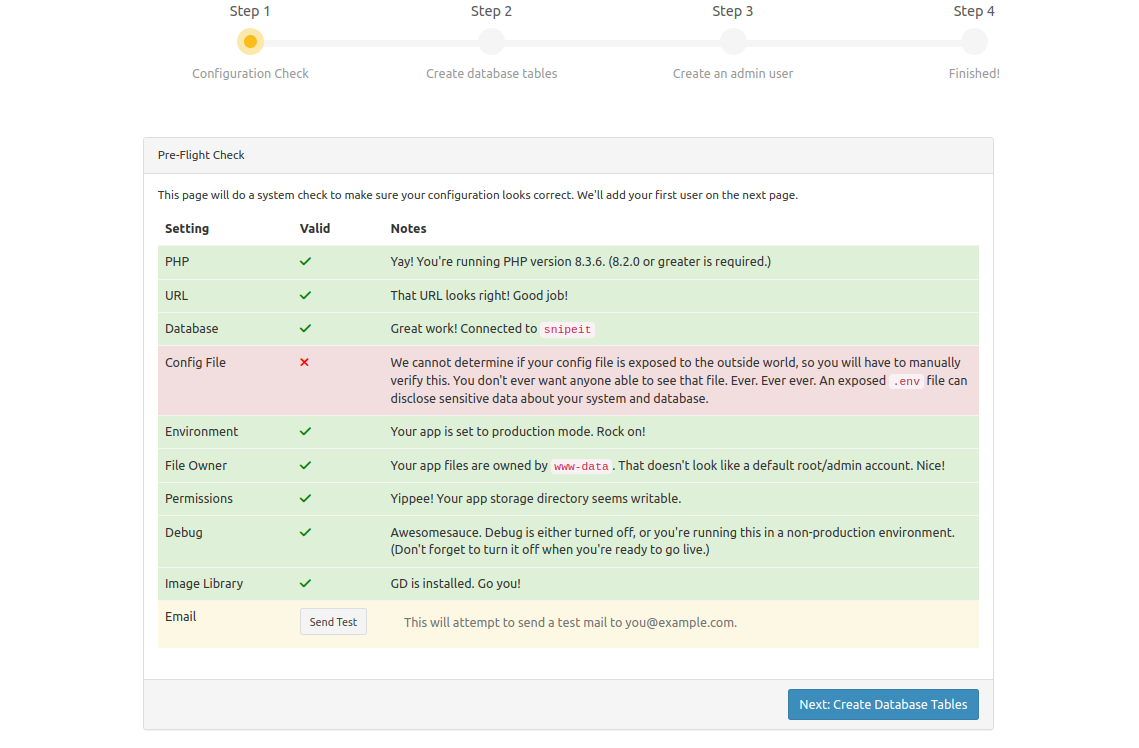
Ensure all required dependencies are installed, then click the Next: Create Database Table. You will see the following page.
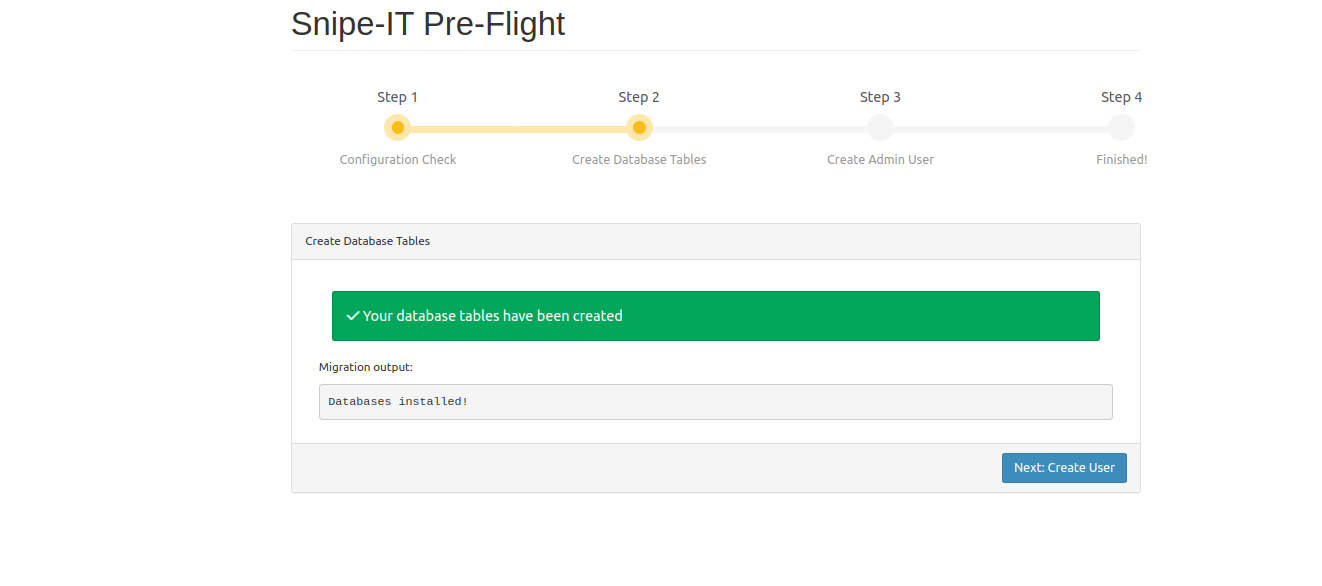
Click on the Next: Create User. You will see the following page.
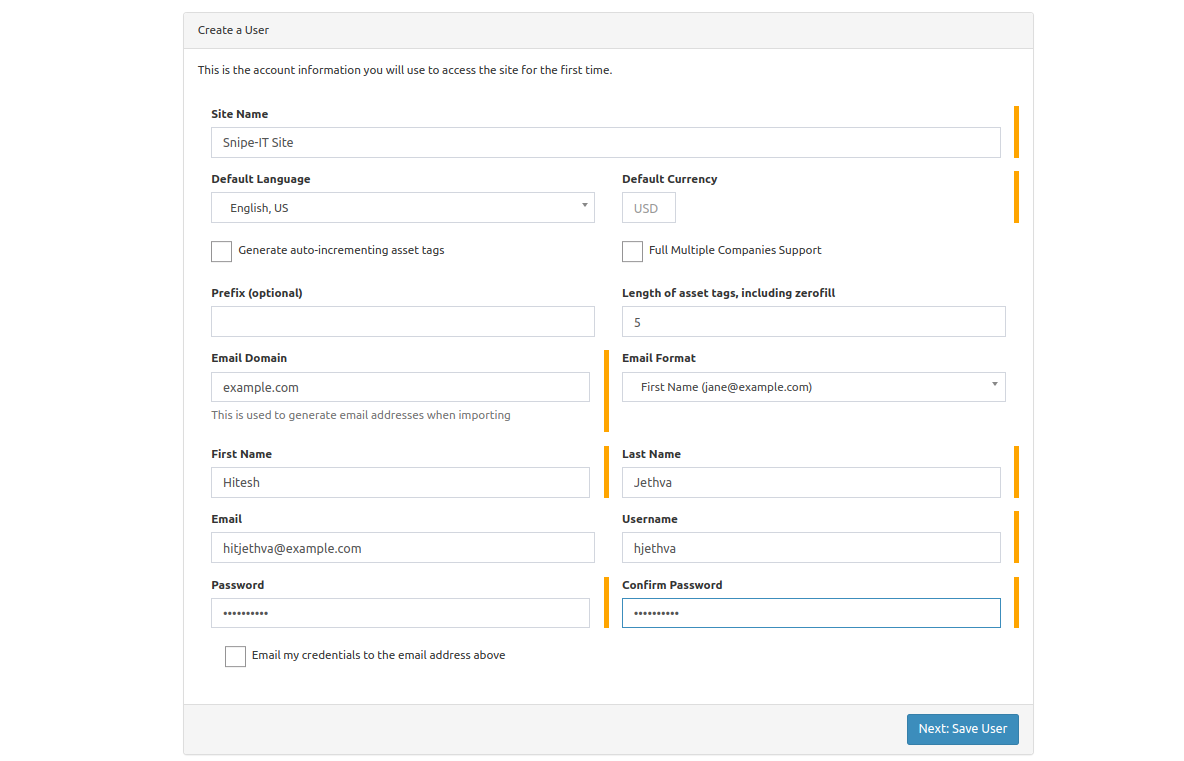
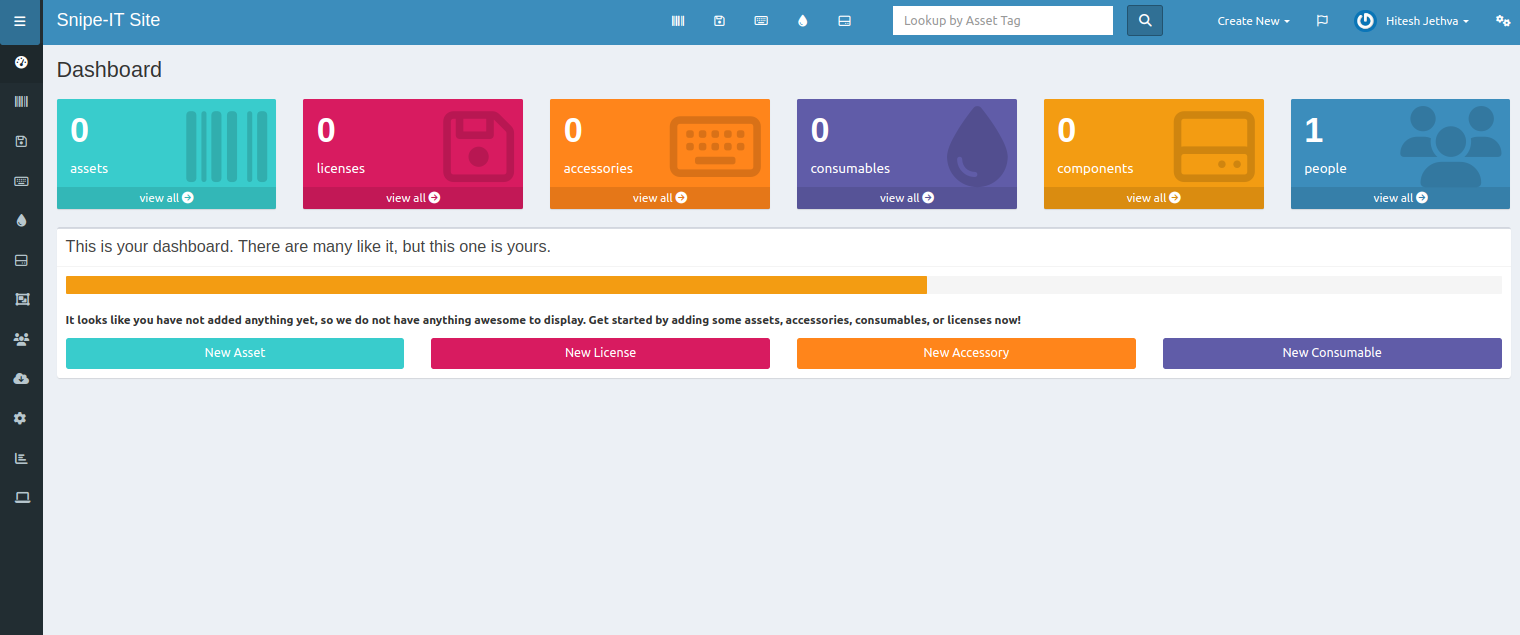
Define your site name, email, user, and password, then click Next: Save User. You will see the Snipe-IT dashboard.
Conclusion
Congratulations! You have successfully installed Snipe-IT on Ubuntu 24.04. You can now start using Snipe-IT to manage your organization’s assets efficiently. Remember to regularly update Snipe-IT and keep your system secure by following best practices for server administration. Explore the Snipe-IT documentation for additional features and customization options based on your organization’s needs. You can now deploy Snipe-IT on dedicated server hosting from Atlantic.Net!
* This post is for informational purposes only and does not constitute professional, legal, financial, or technical advice. Each situation is unique and may require guidance from a qualified professional.
Readers should conduct their own due diligence before making any decisions.