Strapi is a free, open-source, next-generation headless CMS used to develop websites, mobile applications, eCommerce sites, and APIs. It helps developers to create an API without using any database and backend. Strapi gives you the freedom to use your favorite tools and allows content editors to streamline content delivery across any device.
In this post, we will show you how to install Strapi CMS on Fedora Linux.
Step 1 – Install Node.js
Strapi is based on Node.js, so you will need to install Node.js on your server.
First, install all required dependencies using the following command.
dnf install -y gcc-c++ make git
Next, add the Node source repo with the following command.
curl -sL https://rpm.nodesource.com/setup_18.x | bash -
After that install Node.js with the following command.
dnf install nodejs
You can verify the Node.js version with the following command.
node -v
v18.19.0
Step 2 – Install PostgreSQL
Strapi uses PostgreSQL as a database backend, so you will need to install PostgreSQL on your server.
First, enable the PostgreSQL module.
dnf module enable postgresql:13
Next, install the PostgreSQL server using the following command.
dnf install postgresql-server
Then, initialize the PostgreSQL database.
postgresql-setup --initdb
After that, start and enable the PostgreSQL service.
systemctl enable postgresql
systemctl start postgresql
Next, connect to the PostgreSQL shell.
sudo -u postgres psql
Next, set the PostgreSQL password and create a Strapi database.
ALTER USER postgres PASSWORD 'password';
create database strapi;
Next, exit from the PostgreSQL shell.
\q
Step 3 – Create a Strapi Application
You can use the npx command line utility to easily create a Strapi app.
npx create-strapi-app@latest strapi --no-run
You will see the following output.
Need to install the following packages:
  [email protected]
Ok to proceed? (y) y
? Choose your installation type Quickstart (recommended)
Next, navigate to the strapi directory and build the application with the following command.
cd strapi
npm run build
Output:
> [email protected] build
> strapi build
Building your admin UI with development configuration…
✔ Webpack
  Compiled successfully in 30.45s

Admin UI built successfully
Next, edit the server.js file and define your domain.
nano ./config/server.js
Change the following lines:
module.exports = ({ env }) => ({
  host: env('HOST', '0.0.0.0'),
  port: env.int('PORT', 1337),
url: 'http://strapiapp.example.com',
  app: {
    keys: env.array('APP_KEYS'),
  },
  webhooks: {
    populateRelations: env.bool('WEBHOOKS_POPULATE_RELATIONS', false),
  },
});
Save and close the file, then run Strapi in development mode.
npm run develop
If everything is fine, you will get the following output.
 Project information

┌────────────────────┬──────────────────────────────────────────────────┐
│ Time               │ Thu Jul 13 2023 10:06:52 GMT-0400 (Eastern Dayl… │
│ Launched in        │ 2236 ms                                          │
│ Environment        │ development                                      │
│ Process PID        │ 13769                                            │
│ Version            │ 4.11.5 (node v18.11.0)                           │
│ Edition            │ Community                                        │
│ Database           │ sqlite                                           │
└────────────────────┴──────────────────────────────────────────────────┘

 Actions available

One more thing...
Create your first administrator 💻 by going to the administration panel at:

┌────────────────────────────────────┐
│ http://strapiapp.example.com/admin │
└────────────────────────────────────┘
Press the CTRL+C to stop the application.
Step 4 – Create a Systemd Service for Strapi
It is recommended to create a systemd file to manage the Strapi service.
nano /etc/systemd/system/strapi.service
Add the following configurations.
[Unit]
Description=Strapi Project
After=network.target
[Service]
Type=simple
WorkingDirectory=/root/strapi
User=root
ExecStart=/usr/bin/node /root/strapi/node_modules/.bin/strapi develop
[Install]
WantedBy=multi-user.target
Save and close the file, then reload the systemd daemon to apply the changes.
systemctl daemon-reload
Next, start and enable the Strapi service to start at system reboot.
systemctl start strapi
systemctl enable strapi
You can verify the Strapi service status using the following command.
systemctl status strapi
Output:
● strapi.service - Strapi Project
     Loaded: loaded (/etc/systemd/system/strapi.service; disabled; vendor preset: disabled)
     Active: active (running) since Thu 2023-07-13 10:12:23 EDT; 3s ago
   Main PID: 14102 (node)
      Tasks: 14 (limit: 4666)
     Memory: 224.7M
        CPU: 4.403s
     CGroup: /system.slice/strapi.service
             ├─14102 /usr/bin/node /root/strapi/node_modules/.bin/strapi develop
             └─14116 /usr/bin/node /root/strapi/node_modules/.bin/strapi develop

Jul 13 10:12:23 fedora systemd[1]: Started Strapi Project.
Step 5 – Configure Nginx for Strapi App
First, install the Nginx package with the following command.
dnf install nginx
Next, create a new Nginx virtual host configuration file.
nano /etc/nginx/conf.d/strapi.conf
Add the following configurations:
# Strapi server
upstream strapi {
server 127.0.0.1:1337;
}
server {
listen 80;
server_name strapiapp.example.com;
# Proxy Config
location / {
proxy_pass http://strapi;
proxy_http_version 1.1;
proxy_set_header X-Forwarded-Host $host;
proxy_set_header X-Forwarded-Server $host;
proxy_set_header X-Real-IP $remote_addr;
proxy_set_header X-Forwarded-For $proxy_add_x_forwarded_for;
proxy_set_header X-Forwarded-Proto $scheme;
proxy_set_header Host $http_host;
proxy_set_header Upgrade $http_upgrade;
proxy_set_header Connection "Upgrade";
proxy_pass_request_headers on;
}
}
Save and close the file, then edit the Nginx main configuration file.
nano /etc/nginx/nginx.conf
Add the following line after the line http{:
server_names_hash_bucket_size 64;
Save the file, then verify the Nginx configuration.
nginx -t
You should see the following output.
nginx: the configuration file /etc/nginx/nginx.conf syntax is ok
nginx: configuration file /etc/nginx/nginx.conf test is successful
Finally, start the Nginx service to implement the changes.
systemctl start nginx
Step 6 – Access Strapi Web UI
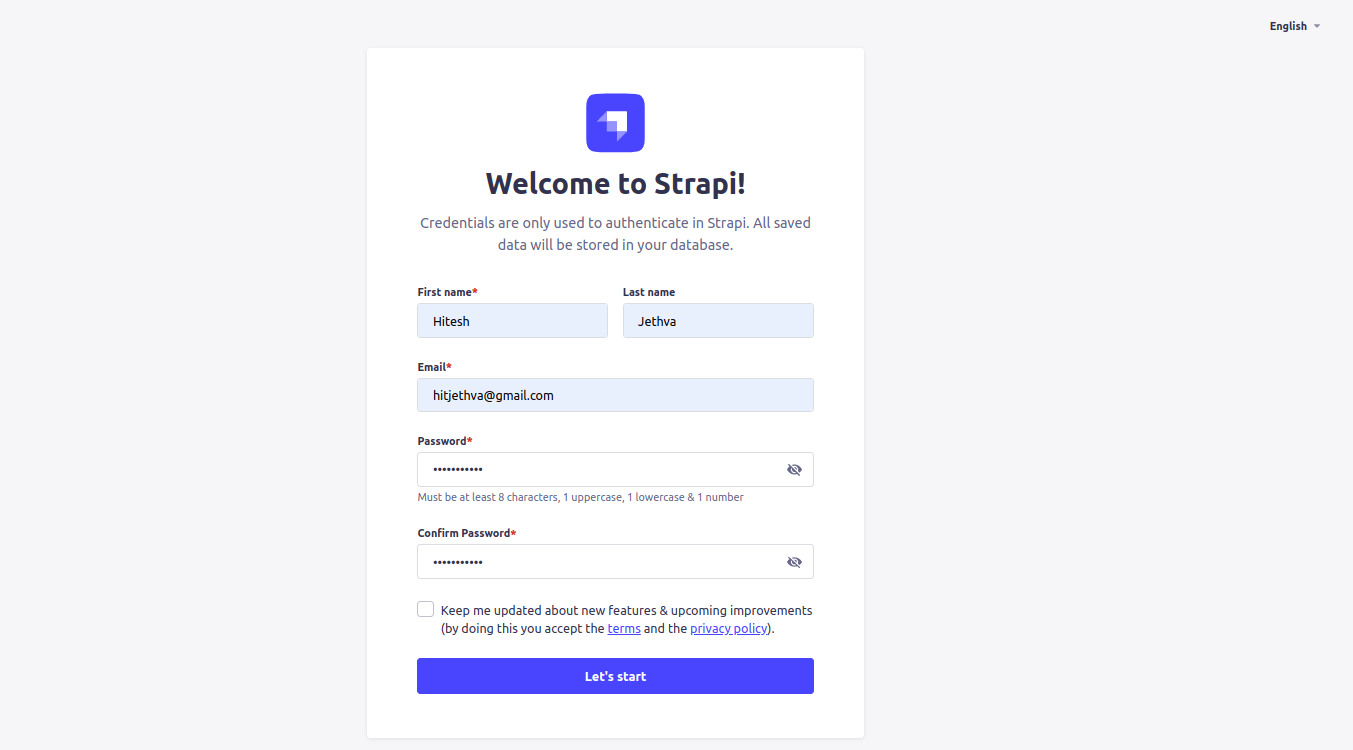
At this point, Strapi is installed and configured. You can now access the Strapi web interface using the URL http://strapiapp.example.com/admin. You should see the user registration page.
Provide your name, email, and password, and click on the Let’s start button. You will be redirected to the Strapi dashboard.
Conclusion
In this post, we have shown you how to install Strapi on Fedora Linux. We also installed and configured Nginx as a reverse proxy for Strapi. You can now use Strapi in the production environment to create an API easily. Try to deploy the Strapi application on dedicated server hosting from Atlantic.Net!

