WordPress is a free, open-source, self-hosted CMS software solution that allows you to host a blog or website on the internet. It is very popular for beginners who don’t know how to code a website. WordPress is secure, fast, customizable, and comes with tons of themes and plugins that help you to extend the functionality of your website. It is written in PHP and uses MySQL/MariaDB as a database backend. This popular platform is a great choice for getting a website up and running quickly.
commerce.
In this post, we will explain how to install WordPress using a LAMP stack on OracleLinux 10.
Step 1 – Install LAMP Stack
Before starting, install the LAMP stack components like Apache web server and MariaDB using the following command:
dnf install httpd mariadb-server -y
After installing both packages, you will need to install PHP and other PHP extensions to your system.
You can install PHP with other extensions using the following command:
dnf install php php-cli php-fpm php-json php-gd php-mbstring php-pdo php-xml php-mysqlnd php-pecl-zip curl -y
Once all the packages are installed, start and enable Apache, PHP-FPM, and MariaDB services using the following command:
systemctl start httpd mariadb php-fpm
systemctl enable httpd mariadb php-fpm
Step 2 – Create a Database for WordPress
WordPress uses MySQL/MariaDB to store the contents, so you will need to create a database and user for WordPress:
First, connect to the MariaDB with the following command:
mysql
Once you are connected, create a database and user with the following command:
CREATE DATABASE wordpressdb;
CREATE USER `wordpressuser`@`localhost` IDENTIFIED BY 'securepassword';
Next, grant all the privileges to the WordPress database using the following command:
GRANT ALL ON wordpressdb.* TO `wordpressuser`@`localhost`;
Next, flush the privileges and exit from the MariaDB with the following command:
FLUSH PRIVILEGES;
EXIT;
Step 3 – Download WordPress
Next, change the directory to the Apache default web root directory and download the latest version of WordPress with the following command:
cd /var/www/html
curl https://wordpress.org/latest.tar.gz --output wordpress.tar.gz
Once the download is completed, extract the downloaded file with the following command:
tar xf wordpress.tar.gz
Next, change the directory to WordPress and rename the WordPress configuration file:
cd wordpress
mv wp-config-sample.php wp-config.php
Next, set proper ownership of the WordPress directory with the following command:
chown -R apache:apache /var/www/html/wordpress
chmod -R 755 /var/www/html/wordpress
Step 4 – Configure Apache to Host WordPress
Next, you will need to create an Apache virtual host file to host the WordPress. You can create it with the following command:
nano /etc/httpd/conf.d/wordpress.conf
Add the following lines:
<VirtualHost *:80>
ServerAdmin root@localhost
ServerName wordpress.example.com
DocumentRoot /var/www/html/wordpress
<Directory "/var/www/html/wordpress">
Options Indexes FollowSymLinks
AllowOverride all
Require all granted
</Directory>
ErrorLog /var/log/httpd/wordpress_error.log
CustomLog /var/log/httpd/wordpress_access.log common
</VirtualHost>
Save and close the file, then restart the Apache service to apply the configuration changes:
systemctl restart httpd
Step 5 – Access WordPress Installer
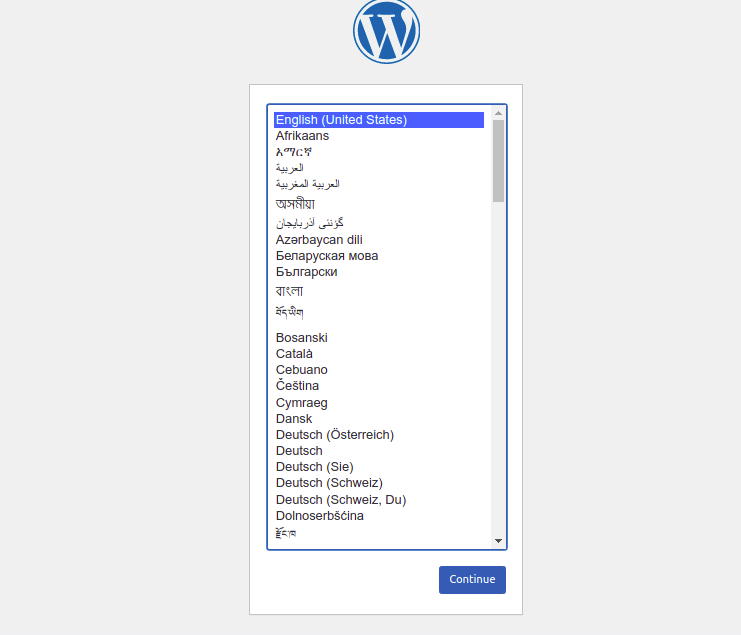
Now, open your web browser and access the WordPress installer using the URL http://wordpress.example.com. You should see the following screen:
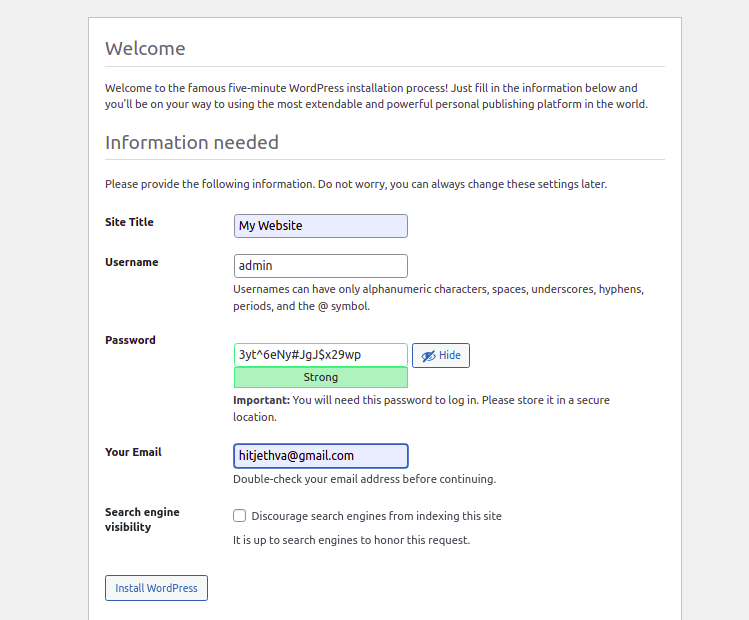
Select your language and click on the Continue button. You will be redirected to the following screen:
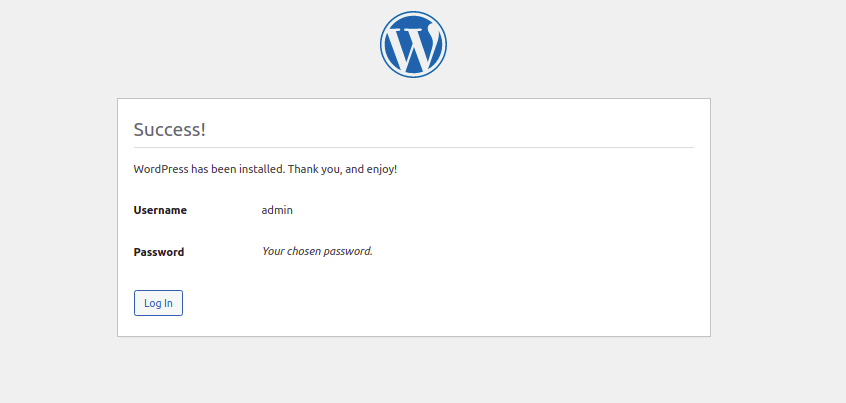
Provide your site information and click on the Install WordPress button. You should see the following screen:
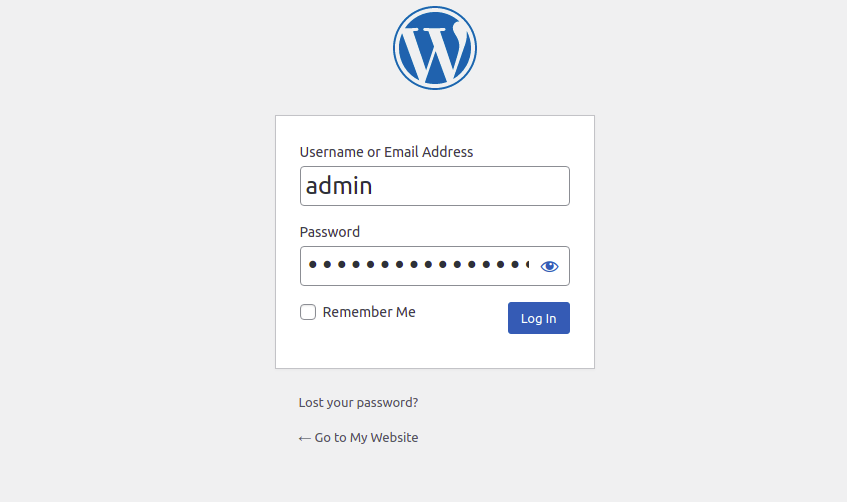
Click on the Log In button. You should see the following screen:
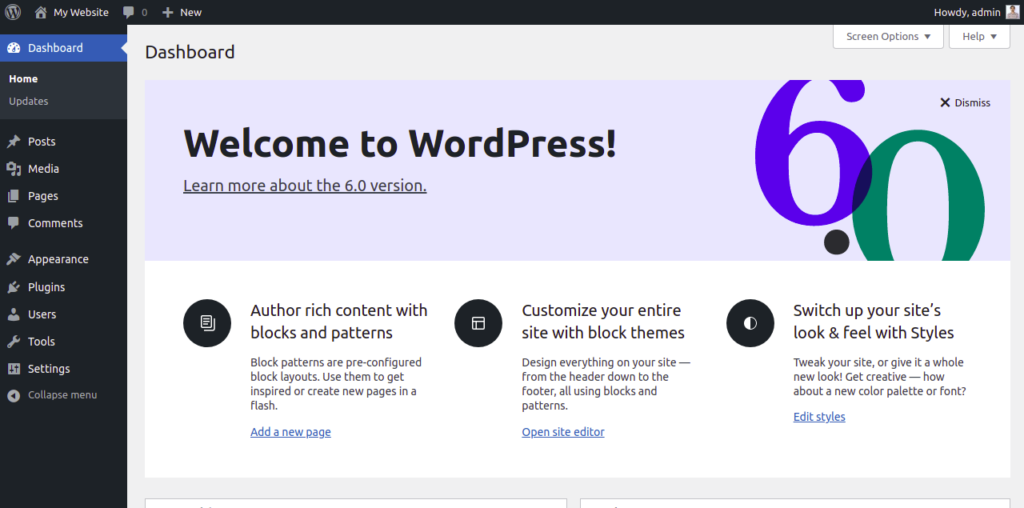
Provide your admin username and password and click on the Log In button. You should see the WordPress dashboard on the following screen:
Conclusion
In the above guide, we learned how to install WordPress with LAMP on OracleLinux 10. You can now install the necessary plugins and themes and start creating your first website from the WordPress dashboard. Give it a try on your dedicated server from Atlantic.Net!
