Zen Cart is an open-source software program that allows you to set up and manage an online store. It’s free to use and considered user-friendly, making it a popular choice for those starting out with e-commerce. Zen Cart is a solid option for those looking for a free and easy-to-use platform to set up a basic online store.
In this tutorial, we will show you how to install Zen Cart on Ubuntu 22.04.
Step 1 – Install LAMP Server
First, install the Apache, MariaDB, PHP and other required PHP extensions using the following command:
apt install -y apache2 mariadb-server php php-cli php-common libapache2-mod-php php-curl php-zip php-gd php-mysql php-xml php-mbstring php-json php-intlNext, edit the PHP configuration file:
nano /etc/php/8.1/apache2/php.iniChange the default values of the following settings:
memory_limit = 512M
post_max_size = 128M
upload_max_filesize = 128M
date.timezone = America/Chicago
Save the file, then restart the Apache service to implement the changes.
systemctl restart apache2Step 2 – Create a Database and User
First, log in to your MariaDB shell:
mysqlAfter the successful connection, create a database and user for Zen Cart:
CREATE DATABASE zencart;
CREATE USER 'zencart'@'localhost' IDENTIFIED BY 'password';
Next, grant all the privileges to Zen Cart.
GRANT ALL PRIVILEGES ON zencart. * TO 'zencart'@'localhost';Next, flush the privileges and exit from the MariaDB shell:
FLUSH PRIVILEGES;
EXIT;
Step 3 – Download Zen Cart
First, go to the Zen Cart official download page and download the latest Zen Cart archive.
wget https://github.com/zencart/zencart/archive/refs/tags/v2.0.0.zip --no-check-certificateThen, unzip the downloaded archive:
unzip v2.0.0.zipNext, move the extracted directory to the Apache web root:
mv zencart-2.0.0 /var/www/html/zencartNext, copy the Zen Cart sample configuration file.
cp /var/www/html/zencart/includes/dist-configure.php /var/www/html/zencart/includes/configure.phpNext, change the ownership and permission of the Zen Cart directory.
chown -R www-data:www-data /var/www/html/zencart
find /var/www/html/zencart/ -type d -exec chmod 755 {} \;
find /var/www/html/zencart/ -type f -exec chmod 644 {} \;
Step 4 – Create an Apache Virtual Host
Next, you will need to create an Apache virtual host configuration file for Zen Cart.
nano /etc/apache2/sites-available/zencart.confAdd the following content:
 <VirtualHost *:80>
    ServerAdmin admin@example.com
    DocumentRoot /var/www/html/zencart/

    ServerName zencart.example.com

    <Directory /var/www/html/zencart/>
        Options FollowSymLinks
        AllowOverride All
        Order allow,deny
        Allow from all
    </Directory>

    ErrorLog /var/log/apache2/example.com-error_log
    CustomLog /var/log/apache2/example.com-access_log common

 </VirtualHost>
Save the file then activate the Zen Cart virtual host.
a2ensite zencart.confFinally, restart the Apache service to apply the changes.
systemctl restart apache2Step 5 – Access Zen Cart Web Interface
Now, open your web browser and access the Zen Cart UI using the URL http://zencart.example.com. You will see the following page:
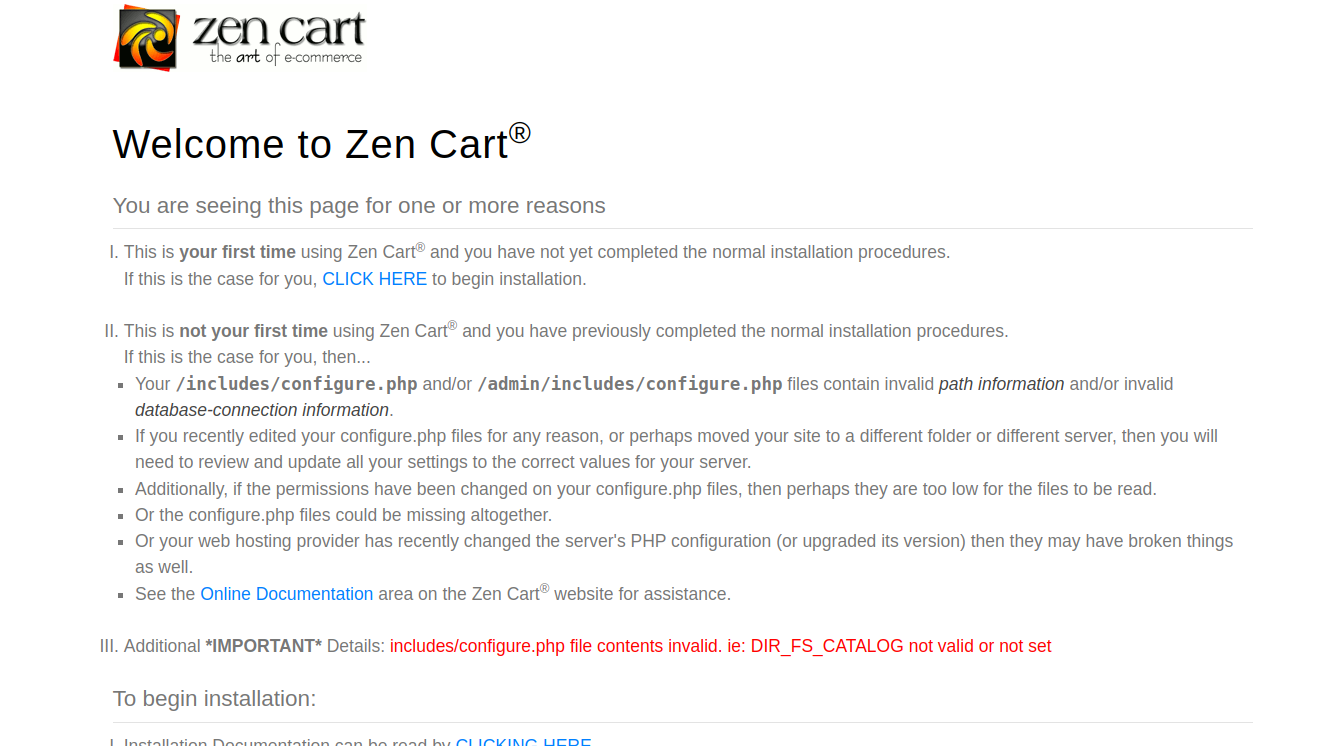
Click on CLICK HERE. You will see the system inspection page:
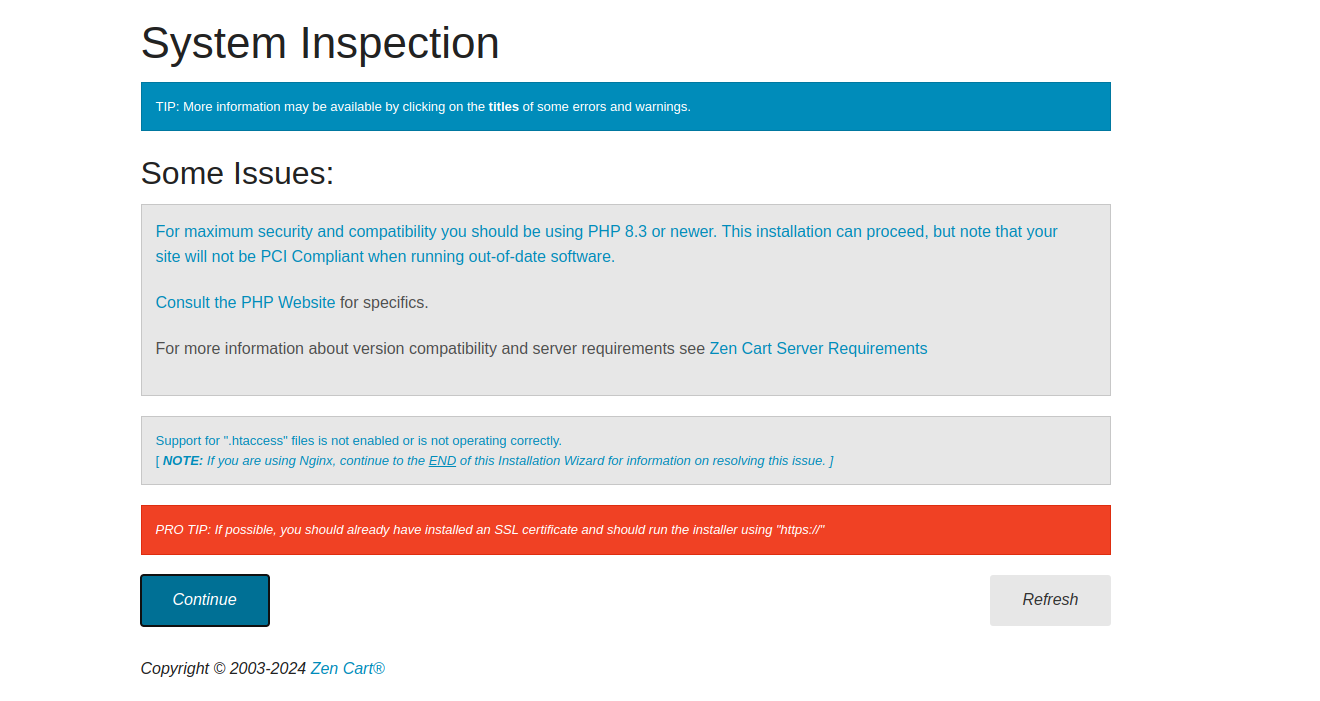
Click on Continue. You will see the License Agreement and settings page:
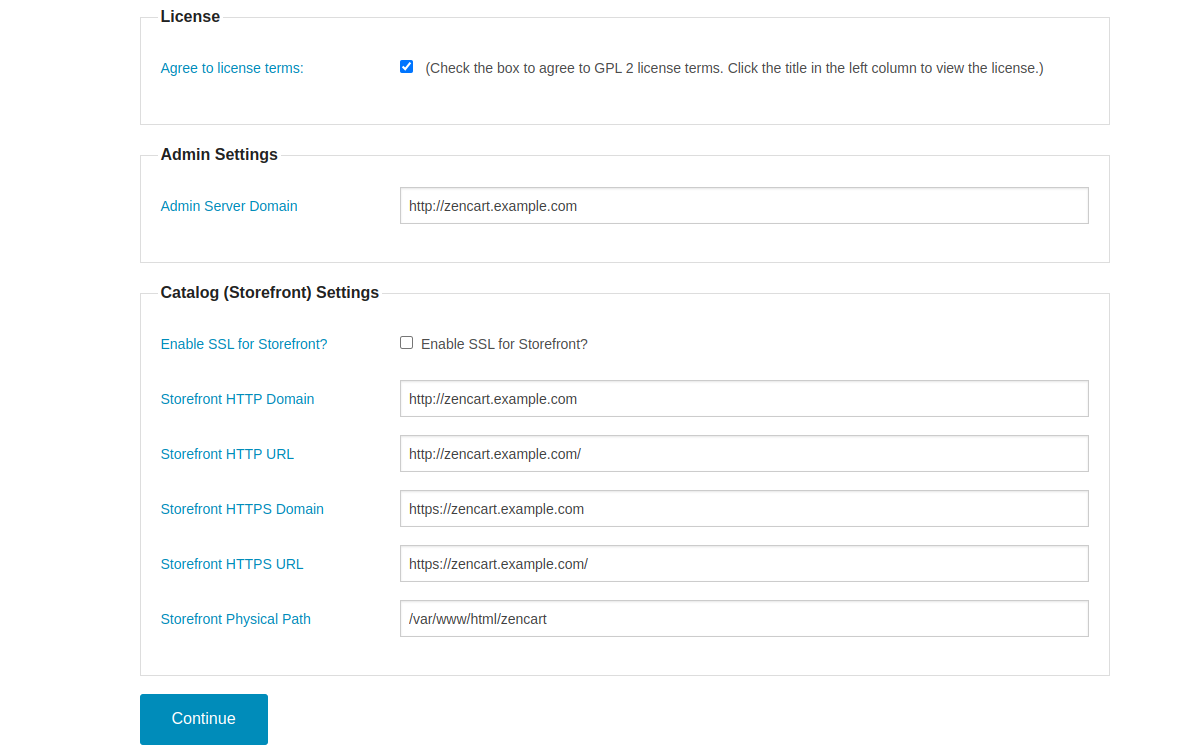
Accept the License Agreement, define other necessary settings, and click on Continue. You will see the database setup page:

Provide your database credentials and click on Continue. You will see the admin setup page:
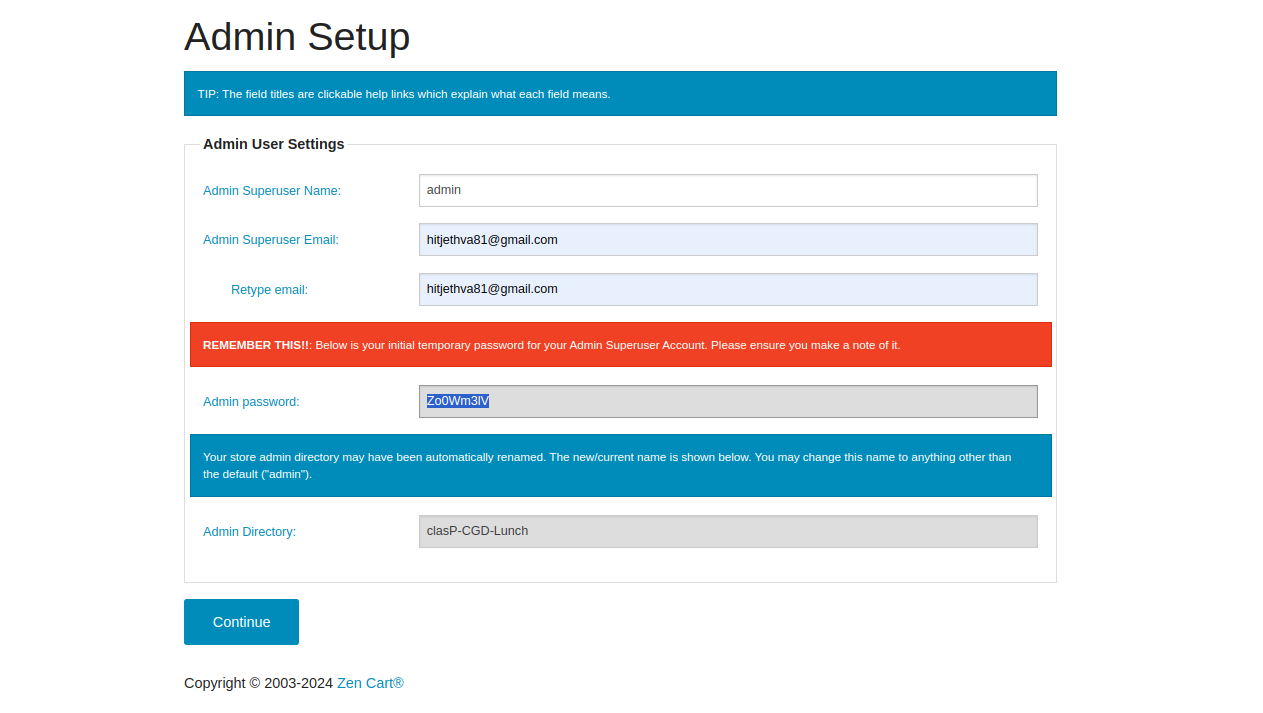
Set your admin username, email, and password, and click on Continue. You will see the following page:
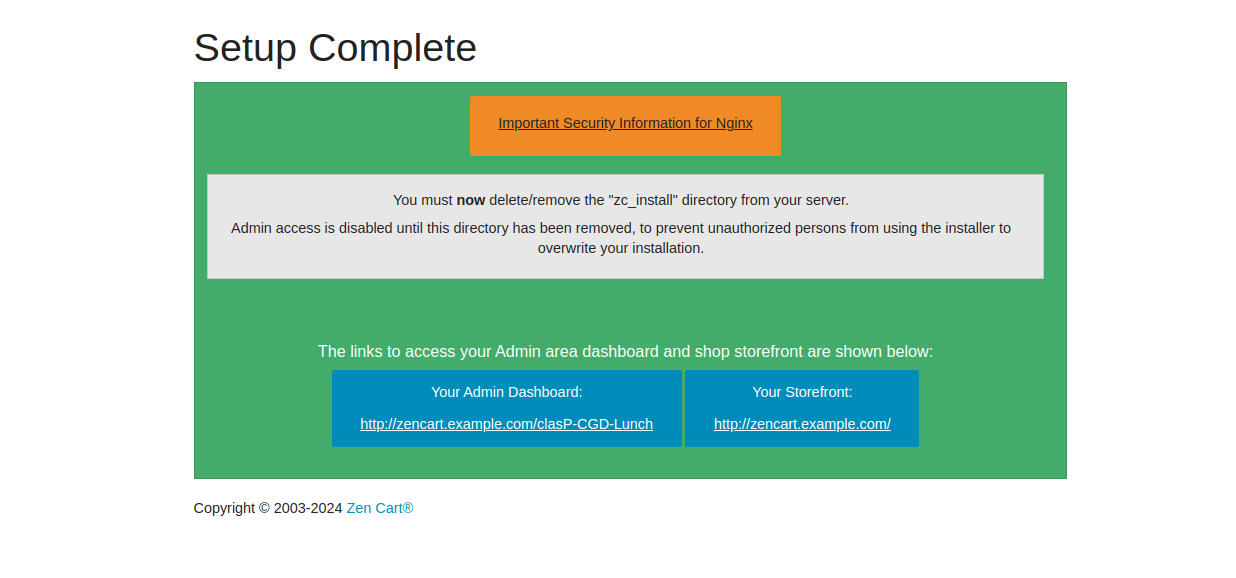
Now, delete the installation directory from your server using the following command.
rm -rf /var/www/html/zencart/zc_installNext, click on the Admin Dashboard link. You will see the following page:

Provide your admin username and password and click on Submit. You will see the password reset page:
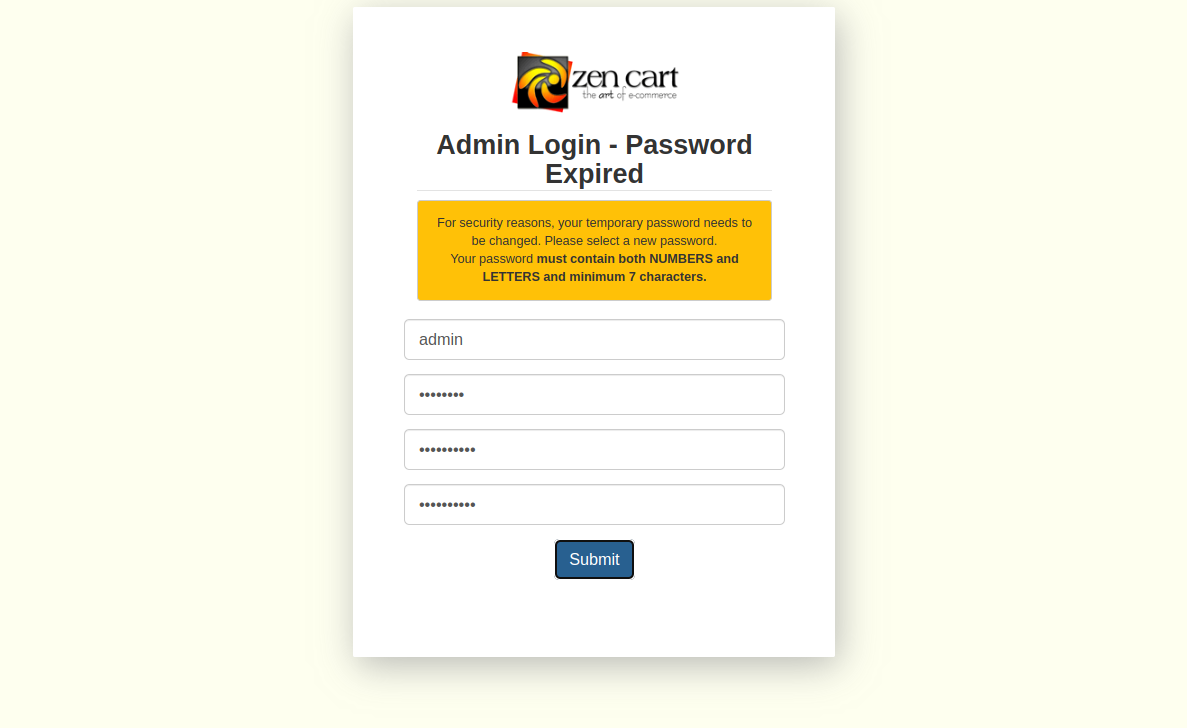
Change your admin password and click on Submit. You will see the Initial Setup page.
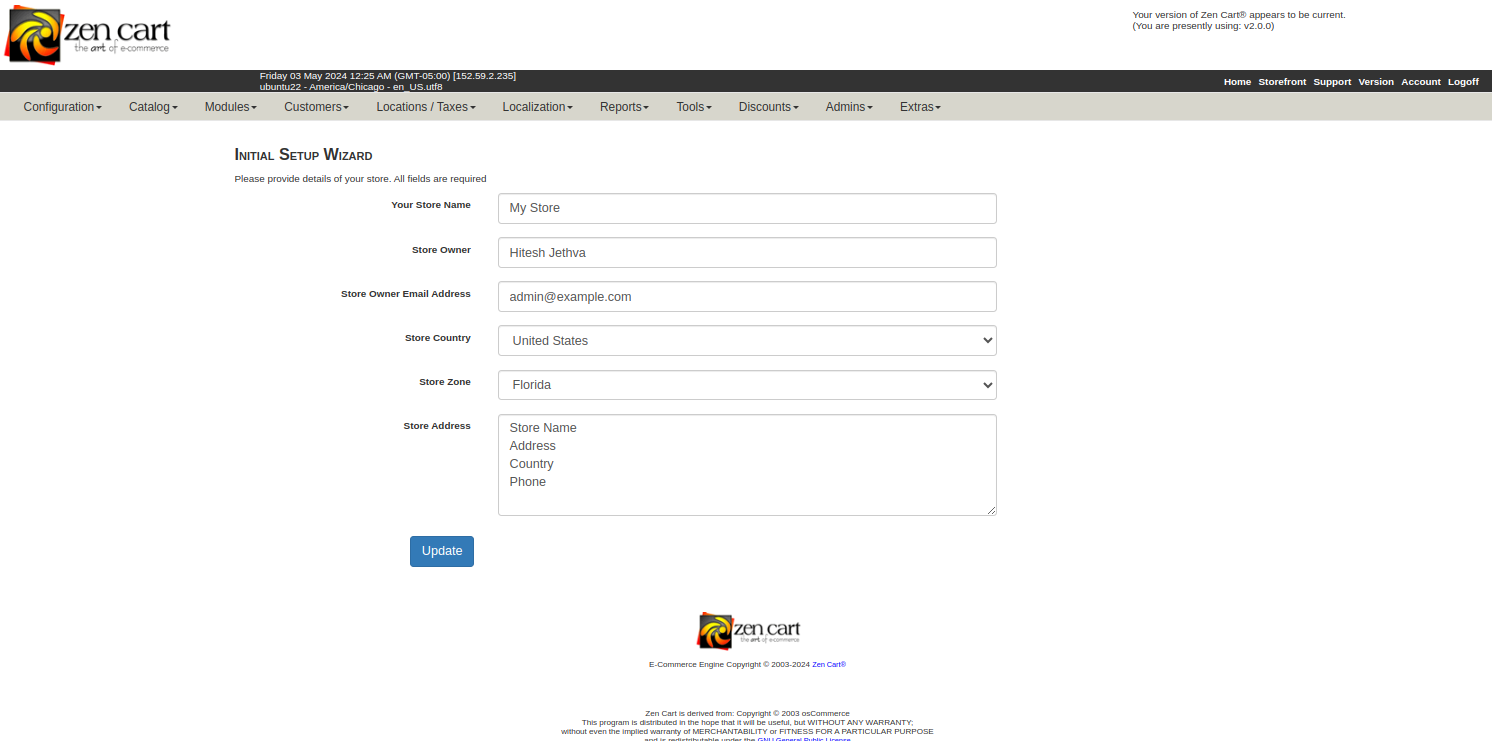
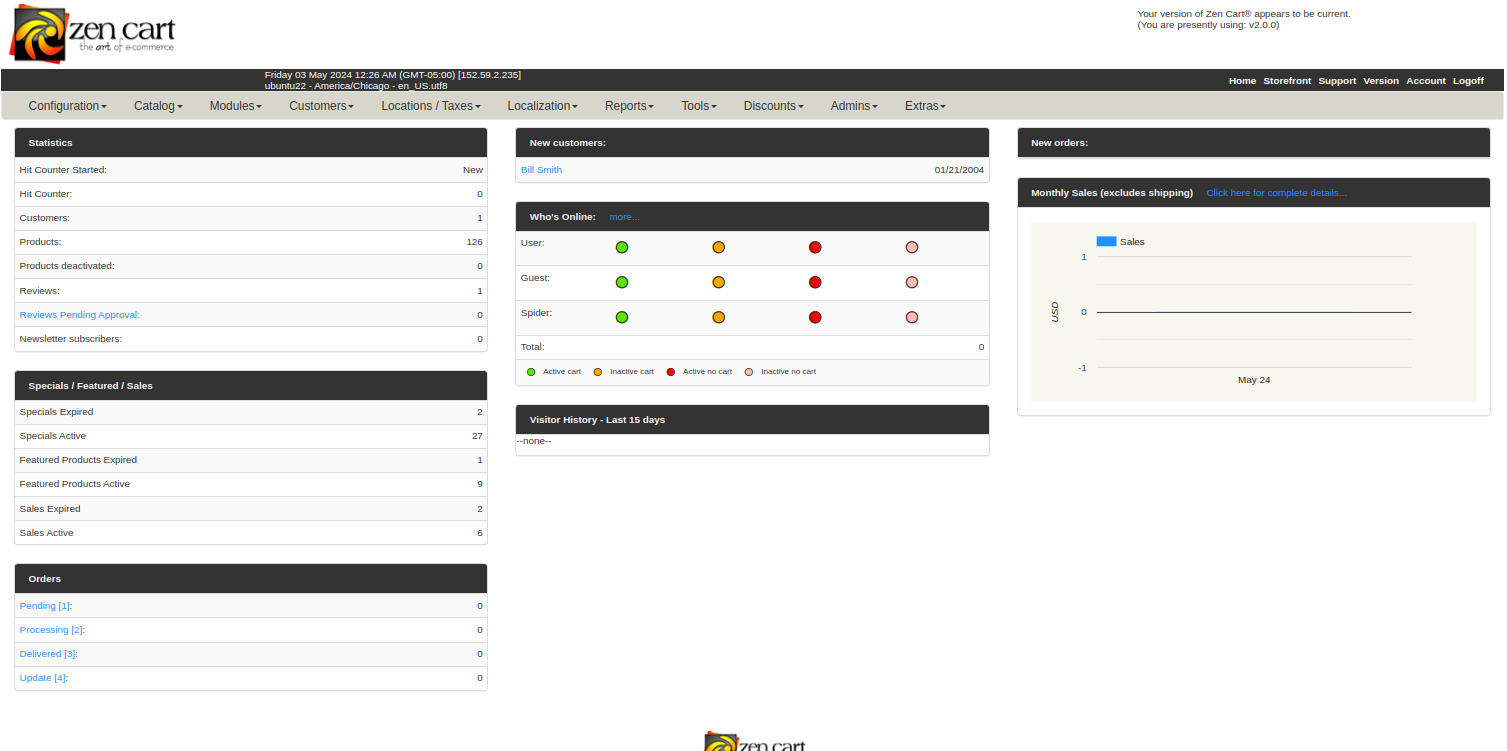
Provide your store information and click on Update. You will see the Zen Cart dashboard.
Conclusion
Zen Cart offers a powerful and flexible solution for e-commerce, and with this guide, you can confidently set it up on your Ubuntu 22.04 server. Whether you are setting up a new store or migrating an existing one, you now have the knowledge to manage your installation effectively. Enjoy the capabilities of Zen Cart and start building your online presence today! You can now host your own online store using Zen Cart on dedicated server hosting from Atlantic.Net!
* This post is for informational purposes only and does not constitute professional, legal, financial, or technical advice. Each situation is unique and may require guidance from a qualified professional.
Readers should conduct their own due diligence before making any decisions.