The Docker pull command is used for downloading Docker images from the Docker Hub or private registry. By default, it will download the images from the Docker Hub. You will need to specify the name of the private registry if you want to pull from it.
The Docker push command is used to upload or share images to the Docker Hub registry. Before pushing an image to the Docker Hub, you will need to create an account on Docker Hub.
Step 1 – Docker Pull Command
In this section, we will show you how to pull a Docker image from the Docker Hub.
The basic syntax to pull a Docker image from the Docker Hub is shown below:
docker pull [OPTIONS] NAME[:TAG|@DIGEST]
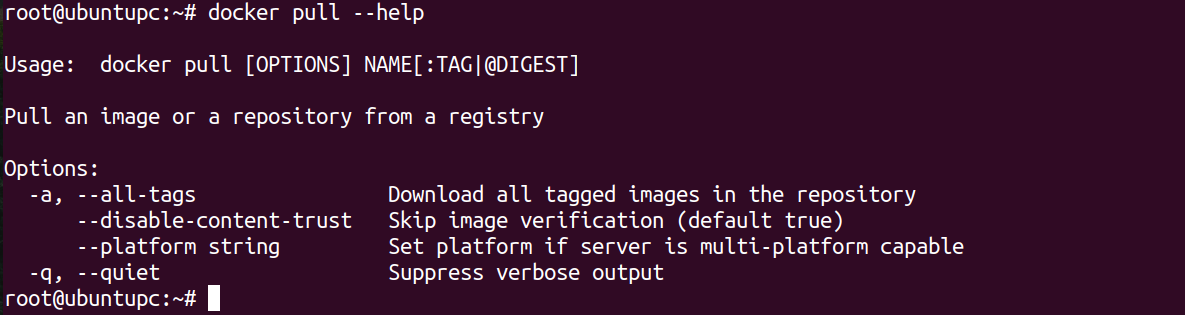
Run the Docker pull command followed by the –help option to see all available options.
docker pull --help
You will see all the options that you can use with the Docker pull command as shown below:
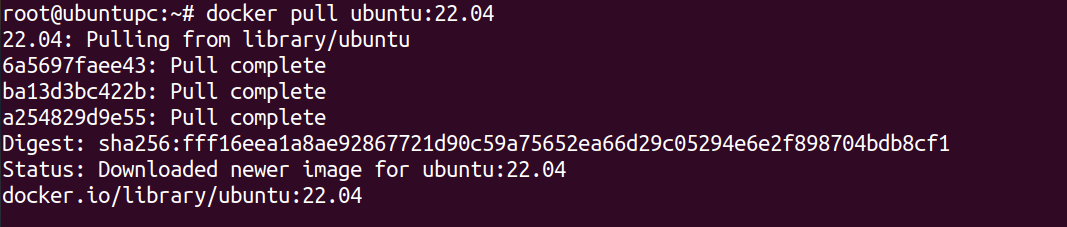
To understand better, let’s download the Ubuntu 22.04 image from the Docker Hub.
docker pull ubuntu:22.04
This will download the Ubuntu 22.04 image from the Docker Hub registry as shown below:
To verify your downloaded image, run the following command.
docker images
You will see your downloaded Ubuntu 22.04 image in the following output:
REPOSITORY          TAG                 IMAGE ID            CREATED             SIZE
ubuntu              22.04               d70eaf7277ea        12 days ago         72.9MB
Step 2 – Update and Commit an Image
At this point, you have the Ubuntu 22.04 image in your system. Now, we will create a container from this image, install the Nginx package, and save this container to a new image named nginx-instance.
First, create a new container from the Ubuntu 22.04 image.
docker run -t -i ubuntu:22.04 /bin/bash
This will create a new container and attach it to the bash shell as shown below:
root@013aecdd6919:/#
Now, update the package index and install the Nginx package inside the container.
root@013aecdd6919:/# apt-get update -y
root@013aecdd6919:/# apt-get install nginx -y
Next, exit from the container with the following command:
root@013aecdd6919:/# exit
Next, locate your new container ID using the following command:
dokcer ps -a
You should get the container ID in the following output:
CONTAINER ID        IMAGE               COMMAND             CREATED             STATUS                       PORTS               NAMES
013aecdd6919        ubuntu:22.04        "/bin/bash"         3 minutes ago       Exited (0) 33 seconds ago                        angry_mayer
Next, use the container ID from the above output and save the updated container with a new image named nginx-instance.
docker commit "013aecdd6919" nginx-instance
Note: Replace the 013aecdd6919 with your container ID.
You can now verify your newly created “nginx-instance” image with the following command:
docker images
You will see your nginx-instance image in the following output.
REPOSITORY          TAG                 IMAGE ID            CREATED             SIZE
nginx-instance      latest              12cefc9b5362        57 seconds ago      158MB
ubuntu              22.04               d70eaf7277ea        12 days ago         72.9MB
Step 3 – Docker Push Command
At this point, you have your own custom Docker image named nginx-instance in your system. We will now use the Docker push command to push the nginx-instance image to the Docker Hub registry.
Note: To push an image to the Docker Hub registry, you will need to create an account on Docker Hub.
First, log in to the Docker Hub using the docker login command:
docker login
You will be asked to provide your Docker Hub username and password as shown below:

Next, tag the nginx-instance image that matches with your Docker Hub username:
docker tag 12cefc9b5362 hitjethva/nginx-instance:ubuntu
A brief explanation of the above command is shown below:
- 12cefc9b5362 is the ID of the nginx-instance image.
- hitjethva is your Docker Hub username.
- nginx-instance is the name of the image that you want to push.
You can now verify your tagged image using the following command:
docker images
You should see the following output:
REPOSITORY                 TAG                 IMAGE ID            CREATED             SIZE
hitjethva/nginx-instance   ubuntu              12cefc9b5362        12 minutes ago      158MB
nginx-instance             latest              12cefc9b5362        12 minutes ago      158MB
ubuntu                     22.04               d70eaf7277ea        12 days ago         72.9MB
Finally, push your hitjethva/nginx-instance image to the Docker Hub using the following command:
docker push hitjethva/nginx-instance
This will push an nginx-instance image to the Docker Hub registry as shown below.

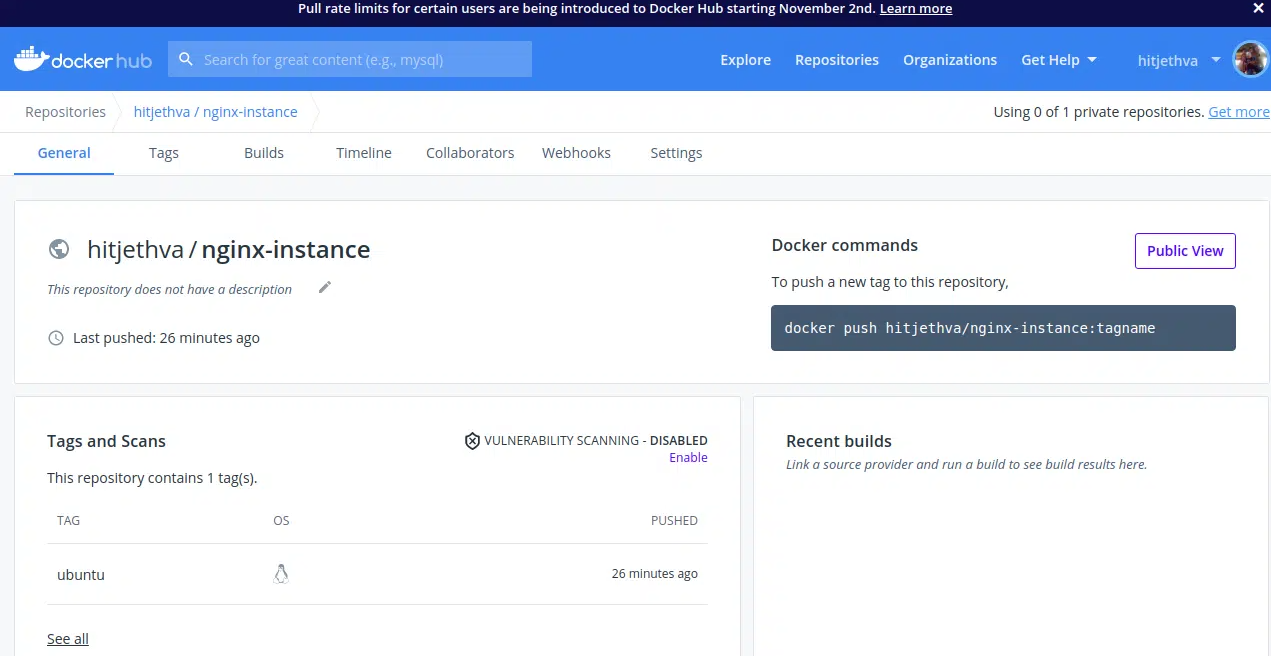
You can now login to the Docker Hub using your web browser and verify your nginx-instance image in Repositories:
Conclusion
In this tutorial, you learned how to use the Docker pull and pull command to download and upload images to the Docker Hub registry. You can now start building your own custom Docker images, store them on the Docker Hub registry, and share them with other developers and users. Docker Hub service makes it easier for users to push their local images to Docker Hub and pull them from Docker Hub per their needs. Try to use Docker on dedicated server hosting from Atlantic.Net!
* This post is for informational purposes only and does not constitute professional, legal, financial, or technical advice. Each situation is unique and may require guidance from a qualified professional.
Readers should conduct their own due diligence before making any decisions.