phpMyAdmin is an open-source and web-based tool for managing databases via a web browser. It allows users to interact with their databases without executing commands manually in a command-line interface. Using phpMyAdmin, you can import and export data in various formats, such as SQL, CSV, and XML. It is the preferred choice for web developers, database administrators, and website owners to simplify database management.
Step 1 – Install Apache and PHP
First, you will need to install Apache and PHP with all required PHP extensions. You can install them with the following command.
apt install apache2 wget unzip php php-zip php-json php-mbstring php-mysql
After the installation, start the Apache service and enable it to start at system reboot.
systemctl start apache2
systemctl enable apache2
Step 2 – Install and Configure MySQL
Next, you will also need to install the MySQL server on your system.
apt install mysql-server
After installing the MySQL server, connect to the MySQL shell using the following command.
mysql
Next, set the password for the root user.
ALTER USER 'root'@'localhost' IDENTIFIED BY 'securepassword';
Then, flush the privileges and exit from the MySQL shell.
FLUSH PRIVILEGES;
EXIT;
Step 3 – Install phpMyAdmin
By default, the phpMyAdmin package is included in the Ubuntu default repository. You can install it using the following command.
apt install phpmyadmin -y
During the installation, you will be asked to set up a phpMyAdmin database using the dbconfig-common configuration package.
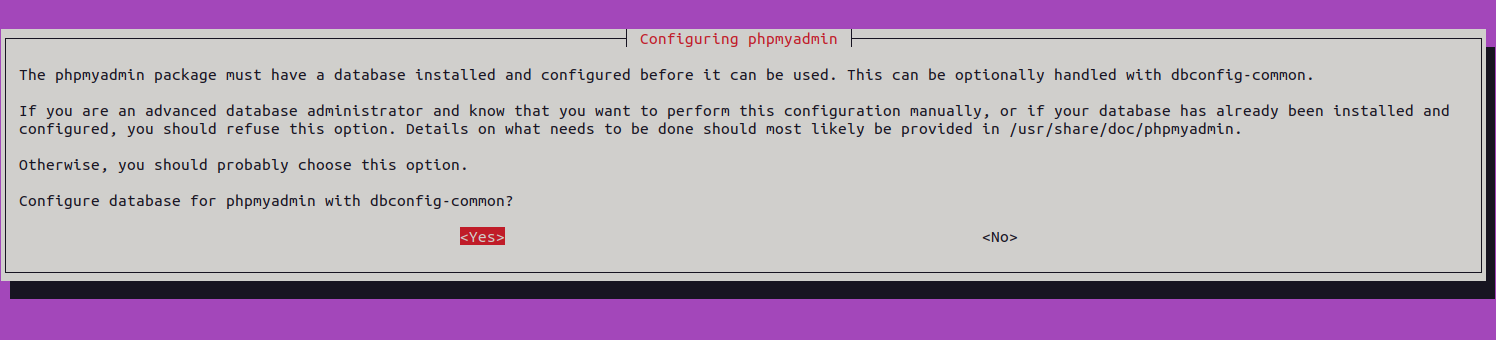
Click on Yes and press the Enter key. You will be asked to set a password for phpmyadmin user.
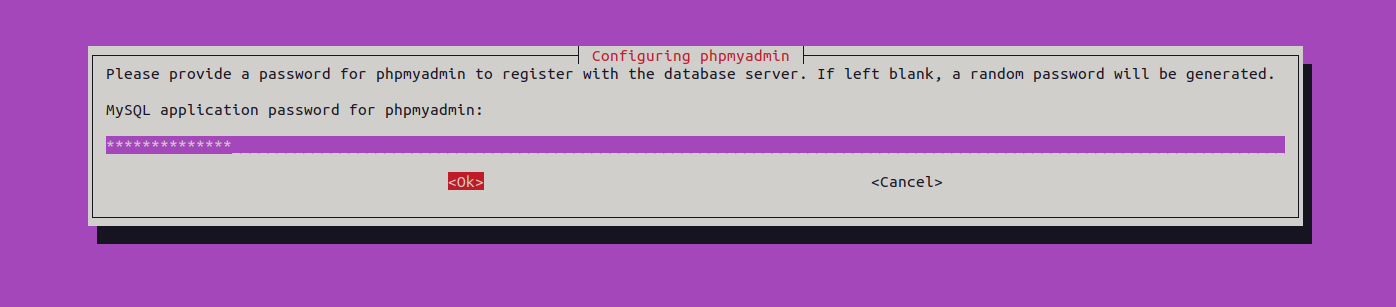
Define your password and press the Enter key to finish the installation.
Step 4 – Secure phpMyAdmin
To secure the phpMyAdmin instance, it is recommended to add the Apache basic authentication in phpMyAdmin.
To do so, edit the phpMyAdmin configuration file.
nano /etc/apache2/conf-available/phpmyadmin.conf
Find the following line:
DirectoryIndex index.php
Add the following line after the above line:
AllowOverride All
Save and close the file, then create a .htaccess file.
nano /usr/share/phpmyadmin/.htaccess
Add the following lines.
AuthType Basic
AuthName "Restricted Access"
AuthUserFile /etc/phpmyadmin/.htpasswd
Require valid-user
Save and close the file, then create a user and set a password.
htpasswd -c /etc/phpmyadmin/.htpasswd user1
Set a password as shown below.
New password:
Re-type new password:
Adding password for user user1
Save and close the file, then reload the Apache service to apply the changes.
systemctl reload apache2
Step 5 – Access phpMyAdmin Web UI
Now, open your web browser and access the phpMyAdmin interface using the URL http://your-server-ip/phpmyadmin. You will be asked for the username and password specified in the .htaccess file.
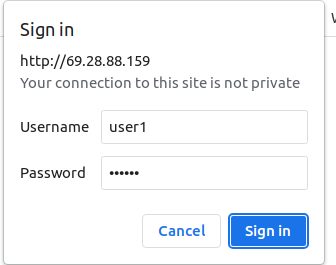
Type your username and password and click on Sign in. You will see the phpMyAdmin login page.
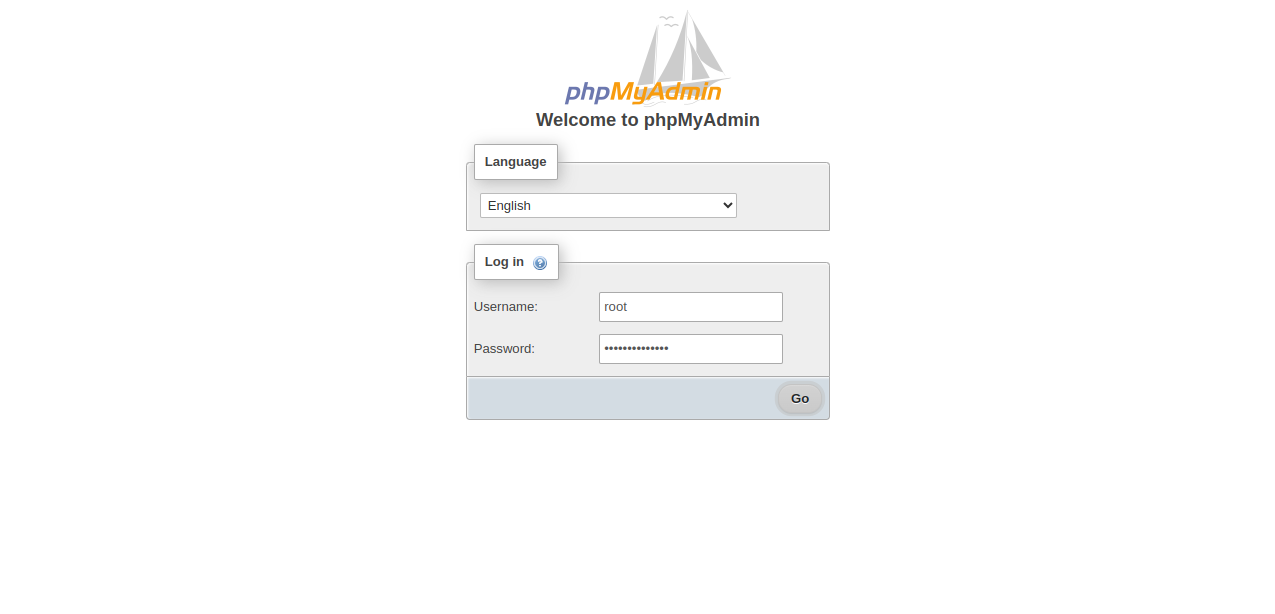
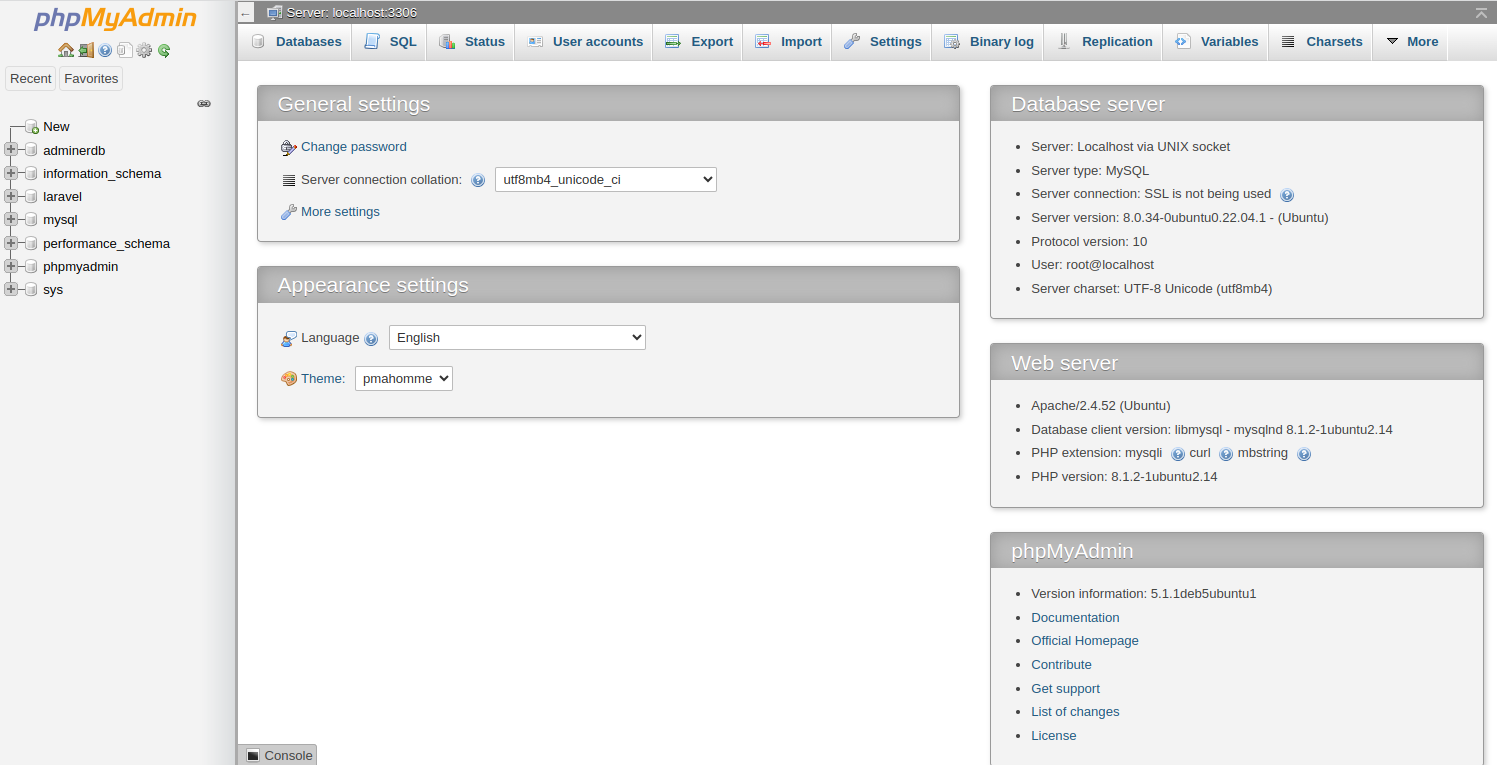
Provide your MySQL root username and password and click on Go. You will see the phpMyAdmin dashboard on the following page.
Conclusion
In this post, we explained how to install phpMyAdmin on Ubuntu 22.04. We also showed you how to secure the phpMyAdmin instance with the Apache authentication method. You can now deploy the phpMyAdmin in the production environment and start managing your databases via a web-based interface. Try to deploy phpMyAdmin on dedicated server hosting from Atlantic.Net!
* This post is for informational purposes only and does not constitute professional, legal, financial, or technical advice. Each situation is unique and may require guidance from a qualified professional.
Readers should conduct their own due diligence before making any decisions.