Streamlit is a popular tool for creating interactive and user-friendly web applications for data science and machine learning projects. It simplifies building dashboards and visualizations with Python. When integrated with powerful libraries like NumPy, Pandas, and PyTorch, Streamlit enables developers to create feature-rich, GPU-accelerated applications.
In this guide, we will build a Streamlit app on a GPU server. The app will use NumPy for numerical computations, Pandas for data manipulation, and PyTorch for deep learning tasks.
Prerequisites
Before starting, ensure you have the following:
- An Ubuntu 22.04 Cloud GPU Server.
- CUDA Toolkit and cuDNN Installed.
- A root or sudo privileges.
Step 1: Install Required Packages
The first step is to update the server’s package index and install the necessary libraries for your application.
1. Update the package index.
apt update -y2. Install PyTorch and its related libraries using the following command:
pip install torch torchvision torchaudio --index-url https://download.pytorch.org/whl/cu1243. Install Streamlit, along with NumPy, Pandas, and Matplotlib, for building and visualizing your app:
pip install streamlit numpy pandas matplotlibStep 2: Set Up the Project
1. Create a directory for the project.
mkdir streamlit_gpu_app2. Navigate it to your project directory.
cd streamlit_gpu_app3. Create a Python script that defines your Streamlit application:
nano gpu_calculator.pyAdd the following code:
import streamlit as st
import numpy as np
import pandas as pd
import torch
# Title
st.title("Streamlit App with GPU Computations")
# Sidebar for user input
st.sidebar.header("Choose an Operation")
operation = st.sidebar.selectbox("Select a computation:", [
"Matrix Multiplication (NumPy)",
"DataFrame Operations (Pandas)",
"Tensor Computations (PyTorch)",
"Train and Test a Deep Learning Model"
])
# Main app functionality
if operation == "Matrix Multiplication (NumPy)":
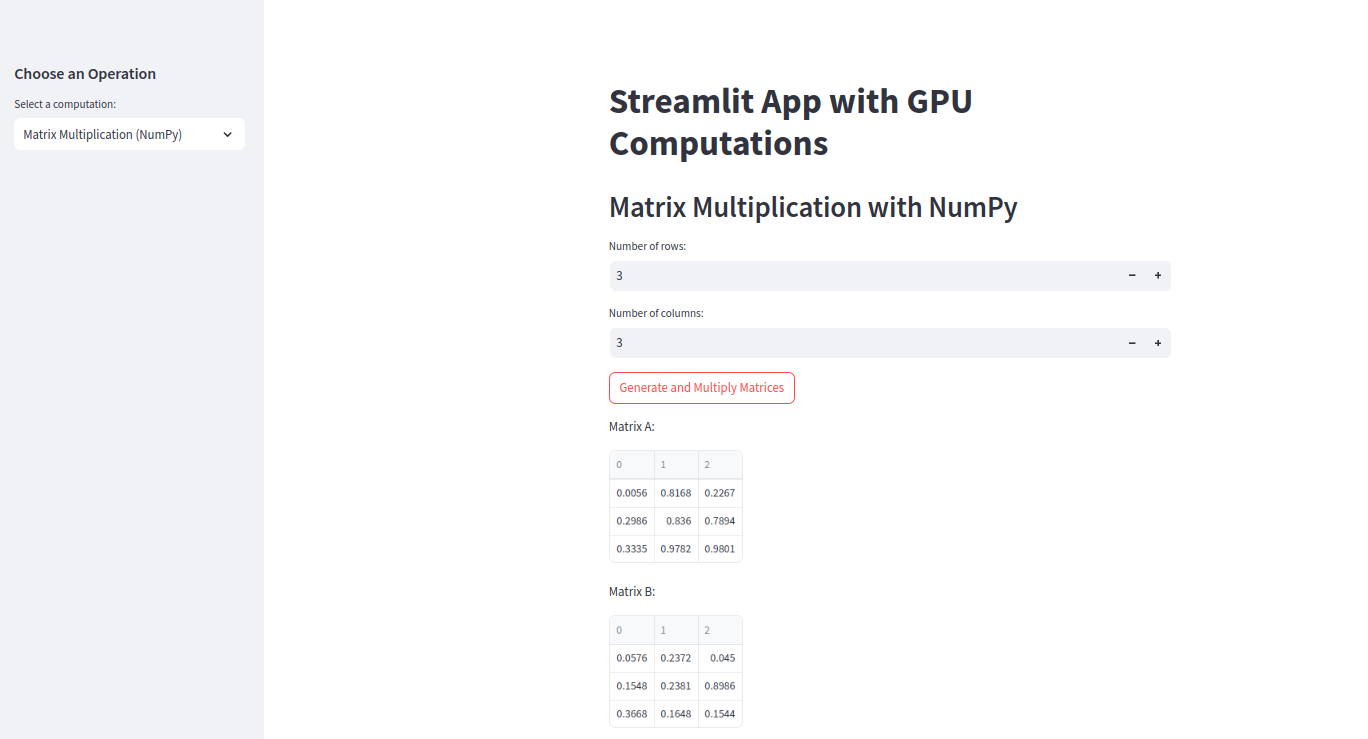
st.header("Matrix Multiplication with NumPy")
# User inputs for matrix dimensions
rows = st.number_input("Number of rows:", min_value=1, max_value=1000, value=3)
cols = st.number_input("Number of columns:", min_value=1, max_value=1000, value=3)
if st.button("Generate and Multiply Matrices"):
# Generate random matrices
matrix_a = np.random.rand(rows, cols)
matrix_b = np.random.rand(cols, rows)
# Perform matrix multiplication
result = np.dot(matrix_a, matrix_b)
st.write("Matrix A:")
st.write(matrix_a)
st.write("Matrix B:")
st.write(matrix_b)
st.write("Resultant Matrix:")
st.write(result)
elif operation == "DataFrame Operations (Pandas)":
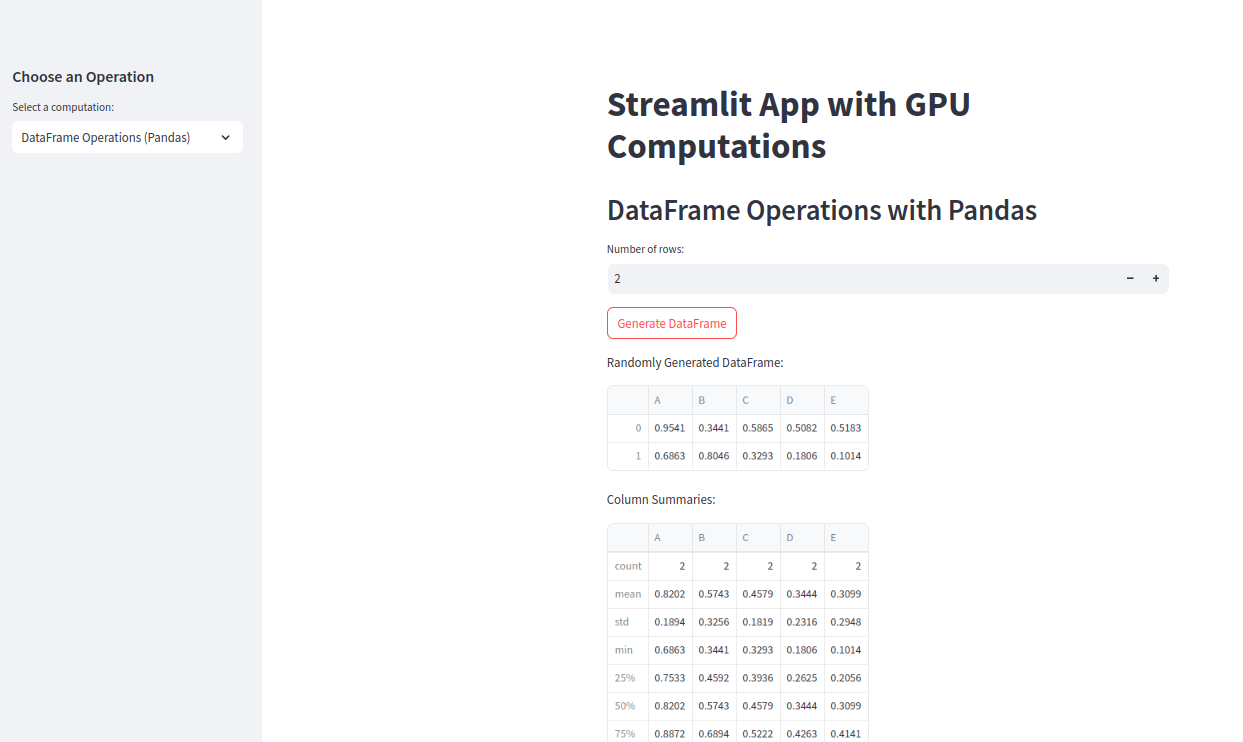
st.header("DataFrame Operations with Pandas")
# Generate a random DataFrame
rows = st.number_input("Number of rows:", min_value=1, max_value=1000, value=10)
if st.button("Generate DataFrame"):
df = pd.DataFrame(
np.random.rand(rows, 5),
columns=["A", "B", "C", "D", "E"]
)
st.write("Randomly Generated DataFrame:")
st.write(df)
st.write("Column Summaries:")
st.write(df.describe())
elif operation == "Tensor Computations (PyTorch)":
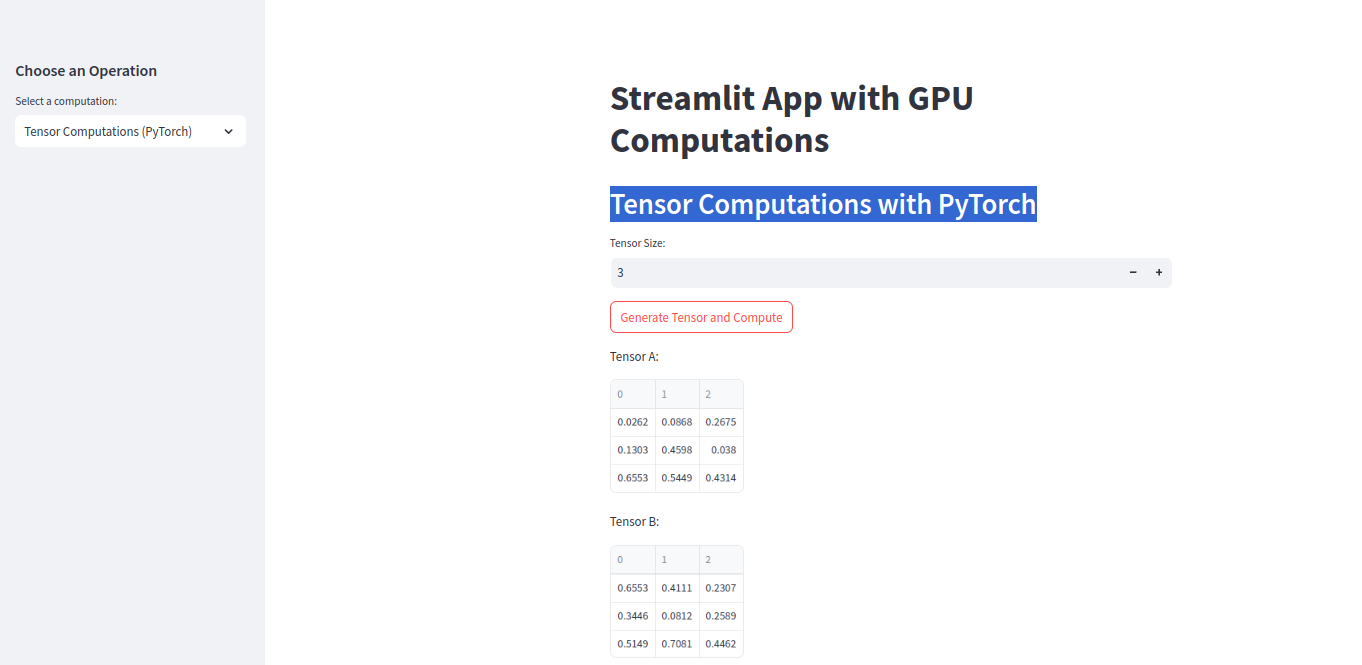
st.header("Tensor Computations with PyTorch")
# Tensor size input
tensor_size = st.number_input("Tensor Size:", min_value=1, max_value=10000, value=3)
if st.button("Generate Tensor and Compute"):
# Generate random tensor on GPU
tensor_a = torch.rand(tensor_size, tensor_size, device="cuda")
tensor_b = torch.rand(tensor_size, tensor_size, device="cuda")
# Perform matrix multiplication on GPU
result = torch.matmul(tensor_a, tensor_b)
st.write("Tensor A:")
st.write(tensor_a.cpu().numpy())
st.write("Tensor B:")
st.write(tensor_b.cpu().numpy())
st.write("Resultant Tensor:")
st.write(result.cpu().numpy())
elif operation == "Train and Test a Deep Learning Model":
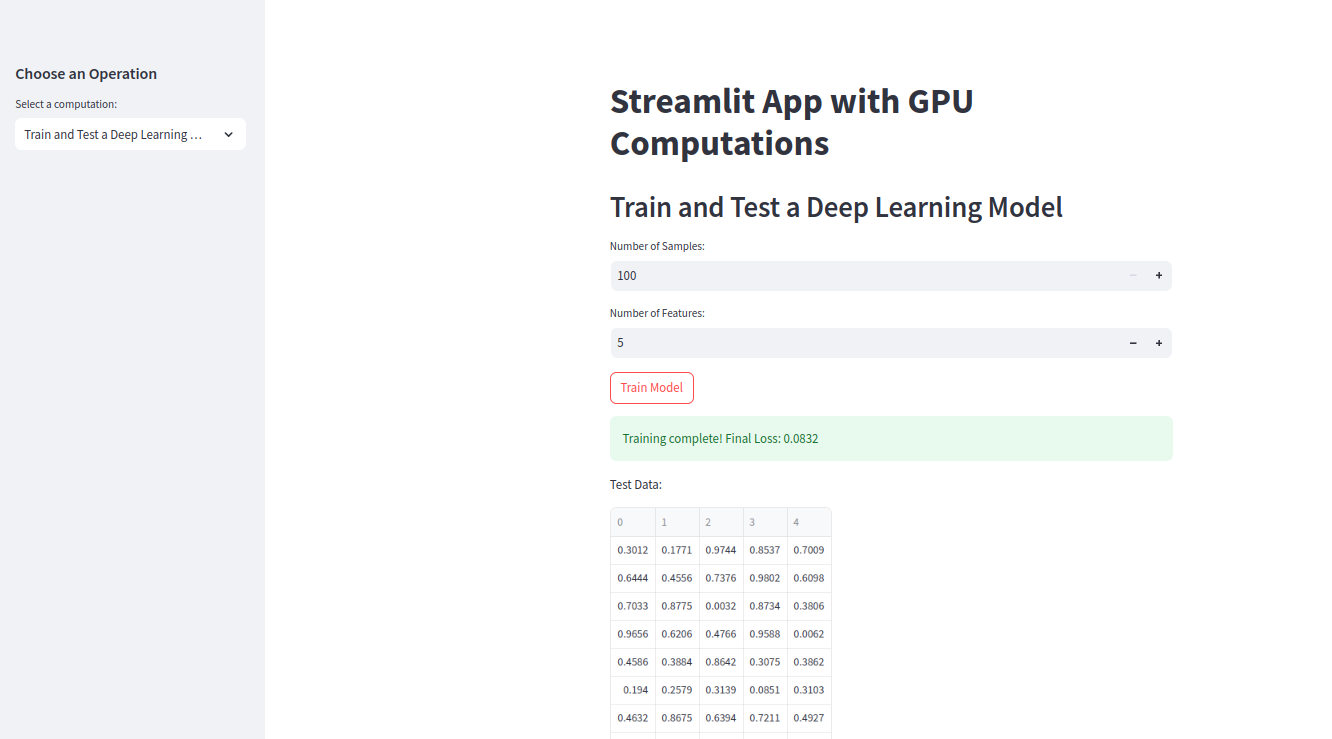
st.header("Train and Test a Deep Learning Model")
# User input for dataset size
num_samples = st.number_input("Number of Samples:", min_value=100, max_value=10000, value=1000)
num_features = st.number_input("Number of Features:", min_value=1, max_value=100, value=10)
if st.button("Train Model"):
# Generate random data
X = torch.rand(num_samples, num_features, device="cuda")
y = torch.sum(X, dim=1) + torch.randn(num_samples, device="cuda") * 0.1 # Add noise
# Define a simple model
model = torch.nn.Sequential(
torch.nn.Linear(num_features, 50),
torch.nn.ReLU(),
torch.nn.Linear(50, 1)
).to("cuda")
# Loss and optimizer
criterion = torch.nn.MSELoss()
optimizer = torch.optim.Adam(model.parameters(), lr=0.01)
# Train the model
epochs = 50
for epoch in range(epochs):
optimizer.zero_grad()
predictions = model(X)
loss = criterion(predictions.squeeze(), y)
loss.backward()
optimizer.step()
st.success(f"Training complete! Final Loss: {loss.item():.4f}")
# Test the model
test_data = torch.rand(10, num_features, device="cuda")
test_predictions = model(test_data)
st.write("Test Data:")
st.write(test_data.cpu().numpy())
st.write("Predictions:")
st.write(test_predictions.cpu().detach().numpy())Here is the explanation:
- The code creates a Streamlit web app with a sidebar for choosing different operations.
- Based on the selection, it can do matrix multiplication with NumPy, DataFrame tasks with Pandas, or tensor computations on GPU with PyTorch.
- It also trains and tests a simple deep learning model using PyTorch.
- User inputs for data size and model parameters are taken from the Streamlit interface.
- Results, such as matrices, data summaries, or model predictions, are displayed directly in the browser.
Step 3: Run the Streamlit App
You can now run the app using the server’s IP address. Replace with your server’s IP address.
streamlit run gpu_calculator.py --server.address your-server-ip --server.port 8501You will see the below output.
You can now view your Streamlit app in your browser.
URL: http://your-server-ip:8501
Note: Replace the your-server-ip with the actual IP address of the GPU server.
Step 4: Accessing the App in a Web Browser
Open your web browser and access your app using the URL http://your-server-ip:8501. The app loads with a sidebar containing operation options. Users can navigate to desired features like NumPy, Pandas, or PyTorch computations.
1. Matrix Multiplication with NumP
Input dimensions in the sidebar and click “Generate and Multiply Matrices.” The result displays Matrix A, Matrix B, and the resultant matrix.
2. DataFrame Operations with Pandas
Input the number of rows in the sidebar and click “Generate DataFrame.” A DataFrame is displayed along with column summaries.
3. Tensor Computations with PyTorch
Input tensor size in the sidebar and click “Generate Tensor and Compute.” Tensors and results are shown with GPU acceleration.
4. Train and Test a Deep Learning Model
Input dataset parameters in the sidebar and click “Train Model.” The model trains for 50 epochs, and test predictions are displayed.
Conclusion
This guide has walked you through the entire process—from setting up your environment and writing modular code to deploying and interacting with the app in a web browser. Each functionality, from NumPy matrix operations to training a deep learning model with PyTorch, demonstrates the flexibility and efficiency of this setup. Try it today on GPU hosting from Atlantic.Net!
* This post is for informational purposes only and does not constitute professional, legal, financial, or technical advice. Each situation is unique and may require guidance from a qualified professional.
Readers should conduct their own due diligence before making any decisions.