ComfyUI is a versatile and user-friendly web interface designed for running AI models. It is widely used for tasks like image generation and other AI-driven workflows. By deploying it on a GPU-powered Atlantic.Net server, you can take advantage of high-performance hardware for faster and more efficient processing.
Running ComfyUI on a dedicated server is ideal for users who need reliable performance without the limitations of local machines. It ensures that your infrastructure can handle computationally intensive tasks seamlessly. Atlantic.Net servers provide scalable GPU resources, making them perfect for AI applications.
This guide will walk you through the process of deploying ComfyUI on an Atlantic.Net GPU server.
Prerequisites
Ensure you have the following before starting:
- An Ubuntu 22.04 server with an NVIDIA GPU (minimum 6 GB GPU RAM).
- NVIDIA Drivers and CUDA Toolkit installed.
Step 1: Update and Install Python Dependencies
1. Update the package index and upgrade existing packages:
apt update
apt upgrade -y
2. If Python3 and pip3 are not already installed, install them.
apt install python3 python3-pip -yStep 2: Install ComfyUI
In this section, we will download ComfyUI and install the required dependencies for it.
1. Download the ComfyUI source code using Git.
git clone https://github.com/comfyanonymous/ComfyUI.git2. Navigate to the ComfyUI directory.
cd ComfyUI3. Install required dependency packages.
pip install "numpy<2" torch==2.1.0+cu121 torchvision==0.16.0+cu121 torchaudio==2.1.0+cu121 --extra-index-url https://download.pytorch.org/whl xformersThe above command installs the following packages:
- torch: A library for machine learning. It provides tools for deep learning with a flexible computational graph.
- torchvision: A library for computer vision. It includes utilities for image and video datasets, such as image classification and object detection.
- torchaudio: A library for audio processing. It offers tools for loading, transforming, and working with audio datasets.
- xformers: A library for transformer-based
4. Install additional dependencies.
pip install -r requirements.txt5. Navigate to the models/checkpoints directory.
cd models/checkpoints6. Create a put_checkpoints_here file.
nano put_checkpoints_hereAdd the following lines to download Stable Diffusion models.
## SDXL

wget -c https://huggingface.co/stabilityai/stable-diffusion-xl-base-1.0/resolve/main/sd_xl_base_1.0.safetensors -P ./models/checkpoints/
wget -c https://huggingface.co/stabilityai/stable-diffusion-xl-refiner-1.0/resolve/main/sd_xl_refiner_1.0.safetensors -P ./models/checkpoints/

## SD1.5

wget -c https://huggingface.co/runwayml/stable-diffusion-v1-5/resolve/main/v1-5-pruned-emaonly.ckpt -P ./models/checkpoints/

## SD2

wget -c https://huggingface.co/stabilityai/stable-diffusion-2-1-base/resolve/main/v2-1_512-ema-pruned.safetensors -P ./models/checkpoints/
wget -c https://huggingface.co/stabilityai/stable-diffusion-2-1/resolve/main/v2-1_768-ema-pruned.safetensors -P ./models/checkpoints/
Save the file.
7. Run the above file.
bash put_checkpoints_here8. Switch to your user home directory.
cd9. Move the ComfyUI project directory to a /opt directory.
mv ComfyUI /opt/Step 3: Configure ComfyUI as a System Service
Now, you will need to create a system unit file to manage the ComfyUI service.
1. Create a new service file.
nano /etc/systemd/system/comfyui.serviceAdd the following configurations to the file.
[Unit]
Description=ComfyUI System Service
After=network.target

[Service]
WorkingDirectory=/opt/ComfyUI
ExecStart=python3 main.py  --disable-cuda-malloc

[Install]
WantedBy=multi-user.target
2. Reload the systemd daemon to apply the changes.
systemctl daemon-reload3. Start and enable the ComfyUI system service.
systemctl enable comfyui
systemctl start comfyui
4. Check the service status.
systemctl status comfyuiOutput.
● comfyui.service - ComfyUI System Service
     Loaded: loaded (/etc/systemd/system/comfyui.service; enabled; vendor preset: enabled)
     Active: active (running) since Sat 2024-12-07 05:04:57 UTC; 5s ago
   Main PID: 8372 (python3)
      Tasks: 3 (limit: 14212)
     Memory: 849.9M
        CPU: 5.025s
     CGroup: /system.slice/comfyui.service
             └─8372 python3 main.py

Dec 07 05:05:00 gpu-server python3[8372]:     Python  3.10.13 (you have 3.10.12)
Dec 07 05:05:00 gpu-server python3[8372]:   Please reinstall xformers (see https://github.com/facebookresearch/xformers#installing-xformers)
Dec 07 05:05:00 gpu-server python3[8372]:   Memory-efficient attention, SwiGLU, sparse and more won't be available.
Dec 07 05:05:00 gpu-server python3[8372]:   Set XFORMERS_MORE_DETAILS=1 for more details
Dec 07 05:05:01 gpu-server python3[8372]: xformers version: 0.0.22.post7+cu118
Dec 07 05:05:01 gpu-server python3[8372]: Set vram state to: NORMAL_VRAM
Dec 07 05:05:01 gpu-server python3[8372]: Device: cuda:0 GRID A100D-8C : cudaMallocAsync
Dec 07 05:05:02 gpu-server python3[8372]: Using pytorch cross attention
Dec 07 05:05:03 gpu-server python3[8372]: [Prompt Server] web root: /opt/ComfyUI/web
Dec 07 05:05:03 gpu-server python3[8372]: Successfully imported spandrel_extra_arches: support for non commercial upscale models.
Step 4: Configure Nginx as a Reverse Proxy
By default, ComfyUI listens on the localhost port 8188. You will need to set up a reverse proxy such as Nginx to forward all incoming connection requests to the backend port 8188 to enable access to the ComfyUI interface.
1. Install Nginx.
apt install nginx -y2. Create a new Nginx virtual host configuration file.
nano /etc/nginx/conf.d/comfyui.confAdd the following configuration.
upstream backend {
    server 127.0.0.1:8188;
}

server {

    listen 80;
    listen [::]:80;

    server_name comfy.example.com;

    proxy_set_header Host $host;
    proxy_http_version 1.1;
    proxy_set_header X-Real-IP $remote_addr;
    proxy_set_header X-Forwarded-For $proxy_add_x_forwarded_for;
    proxy_set_header X-Forwarded-Proto $scheme;
    proxy_set_header Sec-WebSocket-Extensions $http_sec_websocket_extensions;
    proxy_set_header Sec-WebSocket-Key $http_sec_websocket_key;
    proxy_set_header Sec-WebSocket-Version $http_sec_websocket_version;
    proxy_set_header Upgrade $http_upgrade;
    proxy_set_header Connection "Upgrade";

    location / {
        proxy_pass http://backend$request_uri;
    }
}
3. Test the Nginx configuration for errors.
nginx -tOutput.
nginx: the configuration file /etc/nginx/nginx.conf syntax is ok
nginx: configuration file /etc/nginx/nginx.conf test is successful
4. Restart Nginx to apply the configuration changes.
systemctl restart nginxStep 5: Access ComfyUI and Generate Images
At this point, ComfyUI is installed and running on your server. You can now generate images using the ComfyUI web interface.
1. Visit the URL http://comfy.example.com using a web browser to access the ComfyUI interface.
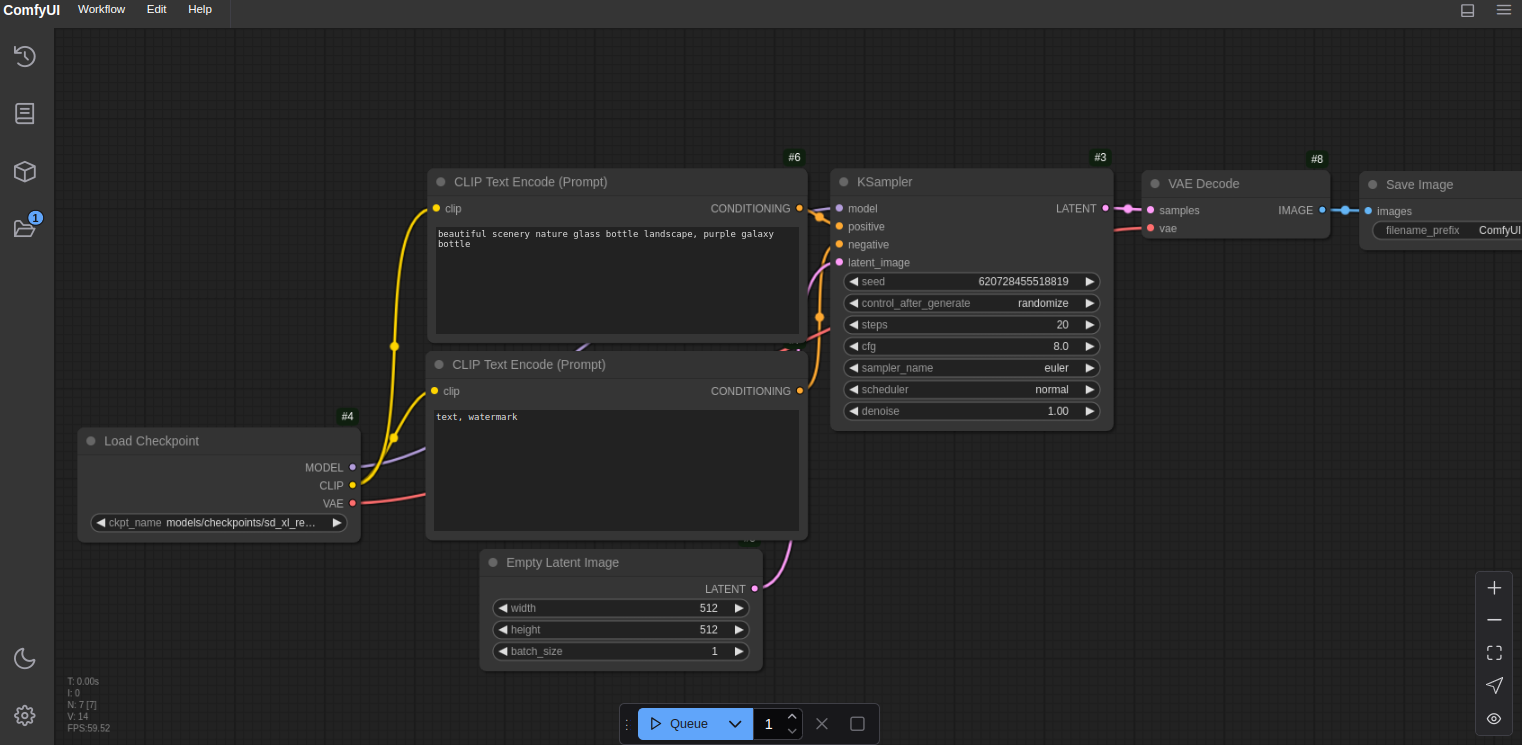
2. Navigate to the Prompt node, and enter the prompt “beautiful scenery nature glass bottle landscape, purple galaxy bottle“. Also, enter a prompt in the respective node such as “text,watermark”. Then, click on Queue to generate a new image.
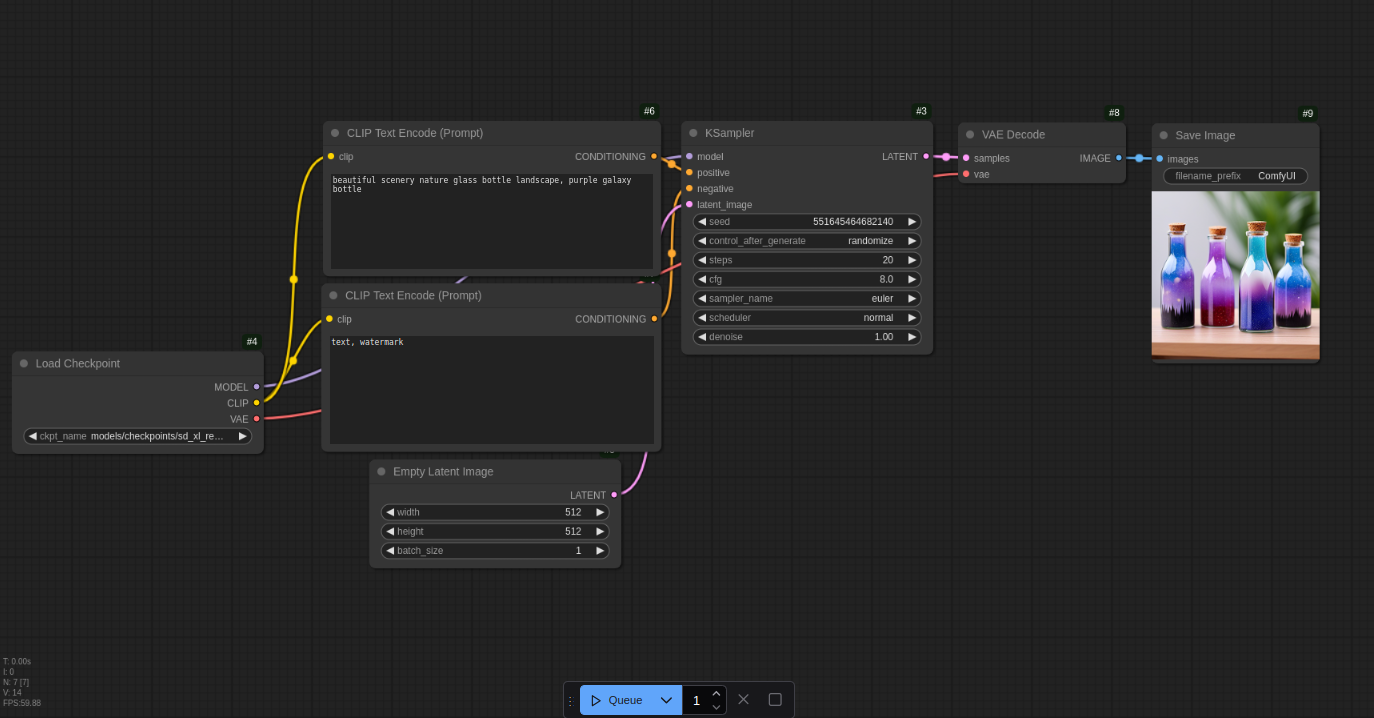
3. Wait for the image generation process to complete. Your generated image should appear in the Save Image node.
Conclusion
You’ve successfully deployed ComfyUI on your Atlantic.Net GPU server. With the power of ComfyUI and stable diffusion models, you can now generate high-quality images directly from your web interface.
* This post is for informational purposes only and does not constitute professional, legal, financial, or technical advice. Each situation is unique and may require guidance from a qualified professional.
Readers should conduct their own due diligence before making any decisions.