OobaBooga’s Text Generation Web UI is an open-source project that simplifies deploying and interacting with large language models like GPT-J-6B. It provides a user-friendly web interface to generate text, fine-tune parameters, and experiment with different models without extensive technical expertise. Whether you are a developer, researcher, or AI enthusiast, this tool makes using LLMs on your own hardware easy.
In this guide, we will go through the steps to deploy OobaBooga and run a model on an Ubuntu GPU server.
Prerequisites
Before starting, ensure you have the following:
- An Ubuntu 24.04 Cloud GPU Server with 8 GB GPU memory.
- CUDA Toolkit 12.x and cuDNN 8.x installed
- Git Installed:
sudo apt install git - Root or sudo privilege
Step 1: Set Up the Environment
First, update your system and install the necessary dependencies:
apt update
apt install python3 python3-pip python3-venv
Next, create a Python virtual environment to isolate your project dependencies:
python3 -m venv opentext-env
source opentext-env/bin/activate
Step 2: Install PyTorch with CUDA Support
OobaBooga relies on PyTorch for model inference.
- Note: This installation may take several minutes depending on your internet connection.
- Verify CUDA is working: Run
python3 -c "import torch; print(torch.cuda.is_available())". If it printsTrue, CUDA is correctly configured.
Install PyTorch with CUDA 11.8 support to enable GPU acceleration:
pip3 install torch torchvision torchaudio --index-url https://download.pytorch.org/whl/cu118Step 3: Clone the OobaBooga Repository
Clone the OobaBooga Text Generation Web UI repository from GitHub:
git clone https://github.com/oobabooga/text-generation-webui.git
cd text-generation-webui
Install the required Python packages:
pip3 install -r requirements.txtStep 4: Download the GPT-J-6B Model
Navigate to the models directory.
cd modelsCreate a folder for the GPT-J-6B model and navigate to it.
mkdir gpt-j-6B
cd gpt-j-6B
Download the necessary model files from Hugging Face:
wget https://huggingface.co/EleutherAI/gpt-j-6B/resolve/main/pytorch_model.bin
wget https://huggingface.co/EleutherAI/gpt-j-6B/resolve/main/config.json
wget https://huggingface.co/EleutherAI/gpt-j-6B/resolve/main/vocab.json
wget https://huggingface.co/EleutherAI/gpt-j-6B/resolve/main/merges.txt
Important: These files are large, so the download may take a significant amount of time. If you encounter slow download speeds or connection issues, Hugging Face’s rate limiting may be in effect.
Return to the project root directory:
cd ../..Step 5: Configure the Web UI
Copy the settings-template.yaml file to settings.yaml to create a configuration file:
cp settings-template.yaml settings.yamlYou can modify settings.yaml to customize the behavior of the web UI, but the default settings should work fine for most use cases.
Step 6: Run the Web UI
Start the OobaBooga Text Generation Web UI with the following command:
python3 server.py --listen --model models/gpt-j-6B --load-in-8bitThis command does the following:
- –listen: Allows the server to be accessed from other devices on the network.
- –model models/gpt-j-6B: Specifies the path to the GPT-J-6B model.
- –load-in-8bit: Reduces memory usage by loading the model in 8-bit precision.
Once the server starts, you’ll see output similar to this:
15:34:00-890889 INFO     Loaded "gpt-j-6B" in 38.20 seconds.
15:34:00-892683 INFO     LOADER: "Transformers"
15:34:00-893366 INFO     TRUNCATION LENGTH: 2048
15:34:00-893964 INFO     INSTRUCTION TEMPLATE: "Alpaca"

Running on local URL:  http://0.0.0.0:7860
Note: The output Running on local URL: http://0.0.0.0:7860 indicates the server is running on the Ubuntu server itself. To access it from another device, you’ll use http://your_server_public_ip:7860. Also, ensure that port 7860 is open in your server’s firewall. The model will take a longer time to load the first time.
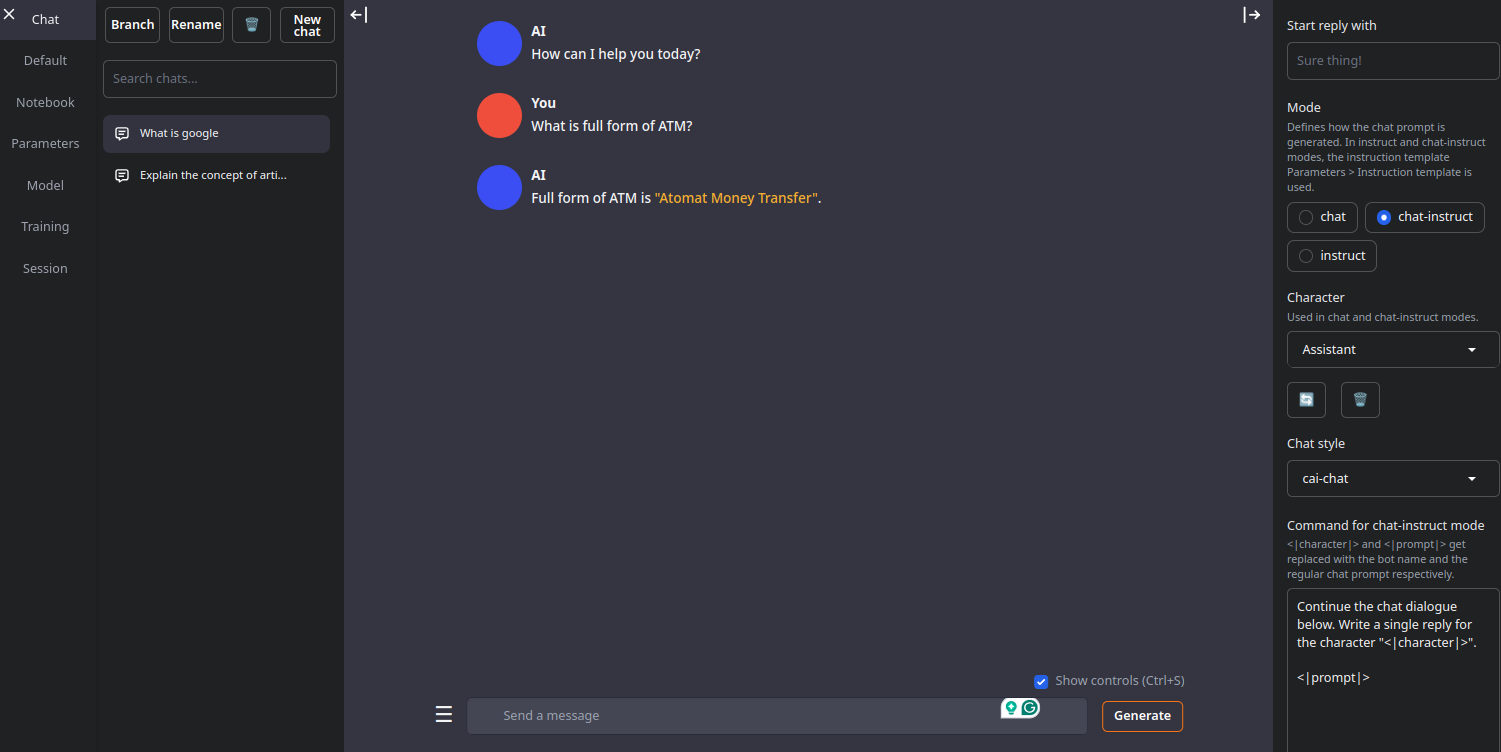
Step 7: Access the Web UI
Open your web browser and navigate to http://your_server_public_ip:7860. Replace your_server_public_ip with the actual public IP address of your Ubuntu server.
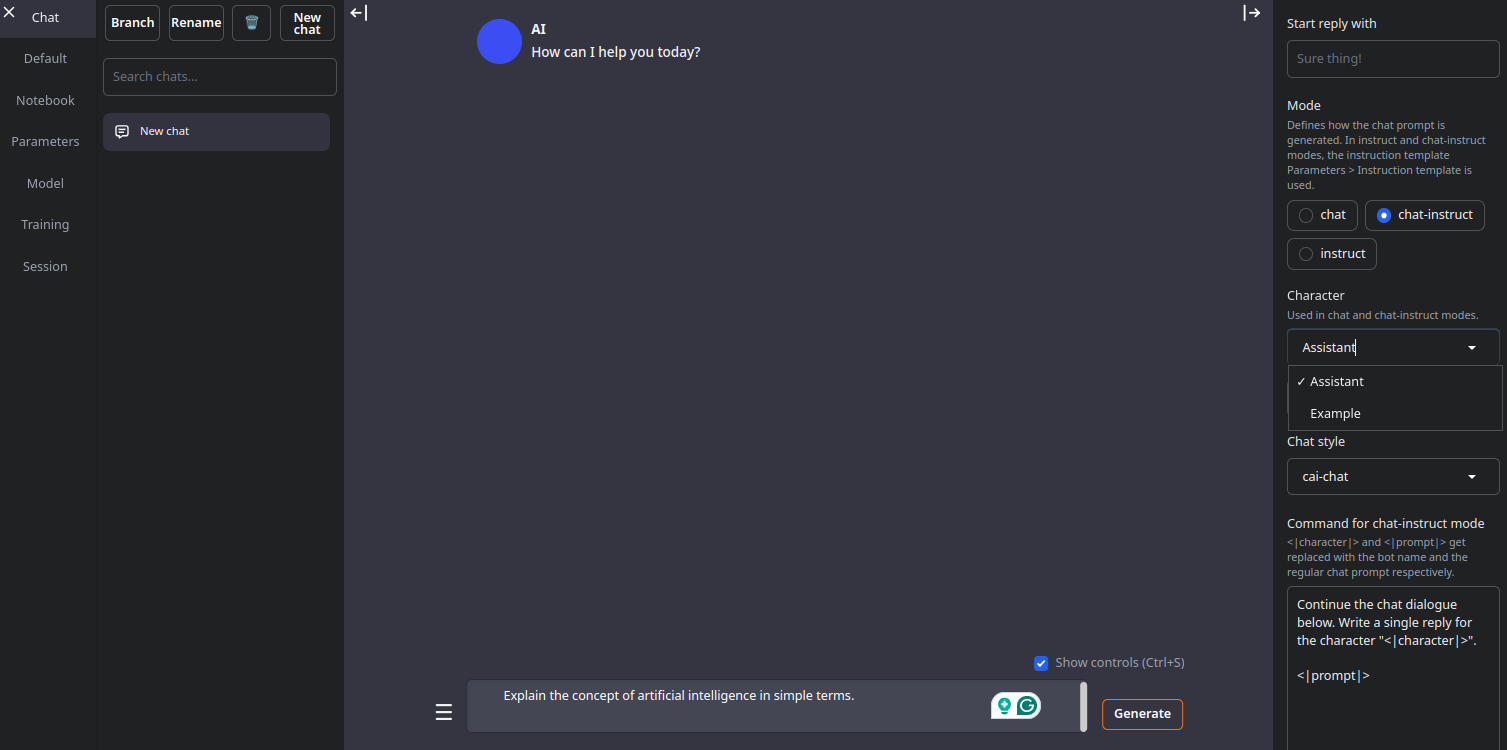
Enter the prompt “What is the full form of ATM” in the text box, and click “Generate” to see the model’s output.
Conclusion
Deploying OobaBooga’s Text Generation Web UI on an Ubuntu GPU server is straightforward and unlocks the power of large language models like GPT-J-6B. Follow this guide to set up a text generation environment and start experimenting with AI-driven content creation.
* This post is for informational purposes only and does not constitute professional, legal, financial, or technical advice. Each situation is unique and may require guidance from a qualified professional.
Readers should conduct their own due diligence before making any decisions.