Table of Contents
- Prerequisites
- Step 1: Install Python and Additional Dependencies
- Step 2: Install WebUI and ModelScope
- Step 3: Configure Nginx as a Reverse Proxy to Access WebUI
- Step 4: Configure Stable Diffusion WebUI
- Step 5: Run the Stable Diffusion WebUI
- Step 6: Access WebUI and Generate Videos using ModelScope
- Conclusion
In the rapidly evolving world of AI and machine learning, generating videos from textual descriptions is no longer confined to the realms of science fiction. Thanks to advancements in generative models, it is now possible to create detailed, dynamic videos based solely on a few lines of text. One of the most exciting developments in this area comes from HuggingFace’s ModelScope, featuring the Text2Video Diffusion Model. This model leverages the power of diffusion techniques to transform written narratives into captivating visual stories.
In this guide, we’ll show you how to use the Text2Video Diffusion Model to generate videos from text.
Prerequisites
Before proceeding, ensure you have the following:
- An Atlantic.Net Cloud GPU server running Ubuntu 24.04, equipped with an NVIDIA A100 GPU with at least 20 GB of GPU RAM.
- CUDA Toolkit and cuDNN Installed.
- Root or sudo privileges.
Step 1: Install Python and Additional Dependencies
The default Python version in Ubuntu 24.04 (Python 3.12) is incompatible with HuggingFace requirements. You’ll need to install Python 3.10:
Add the Python repository.
add-apt-repository ppa:deadsnakes/ppaUpdate the package index.
apt update -yInstall Python 3.10 and essential libraries.
apt install python3.10 python3.10-venv python3.10-dev
apt install build-essential libssl-dev libffi-dev zlib1g-dev libbz2-dev libreadline-dev libsqlite3-dev wget curl llvm libncurses5-dev libncursesw5-dev xz-utils tk-dev libxml2-dev libxmlsec1-dev liblzma-dev
Step 2: Install WebUI and ModelScope
Install Git LFS for managing large files.
apt install git-lfs -yInitialize Git LFS to use the WebUI and ModelScope repositories.
git lfs installClone the WebUI repository.
git clone https://github.com/AUTOMATIC1111/stable-diffusion-webui.gitNavigate to the new WebUI directory.
cd stable-diffusion-webuiSet the WebUI version to 1.7.0, which is compatible with ModelScope.
git reset --hard cf2772fCreate a directory structure to set up ModelScope files.
mkdir -p models/ModelScope/t2vSwitch to the t2v directory.
cd models/ModelScope/t2vDownload the latest ModelScope text-to-video model.
git clone https://huggingface.co/ali-vilab/modelscope-damo-text-to-video-synthesis .Step 3: Configure Nginx as a Reverse Proxy to Access WebUI
By default, the WebUI is accessible on the localhost port 7860. To access the WebUI from an external network, you must configure Nginx as a reverse proxy.
First, install the Nginx web server package.
apt install nginxNext, create an Nginx virtual host configuration file.
nano /etc/nginx/conf.d/webui.confAdd the following configuration.
upstream webui {
    server 127.0.0.1:7860;
}

server {
    listen 80;
    listen [::]:80;
    server_name webui.example.com;

    proxy_set_header Host $host;
    proxy_http_version 1.1;
    proxy_set_header X-Real-IP $remote_addr;
    proxy_set_header X-Forwarded-For $proxy_add_x_forwarded_for;
    proxy_set_header X-Forwarded-Proto $scheme;
    proxy_set_header Sec-WebSocket-Extensions $http_sec_websocket_extensions;
    proxy_set_header Sec-WebSocket-Key $http_sec_websocket_key;
    proxy_set_header Sec-WebSocket-Version $http_sec_websocket_version;
    proxy_set_header Upgrade $http_upgrade;
    proxy_set_header Connection "Upgrade";

    location / {
        proxy_pass http://webui;
    }
}
Save and close the file. Then, verify the Nginx configuration.
nginx -tOutput:
nginx: the configuration file /etc/nginx/nginx.conf syntax is ok
nginx: configuration file /etc/nginx/nginx.conf test is successful
Finally, restart the Nginx to apply the changes.
systemctl restart nginxStep 4: Configure Stable Diffusion WebUI
First, navigate to the stable-diffusion-webui directory.
cd ~/stable-diffusion-webuiThen, create a Python virtual environment and activate it.
python3.10 -m venv venv
source venv/bin/activate
Update pip to the latest version.
pip install --upgrade pipUpdate the tqdm module required by the WebUI interface to run models.
pip3 install --upgrade tqdmInstall Fast API and other libraries.
pip3 install fastapi
pip install clip
Step 5: Run the Stable Diffusion WebUI
At this point, your Stable Diffusion WebUI is configured. You can now launch WebUI, which will serve as the interface for video generation.
python3.10 launch.pyWait for the application to fully initialize, which might take several minutes, depending on your system’s performance. You will see the following output after the successful execution.
100%|███████████████████████████████████████████████████████████████████████████████████████████████████████████████████████████████| 3.97G/3.97G [00:19<00:00, 216MB/s]
Calculating sha256 for /root/stable-diffusion-webui/models/Stable-diffusion/v1-5-pruned-emaonly.safetensors: Running on local URL:  http://127.0.0.1:7860
Step 6: Access WebUI and Generate Videos using ModelScope
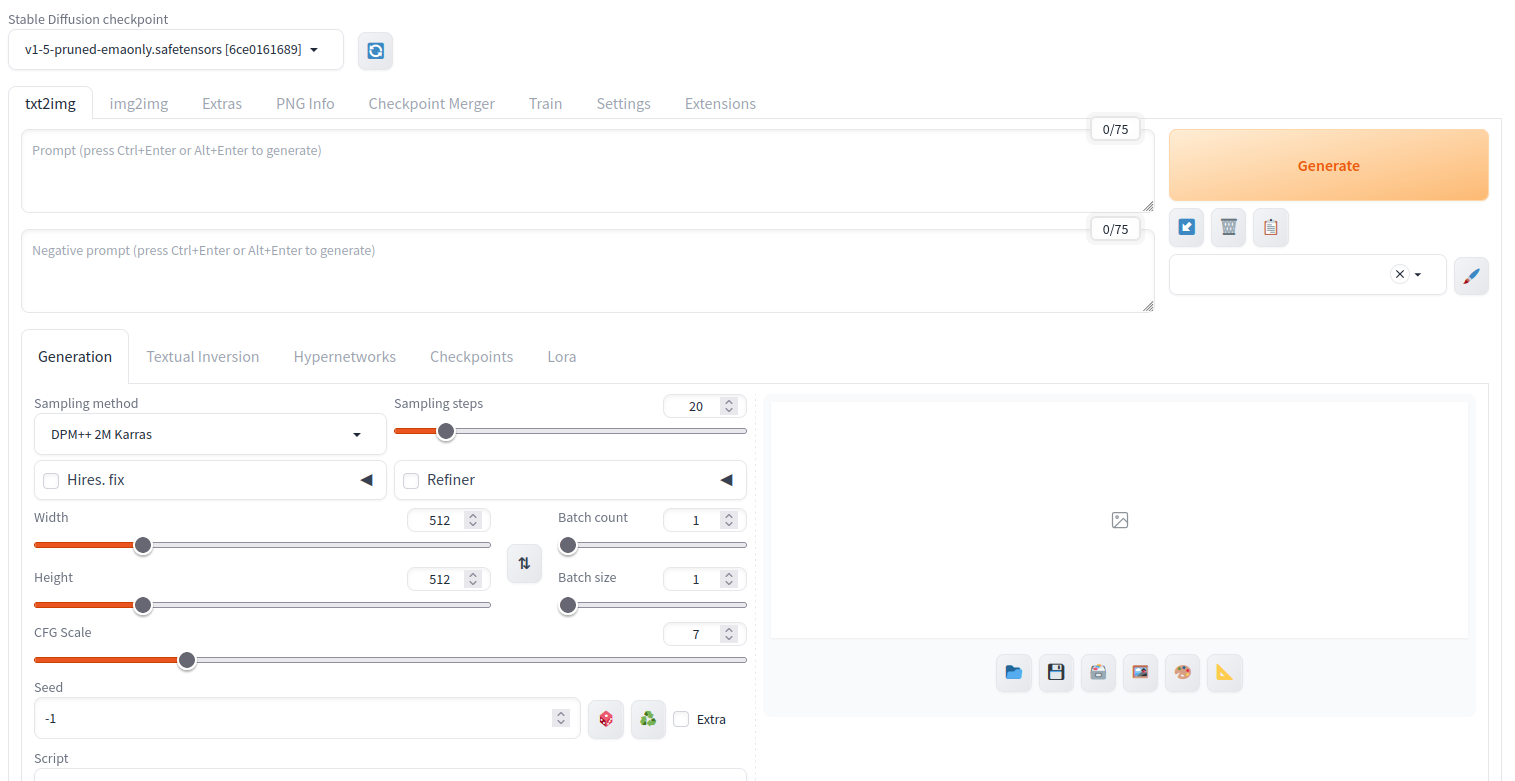
Open your web browser and access WebUI using the URL http://webui.example.com.
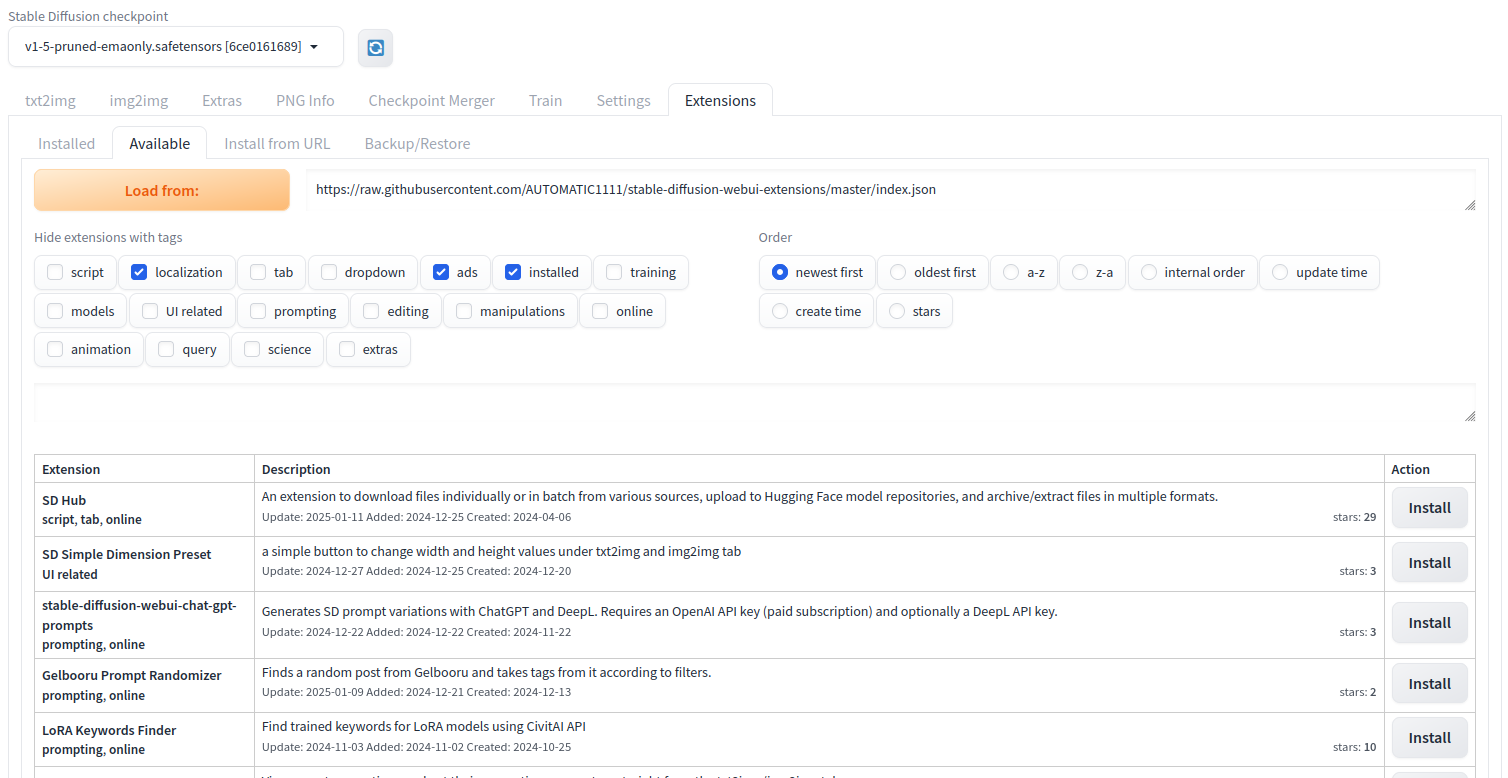
In the main WebUI navigation menu, click on Extensions and navigate to the Available tab and click Load from: to load all available models in the WebUI repository.
In the search field, type the keyword modelscope and press the Space button to search an extension.
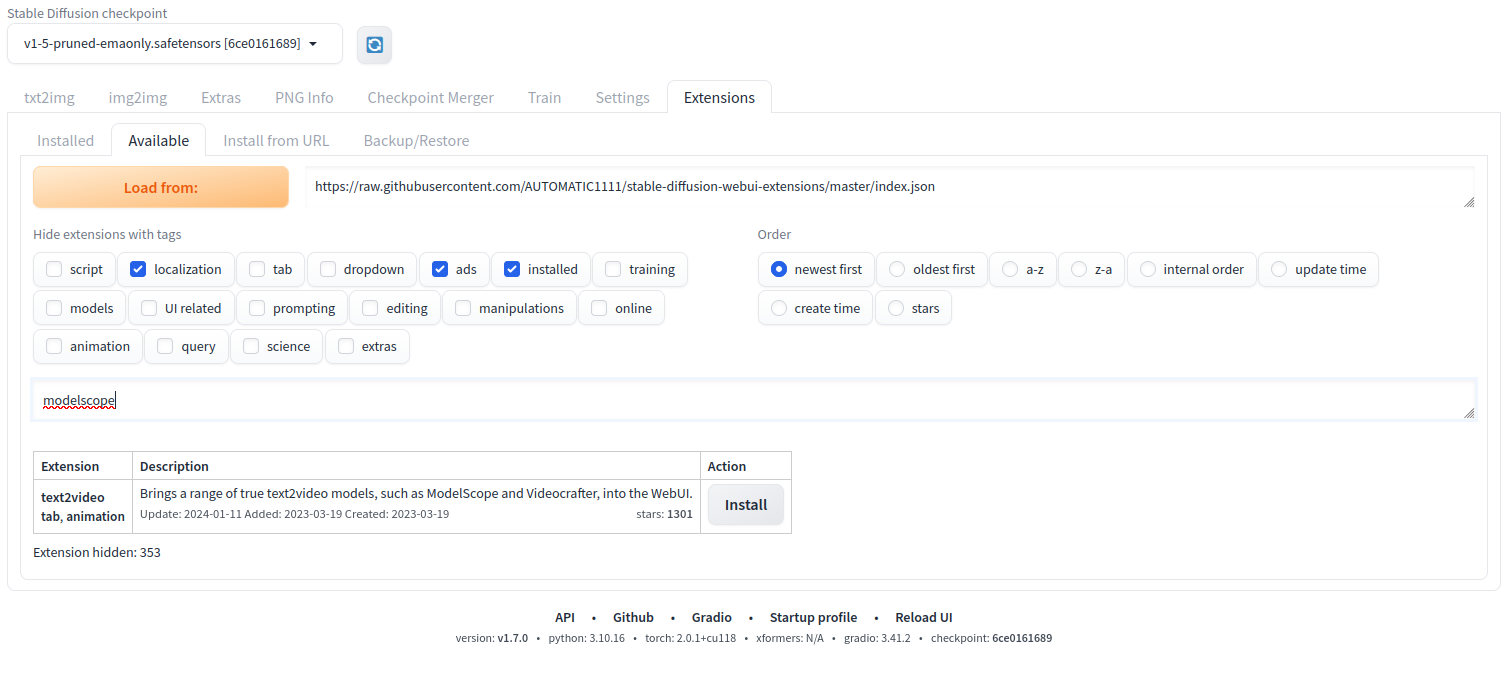
Click Install in the text2video result action tab to install the ModelScope extension.
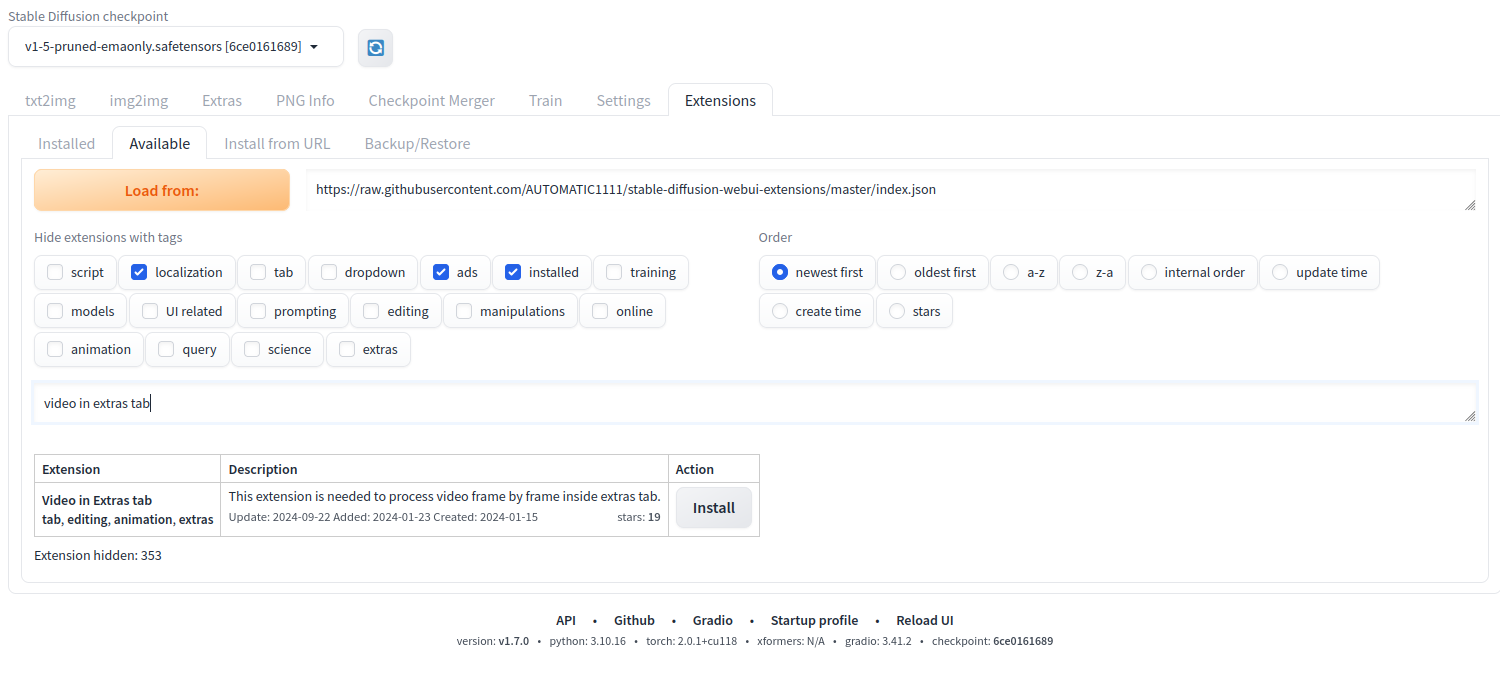
Again search the keyword “video in extras tab” in the search field. Click Install next to the Video in the Extras tab to install the new extension.
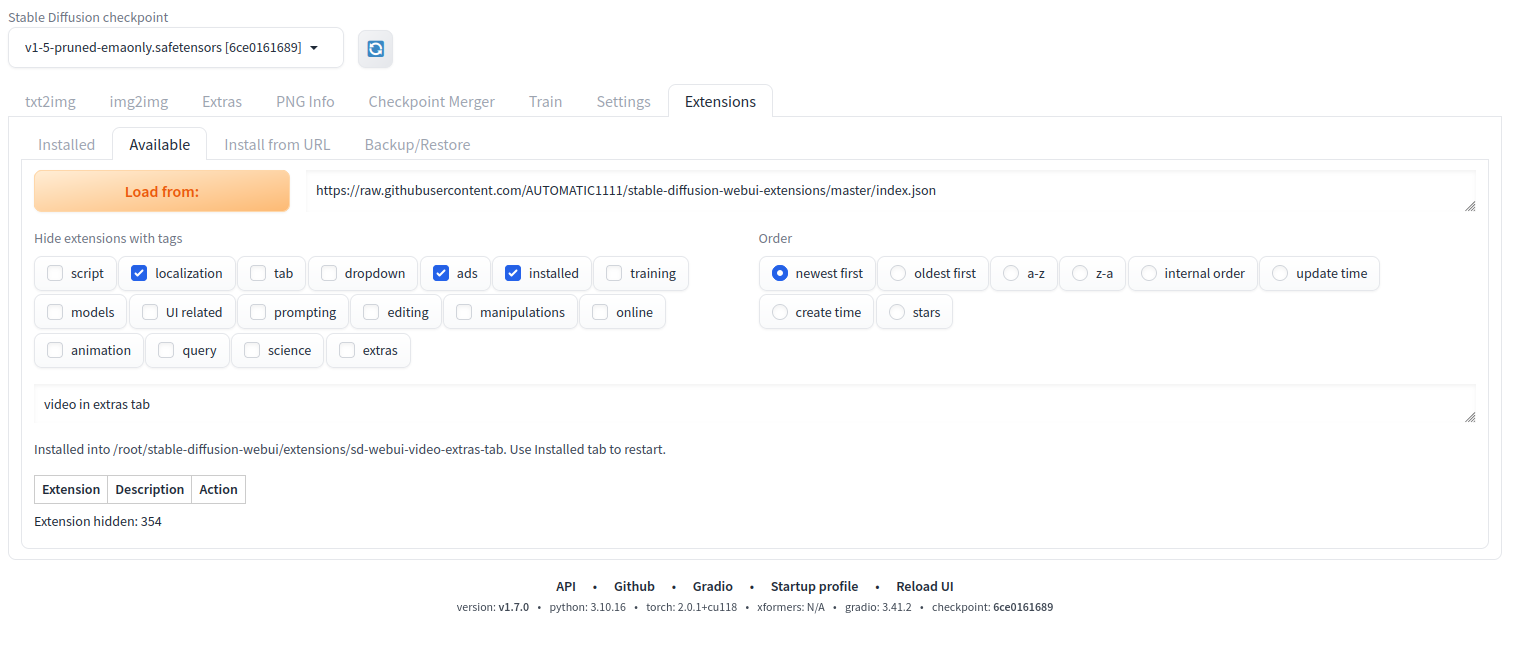
Once the extension is installed, click Reload UI at the bottom of the web page to reload WebUI.
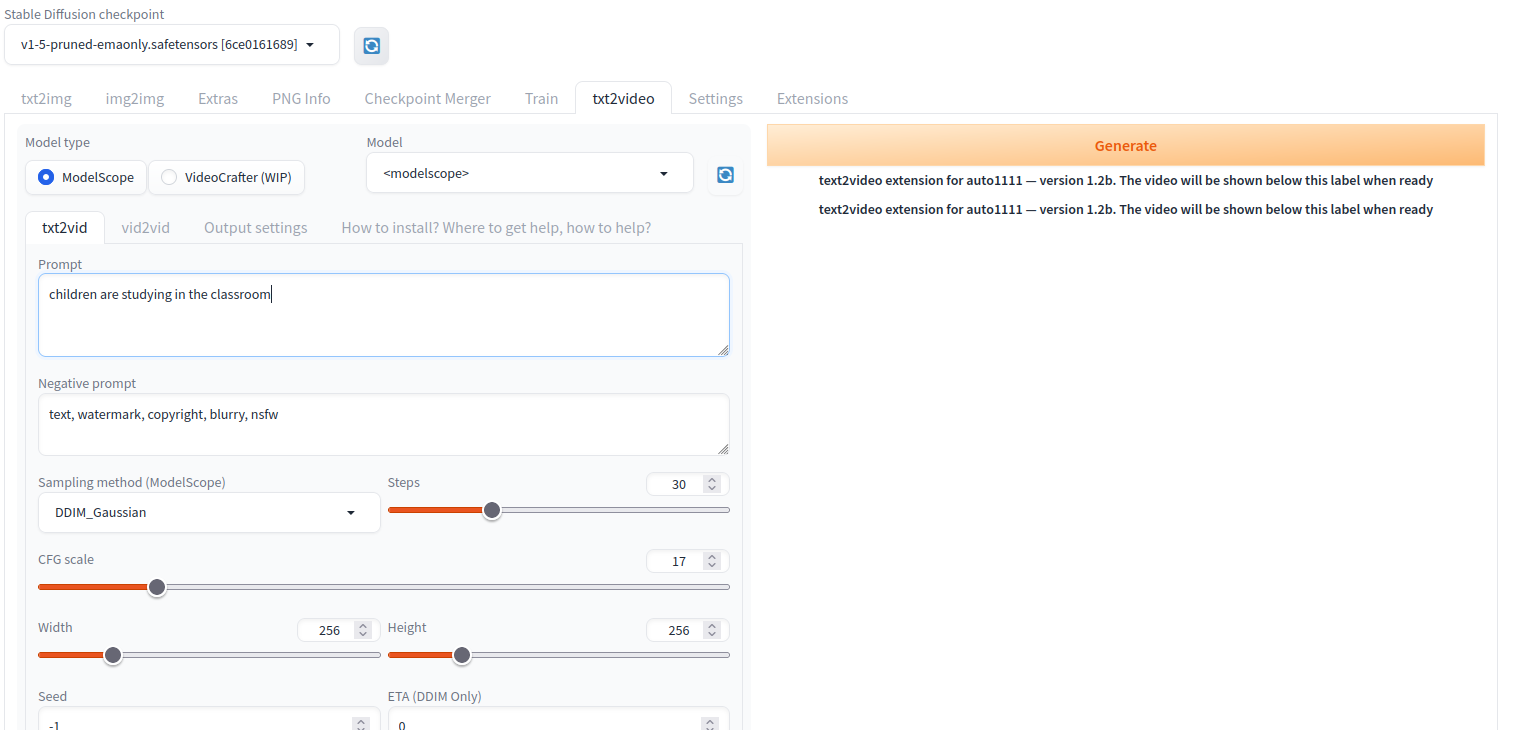
Navigate to the txt2video tab within the WebUI interface.
Select the ModelScope as the Model type and enter your desired text prompt in the Prompt field. For example “children are studying in the classroom”. Then, click Generate and wait for at least 3 minutes for the ModelScope generation process to complete. You should see your generated video on the following screen.
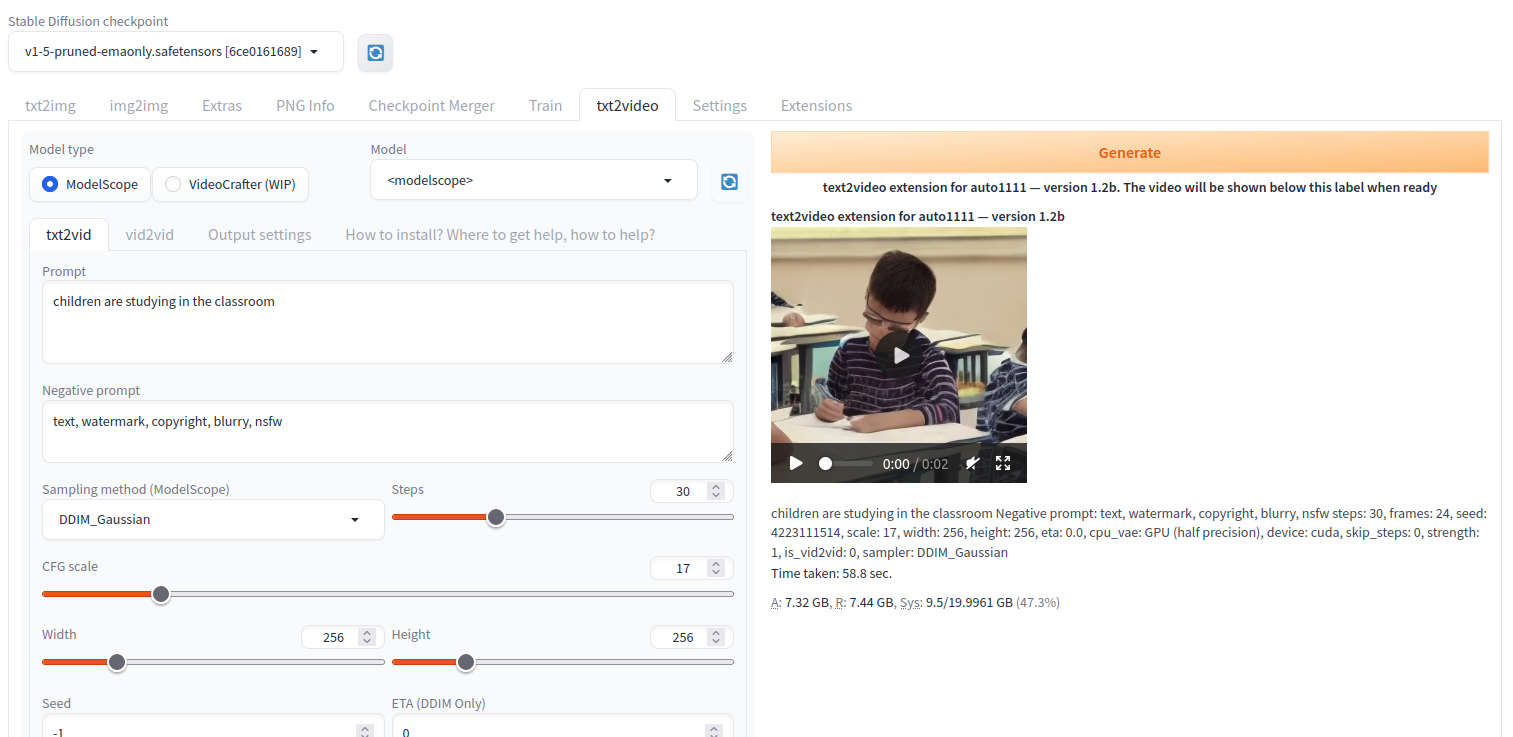
You can also change your input text prompt to generate a new video using ModelScope per your requirements.
Conclusion
Congratulations! You have successfully installed and configured the HuggingFace ModelScope Text2Video Diffusion Model on an Atlantic Cloud GPU. The process involves setting up a compatible Python environment, managing large files with Git LFS, configuring Nginx for external access, and deploying a complex AI model within a user-friendly web interface. You can now experiment with different prompts, explore various settings within the ModelScope, and continue to refine your approach to produce unique and impactful video content.