Object detection is a key technology in computer vision, enabling machines to recognize and localize objects within images or video frames. It has diverse applications, from enhancing security with intelligent surveillance systems to powering autonomous vehicles, retail inventory management, and augmented reality experiences. TensorFlow offers a comprehensive Object Detection API that simplifies the process of creating, training, and deploying object detection models.
In this guide, we will walk you through setting up TensorFlow’s Object Detection API on an Atlantic.Net Cloud GPU Server running Ubuntu 22.04.
Prerequisites
Before starting, ensure you have the following:
- An Ubuntu 22.04 Cloud GPU Server.
- CUDA Toolkit and cuDNN Installed.
- A root or sudo privileges.
Install Required Dependencies
1. First, update all system packages to the updated version.
apt update -y2. Next, install essential tools and libraries required for TensorFlow and object detection.
apt install python3-pip python3.10-venv protobuf-compiler3. Install the Python virtual environment package.
pip install virtualenvCreate a Project Virtual Environment
A virtual environment keeps your project’s dependencies isolated, ensuring compatibility and reducing conflicts.
1. Create a project directory.
mkdir project2. Navigate into the project directory
cd project3. Create the Python virtual environment.
python3 -m venv env4. Activate the virtual environment.
source env/bin/activateInstall TensorFlow Object Detection API
1. First, install TensorFlow and Cython.
pip install tensorflow cython2. Clone the TensorFlow Object Detection API repository.
git clone https://github.com/tensorflow/models3. Change the directory to the research directory.
cd models/research4. Configure the model and training parameters using the protoc command.
protoc object_detection/protos/*.proto --python_out=.Install COCO API
1. Change back to the project directory.
cd ../..2. Clone the cocoapi repository.
git clone https://github.com/cocodataset/cocoapi.git3. Change the directory to PythonAPI.
cd cocoapi/PythonAPI4. Run the make command to build the library.
make5. Copy the pycocotools subfolder into the research folder from the cloned TensorFlow Object Detection API repository.
cp -r pycocotools ../../models/research/6. Install the Object Detection API.
cd ../../models/research
cp object_detection/packages/tf2/setup.py . && python -m pip install .
Create an Object Detection Application
In this section, we’ll build a Python application to use a pre-trained object detection model.
1. First, create a main.py file within your main project directory.
cd ../../
nano main.py
Add the following code to main.py.
import os
import tensorflow as tf
import numpy as np
from PIL import Image
from object_detection.utils import label_map_util
from object_detection.utils import visualization_utils as viz_utils

def download_model(model_name, model_date):
    """
    Downloads and extracts the TensorFlow Object Detection model.
    """
    base_url = 'http://download.tensorflow.org/models/object_detection/tf2/'
    model_file = model_name + '.tar.gz'
    model_dir = tf.keras.utils.get_file(fname=model_name,
                                        origin=base_url + model_date + '/' + model_file,
                                        untar=True)
    print(f"Model downloaded to: {model_dir}")
    return str(model_dir)

def verify_model_path(model_dir, model_name):
    """
    Verifies if the saved_model exists in the downloaded directory.
    Adjusts the path if there is an additional subfolder.
    """
    saved_model_path = os.path.join(model_dir, model_name, "saved_model")
    if os.path.exists(saved_model_path):
        print(f"Found SavedModel at: {saved_model_path}")
        return saved_model_path
    else:
        raise FileNotFoundError(f"SavedModel not found in {saved_model_path}. Please check the download.")

# Download model
model_name = "ssd_resnet152_v1_fpn_1024x1024_coco17_tpu-8"
model_date = "20200711"
PATH_TO_MODEL_DIR = download_model(model_name, model_date)

# Verify saved_model path with subfolder adjustment
PATH_TO_SAVED_MODEL = verify_model_path(PATH_TO_MODEL_DIR, model_name)

# Load model
print("Loading model...")
model_fn = tf.saved_model.load(PATH_TO_SAVED_MODEL)
print("Model loaded successfully!")

# Load labels
PATH_TO_LABELS = 'models/research/object_detection/data/mscoco_label_map.pbtxt'
category_index = label_map_util.create_category_index_from_labelmap(PATH_TO_LABELS, use_display_name=True)

# Images to run detection
images = ["balloon.png", "cow.png"]

# Run inference
for image in images:
    print(f"Running inference for image: {image}")

    # Load image into a numpy array
    image_np = np.array(Image.open(image).convert("RGB"))


    # Convert image to tensor
    input_tensor = tf.convert_to_tensor(image_np)

    # Add an axis to make it a batch
    input_tensor = input_tensor[tf.newaxis, ...]

    # Run inference
    detections = model_fn(input_tensor)

    # Process detection outputs
    num_detections = int(detections.pop('num_detections'))
    detections = {key: value[0, :num_detections].numpy()
                  for key, value in detections.items()}
    detections['num_detections'] = num_detections
    detections['detection_classes'] = detections['detection_classes'].astype(np.int64)

    # Visualize detections
    image_np_with_detections = image_np.copy()

    viz_utils.visualize_boxes_and_labels_on_image_array(
            image_np_with_detections,
            detections['detection_boxes'],
            detections['detection_classes'],
            detections['detection_scores'],
            category_index,
            use_normalized_coordinates=True,
            max_boxes_to_draw=200,
            min_score_thresh=.30,
            agnostic_mode=False,
            line_thickness=8)

    # Save image with detections
    img = Image.fromarray(image_np_with_detections)
    img_filename = image.replace(".png", "_detect.png")
    img.save(img_filename)
    print(f"Saved image with detections to: {img_filename}")
Explanation:
- The code downloads and verifies a TensorFlow object detection model from the TensorFlow model zoo.
- It loads the saved model and label map to map class IDs to readable labels.
- Images are preprocessed into tensors with a batch dimension for inference compatibility.
- The model runs inference to detect objects and processes outputs like bounding boxes, classes, and scores.
- Detected objects are visualized on images with annotations and saved as new files.
2. Download the sample images below, name them balloon.png and cow.png, and place them in the project directory.
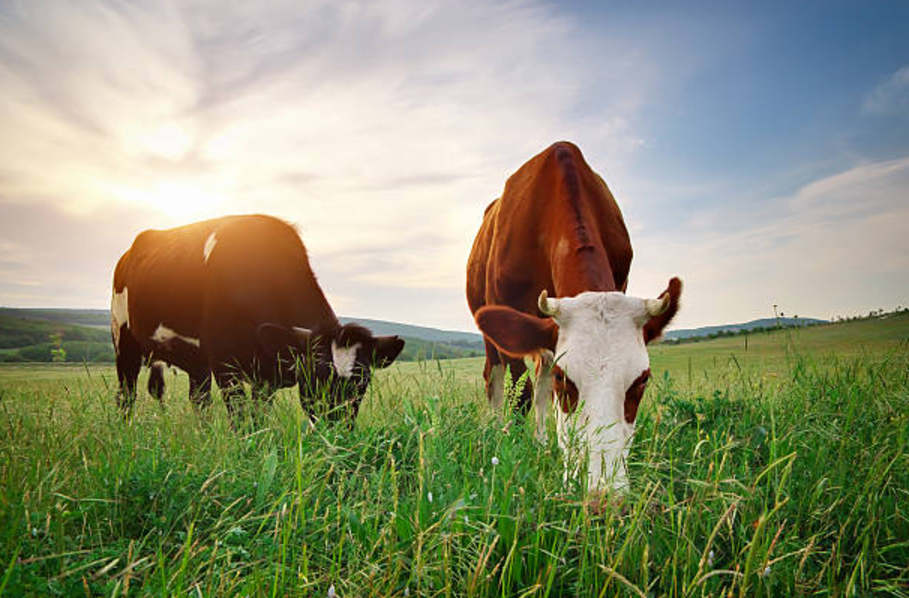

The project directory should look like this:
project
├── env/
└── models/
└── cocoapi/
└── main.py
└── cow.png
└── balloon.png
3. Run the main.py script within your project directory.
python3 main.pyMonitor the output for successful inference and file creation:
I0000 00:00:1734412066.740691   32930 gpu_device.cc:2022] Created device /job:localhost/replica:0/task:0/device:GPU:0 with 5567 MB memory:  -> device: 0, name: NVIDIA A40-8Q, pci bus id: 0000:06:00.0, compute capability: 8.6
Model loaded successfully!
Running inference for image: balloon.png
I0000 00:00:1734412088.887535   32952 cuda_dnn.cc:529] Loaded cuDNN version 90600
Saved image with detections to: balloon_detect.png
Running inference for image: cow.png
Saved image with detections to: cow_detect.png
The above code downloads the model, processes the images, and saves object-detected images within your project directory.
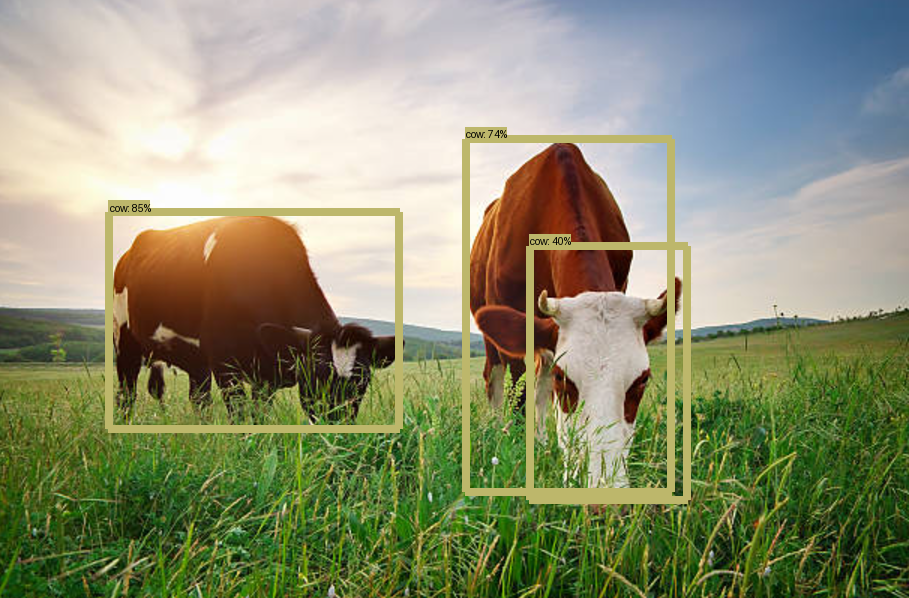
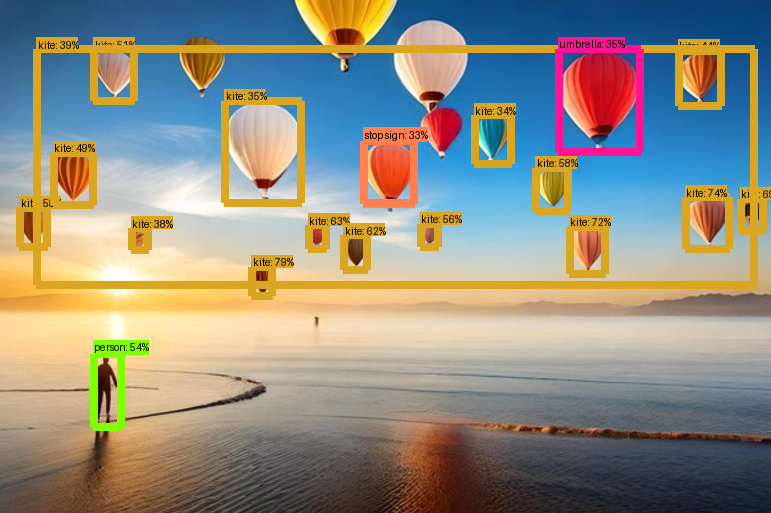
4. Download the newly generated images (balloon_detect.png and cow_detect.png) to your local machine for inspection.
5. Open the detected images and verify that the objects are correctly labeled.
Conclusion
You have successfully set up TensorFlow Object Detection API on an Atlantic.Net Cloud Server and used it to detect objects in images. The process involved:
- Installing TensorFlow and dependencies.
- Setting up COCO and TensorFlow Object Detection APIs.
- Running a pre-trained model for object detection.
This setup can be extended to train custom models for domain-specific applications. Give it a try today on GPU hosting from Atlantic.Net!
* This post is for informational purposes only and does not constitute professional, legal, financial, or technical advice. Each situation is unique and may require guidance from a qualified professional.
Readers should conduct their own due diligence before making any decisions.