The ability to efficiently search and retrieve information based on semantic similarity is crucial. Vector databases have emerged as a powerful tool for this purpose, enabling applications like recommendation systems, natural language processing, and image recognition.
This guide will walk you through the process of creating and using a serverless vector database with DataStax Astra DB on your Atlantic.Net Ubuntu 22.04 cloud server.
We’ll cover everything from setting up your Astra DB account and database to inserting data, generating vector embeddings, and performing vector searches. By the end of this guide, you’ll have a functional vector database.
Prerequisites
- An Atlantic.Net cloud server running Ubuntu 22.04: You’ll need access to a terminal on your server to execute commands.
- An Astra DB Account: You’ll need to sign up for a free Astra DB account.
- Basic Python Knowledge: Familiarity with Python scripting will be helpful.
- Internet Connection: Your server needs an active internet connection to download packages and connect to Astra DB.
Step 1 – Create an Atlantic.Net Cloud Server with Ubuntu 22.04:
This step explains how to create a Cloud Server on Atlantic.Net. If you already have an Atlantic.Net server you can skip this step:
- Sign Up/Log In to Atlantic.Net:
- Go to the Atlantic.Net website and sign up for an account or log in if you already have one.
- Create a Cloud Server:
- In the Atlantic.Net portal, navigate to the cloud server section and click on the option to create a new server.
- Choose Ubuntu 22.04:
- Select “Ubuntu 22.04” as the operating system for your server.
- Select Server Specifications:
- Choose the server size and resources (CPU, RAM, storage) that meet your needs. For this quickstart, a basic configuration should be sufficient.
- Configure Server Options:
- Set a hostname, root password, and any other relevant server options.
- Deploy the Server:
- Review your server configuration and deploy the server. Wait for the server to be provisioned and become active.
- Access Your Cloud Server:
- Once the server is ready, you’ll receive the server’s IP address.
- Use an SSH client (like PuTTY on Windows, or the built-in Terminal on macOS/Linux) to connect to your Server:
Step 2 – Create an Astra Account and Database:
- Sign Up/Log In:
- Go to the Astra DB website and sign up for a free account or log in if you already have one.
- Accept the terms and conditions when prompted
- Fill out the Welcome Page to continue
- Create a Database:
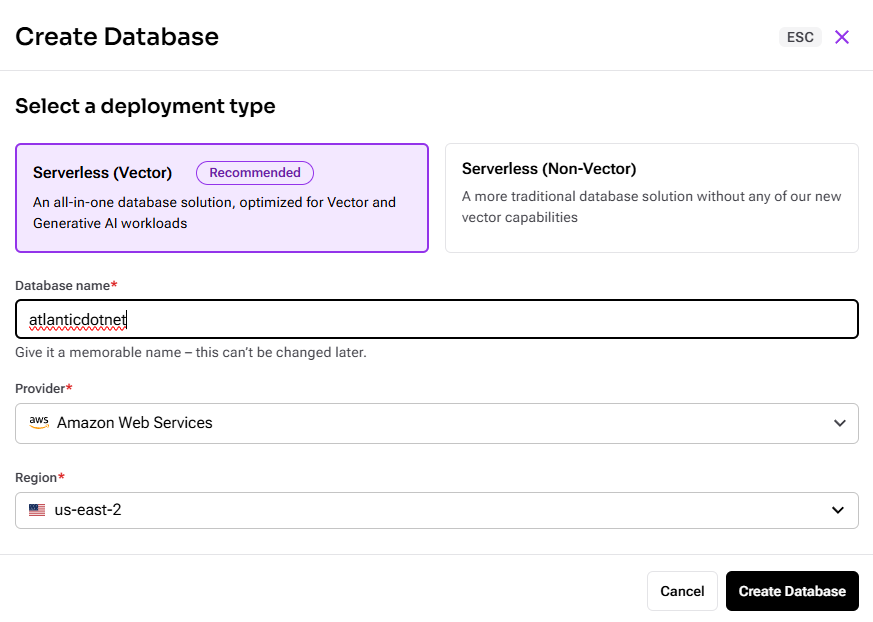
- In the Astra Portal, navigate to “Databases” and click “Create Database.”

-
- Select the following:
- Deployment Type: “Serverless (Vector)”
- Provider: “Amazon Web Services”
- Region: “us-east-2” (This is crucial for the NVIDIA embedding model).
- Select the following:
-
- Click “Create Database.”
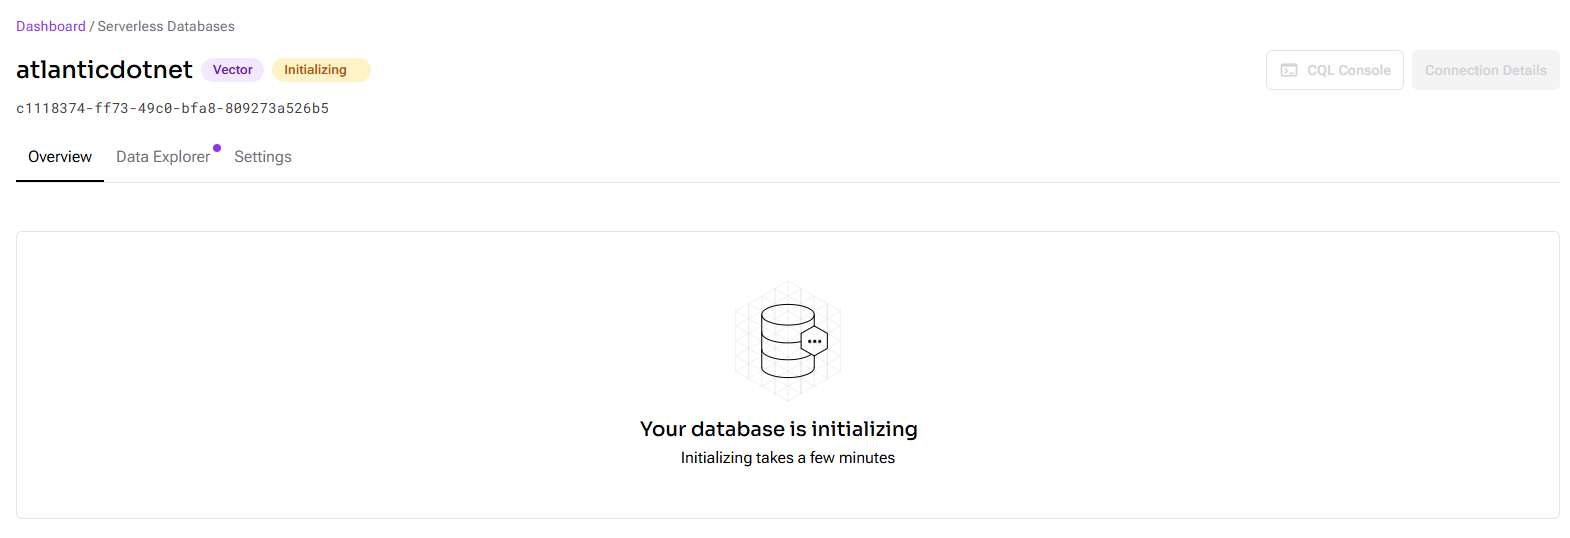
- Wait for the database to reach “Active” status (this might take a few minutes).
-
- Once complete you will see this screen.
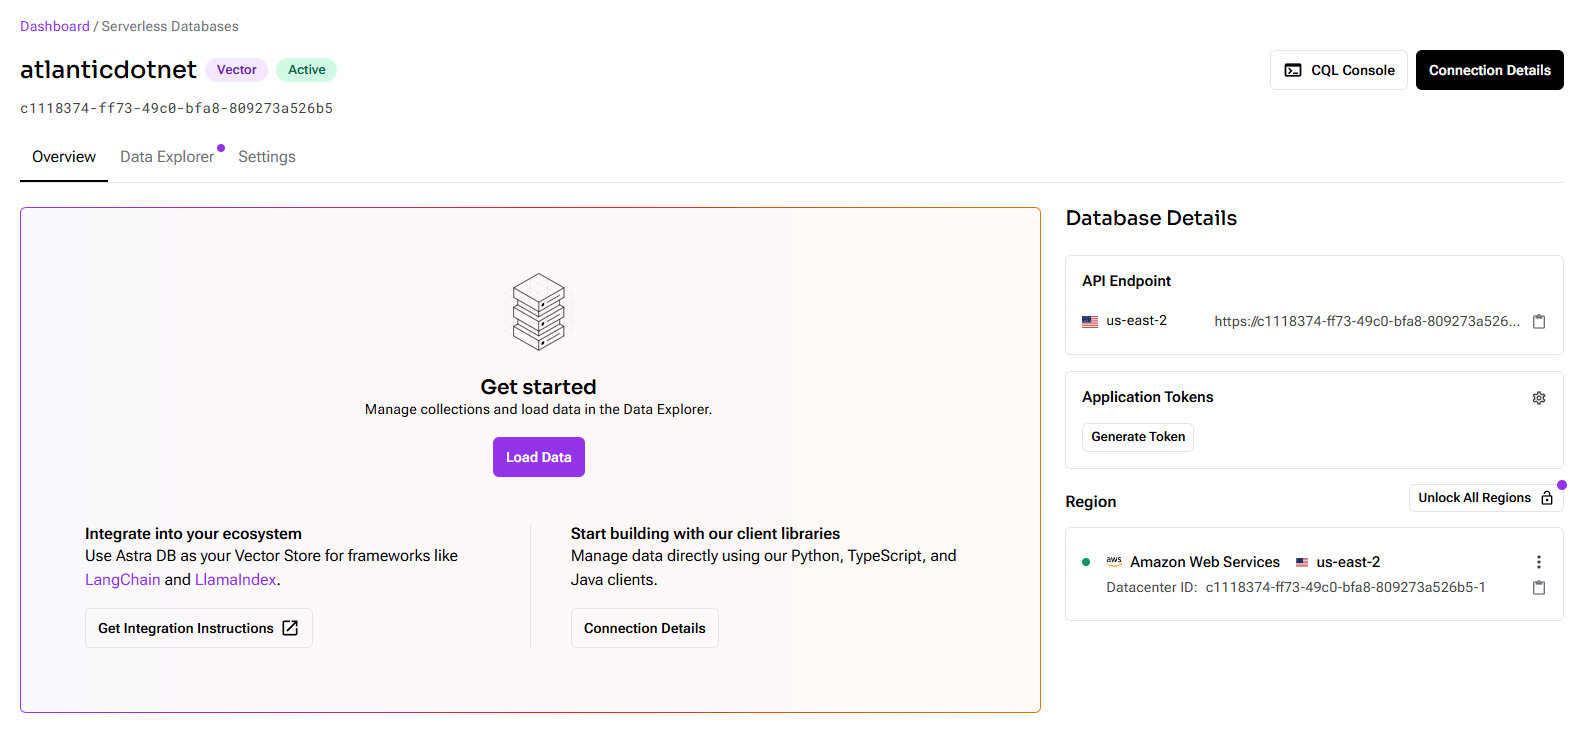
- Retrieve Credentials:
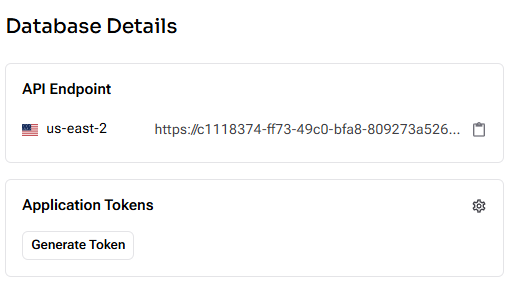
- Once active, go to the “Database Details.” pane on the main page
-
- Copy the “API Endpoint.”
- Click “Generate Token” and copy the token.
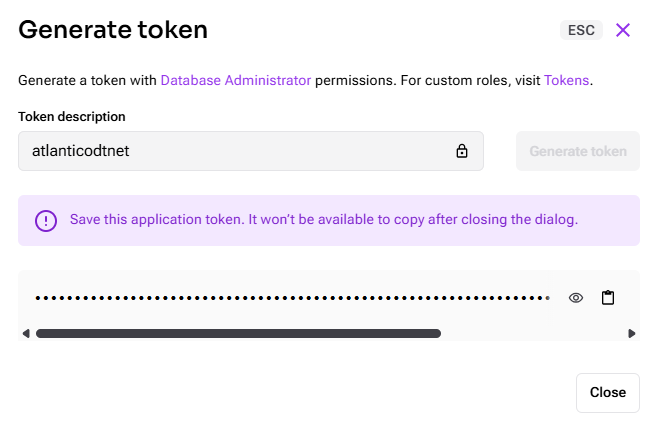
Important: Make a note of these values as you will need them later
Step 3 – Configure Your Atlantic.Net Cloud Server
Now let’s switch over to the Atlantic.Net server to continue the configuration.
- Set environmental variables on your Ubuntu 22.04Server:
- Open your terminal on your Atlantic.Net Server.
- Run the following commands, replacing API_ENDPOINT and TOKEN with the values you copied:
export ASTRA_DB_API_ENDPOINT=API_ENDPOINT
export ASTRA_DB_APPLICATION_TOKEN=TOKEN
- To make these variables persistent, add these export lines to your ~/.bashrc or ~/.zshrc file and then run source ~/.bashrc or source ~/.zshrc.
- Install Python and Astrapy:
- On your Ubuntu Server, update your package lists and upgrade existing packages:
sudo apt update
sudo apt upgrade -y
- Install Python 3.x.x+ and pip:
- Ensure Python 3.x.x or higher is installed.
sudo apt install python3-pip -y
- Verify the Python version.
python3 --version

Python 3.10.12
- Upgrade pip:
python3 -m pip install --upgrade pip
- Verify the pip version.
pip --version

pip 25.0.1 from /usr/local/lib/python3.10/dist-packages/pip (python 3.10)
- Install Astrapy:
- Install the astrapy library:
pip install astrapy
Step 4 – Connect to the Vector Database
Now you are ready to connect to the AstraDB.
- Create a Python file:
-
- First create a file named quickstart_connect.py
nano quickstart_connect.py
Paste the following code into the file:
import os
from astrapy import DataAPIClient, Database

def connect_to_database() -> Database:
    """
    Connects to a DataStax Astra database.
    This function retrieves the database endpoint and application token from the
    environment variables `ASTRA_DB_API_ENDPOINT` and `ASTRA_DB_APPLICATION_TOKEN`.

    Returns:
        Database: An instance of the connected database.

    Raises:
        RuntimeError: If the environment variables `ASTRA_DB_API_ENDPOINT` or
        `ASTRA_DB_APPLICATION_TOKEN` are not defined.
    """
    endpoint = os.environ.get("ASTRA_DB_API_ENDPOINT")
    token = os.environ.get("ASTRA_DB_APPLICATION_TOKEN")

    if not token or not endpoint:
        raise RuntimeError(
            "Environment variables ASTRA_DB_API_ENDPOINT and ASTRA_DB_APPLICATION_TOKEN must be defined"
        )

    client = DataAPIClient(token)
    database = client.get_database(endpoint)

    print(f"Connected to database {database.info().name}")

    return database
Note: quickstart_connect.py is a module that is imported by the other Python scripts and is not run directly.
- Download the Dataset:
-
- Download the quickstart_dataset.json file and save it to your project directory. This dataset contains demo information about 100 books.
Each object within the array represents a single book and has the following key-value pairs:
- title: The title of the book (string).
- author: The author of the book (string).
- summary: A short summary or description of the book’s plot (string).
- genres: An array of genres associated with the book (array of strings).
- numberOfPages: The number of pages in the book (integer).
- rating: The rating of the book (floating-point number).
wget https://docs.datastax.com/en/astra-db-serverless/get-started/_attachments/quickstart_dataset.json
- Create a Python file:
-
- Create a file named quickstart_upload.py and paste the following code:
from quickstart_connect import connect_to_database
from astrapy import Database, Collection
from astrapy.constants import VectorMetric
from astrapy.info import CollectionVectorServiceOptions
import json

def create_collection(database: Database, collection_name: str) -> Collection:
    collection = database.create_collection(
        collection_name,
        metric=VectorMetric.COSINE,
        service=CollectionVectorServiceOptions(
            provider="nvidia",
            model_name="NV-Embed-QA",
        ),
    )
    print(f"Created collection {collection.full_name}")
    return collection

def upload_json_data(collection: Collection, data_file_path: str, embedding_string_creator: callable) -> None:
    with open(data_file_path, "r", encoding="utf8") as file:
        json_data = json.load(file)
    documents = [
        {
            **data,
            "$vectorize": embedding_string_creator(data),
        }
        for data in json_data
    ]
    inserted = collection.insert_many(documents)
    print(f"Inserted {len(inserted.inserted_ids)} items.")

def main():
    database = connect_to_database()
    collection = create_collection(database, "quickstart_collection")
    upload_json_data(
        collection,
        "quickstart_dataset.json",  # Use the actual filename
        lambda data: (
            f"summary: {data['summary']} | "
            f"genres: {', '.join(data['genres'])}"
        ),
    )

if __name__ == "__main__":
    main()
- Run the script:
-
- In your terminal, run: python3 quickstart_upload.py
This will run a nested module that will use the first connect to db script, and then the second script will upload the data. You should see the following information on completion.
python3 quickstart_upload.py
Connected to database atlanticdotnet
Created collection default_keyspace.quickstart_collection
Inserted 100 items.
Step 5 – Start to Query Data
- Create a Python file:
- Create a file named quickstart_find.py
nano quickstart_find.py
- Then paste the following code:
from quickstart_connect import connect_to_database

def main():
    database = connect_to_database()
    collection = database.get_collection("quickstart_collection")

    print("\nFinding books with rating greater than 4.7...")
    rating_cursor = collection.find({"rating": {"$gt": 4.7}})
    for document in rating_cursor:
        print(f"{document['title']} is rated {document['rating']}")

    print("\nUsing vector search to find a single scary novel...")
    single_vector_match = collection.find_one({}, sort={"$vectorize": "A scary novel"})
    print(f"{single_vector_match['title']} is a scary novel")

    print("\nUsing filters and vector search to find 3 books with more than 400 pages that are set in the arctic, returning just the title and author...")
    vector_cursor = collection.find(
        {"numberOfPages": {"$gt": 400}},
        sort={"$vectorize": "A book set in the arctic"},
        limit=3,
        projection={"title": True, "author": True}
    )
    for document in vector_cursor:
        print(document)

if __name__ == "__main__":
    main()
- Run the script:
- In your terminal, navigate to the directory where you saved quickstart_find.py.
Execute the script using Python 3:
python3 quickstart_find.py
You should see the output of the three search queries, demonstrating how to filter and perform vector searches in your Astra DB collection.
- Change the searches:
- Open quickstart_find.py in a text editor.
- Look for these parts in the code:
- collection.find({…}) : This is where you change the filters.
- sort={“$vectorize”: “…”} : This is where you change what you’re searching for with vectors.
- limit=…: This is where you change how many results you get.
- projection={…}: This is where you change what information you get back.
- Change the text or numbers inside these parts.
- Save the file and run again python3 quickstart_find.py
Here is a modified example:
from quickstart_connect import connect_to_database

def main():
    database = connect_to_database()
    collection = database.get_collection("quickstart_collection")

    # Example: Find books with fewer than 300 pages
    print("\nFinding books with fewer than 300 pages...")
    page_cursor = collection.find({"numberOfPages": {"$lt": 300}})
    for document in page_cursor:
        print(f"{document['title']} has {document['numberOfPages']} pages")

    # Example: Vector search for "A thrilling adventure story"
    print("\nVector search for 'A thrilling adventure story'...")
    adventure_match = collection.find_one({}, sort={"$vectorize": "A thrilling adventure story"})
    if adventure_match:
        print(f"{adventure_match['title']} is a thrilling adventure story")
    else:
        print("No thrilling adventure story found.")

    # Example: Find top 5 historical novels with rating > 4.0, show title and author
    print("\nTop 5 historical novels with rating > 4.0, showing title and author...")
    historical_cursor = collection.find(
        {"rating": {"$gt": 4.0}},
        sort={"$vectorize": "A historical novel"},
        limit=5,
        projection={"title": True, "author": True}
    )
    for document in historical_cursor:
        print(document)

if __name__ == "__main__":
    main()
Look how the results differ between the 2 examples. This shows you how easy it is for Vector Databases to give intelligent answers quickly.
Get started with a Vector Database on an Atlantic.Net server today using our GPU server hosting!
* This post is for informational purposes only and does not constitute professional, legal, financial, or technical advice. Each situation is unique and may require guidance from a qualified professional.
Readers should conduct their own due diligence before making any decisions.