Important Note: Before proceeding, ensure your Windows Server on Atlantic.Net is configured with a static public IP address and has RDP (Remote Desktop Protocol) enabled. Also, security best practices like using strong passwords and enabling Network Level Authentication (NLA) for RDP should be considered.
Method 1: RDP over 3389 (Direct, Public Internet)
This is the most straightforward but least secure method, suitable for temporary use or on trusted networks. All Atlantic.Net Windows Servers running the desktop experience have RDP configured out of the box.
-
- Windows Server 2022 Datacenter (Desktop Experience)
- Windows Server 2019 Datacenter (Desktop Experience)
- Windows Server 2016 Datacenter (Desktop Experience)
- Windows Server 2012 R2 Datacenter (Desktop Experience)
Step 1 – Obtain Server IP
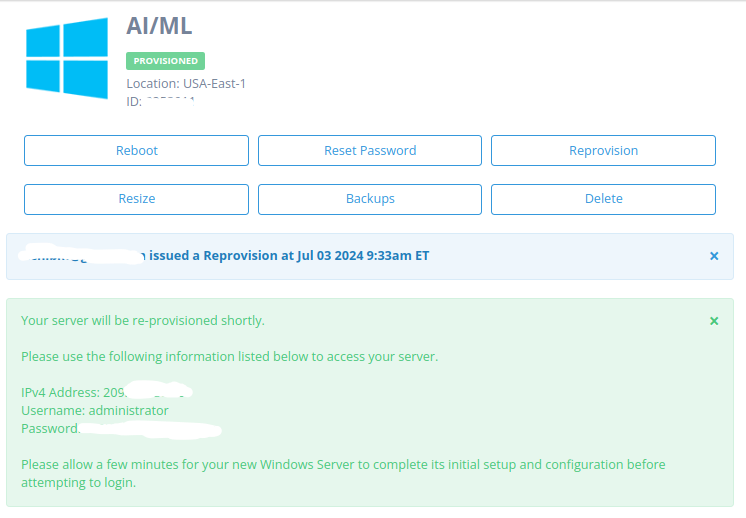
Log into your Atlantic.Net control panel and find your Windows Server’s public IP address. You will also find this on the automated email sent from Atlantic.Net and on the provisioning screen immediately after deploying a Windows Server.
Step 2 – Open RDP Client
On your local Windows machine, press Win + R, type “mstsc”, and press Enter.
If you are using Linux, we recommend using Remmina.
Step 3 – Enter IP Details
In the RDP client, enter your server’s public IP and click “Connect”.
Step 4 – Authenticate
Provide the username and password for a user account with RDP permissions on the server. Atlantic.Net provides this information in the deployment email you get when you first deploy your Windows Server.
Method 2: WinRM (Windows Remote Management)
WinRM offers a PowerShell-based way to manage your server remotely, similar to SSH. To configure this, you will need to RDP to the server first or manage it via the Atlantic.Net VNC console.
Step 1 – Enable WinRM
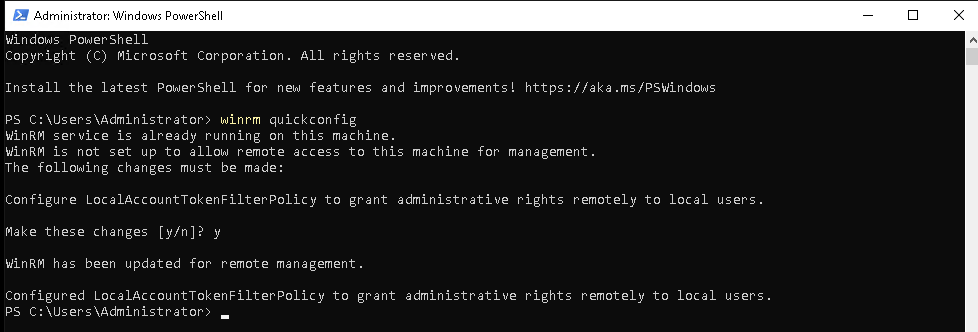
On the Windows Server, open an elevated PowerShell Windows and type:
winrm quickconfig
This enables WinRM with default settings.
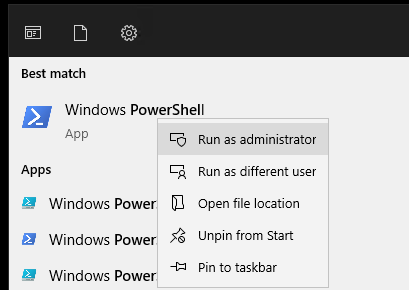
Tip: To open an elevated Powershell window, right-click on the Powershell icon.
Once enabled, you will get the following output:
Step 2 – Create New Inbound & Outbound Firewall Rule
Ensure your Atlantic.net firewall settings allow inbound traffic on port 5985 (HTTP) or 5986 (HTTPS) for WinRM.
Inbound Rule
New-NetFirewallRule -DisplayName "WinRM-HTTP" -Direction Inbound -Action Allow -Protocol TCP -LocalPort 5985
Outbound Rule
New-NetFirewallRule -DisplayName "WinRM-HTTPS" -Direction Inbound -Action Allow -Protocol TCP -LocalPort 5986
You will get the following output:
New-NetFirewallRule -DisplayName "WinRM-HTTP" -Direction Inbound -Action Allow -Protocol TCP -LocalPort 5985

Name : {b985530a-910d-4243-b483-e23b81013076}
DisplayName : WinRM-HTTP
Description :
DisplayGroup :
Group :
Enabled : True
Profile : Any
Platform : {}
Direction : Inbound
Action : Allow
EdgeTraversalPolicy : Block
LooseSourceMapping : False
LocalOnlyMapping : False
Owner :
PrimaryStatus : OK
Status : The rule was parsed successfully from the store. (65536)
EnforcementStatus : NotApplicable
PolicyStoreSource : PersistentStore
PolicyStoreSourceType : Local
RemoteDynamicKeywordAddresses : {}
PolicyAppId :

PS C:\Users\Administrator> New-NetFirewallRule -DisplayName "WinRM-HTTPS" -Direction Inbound -Action Allow -Protocol TCP -LocalPort 5986
Name : {91d8d840-0d61-407b-bf1e-5186841bf683}
DisplayName : WinRM-HTTPS
Description :
DisplayGroup :
Group :
Enabled : True
Profile : Any
Platform : {}
Direction : Inbound
Action : Allow
EdgeTraversalPolicy : Block
LooseSourceMapping : False
LocalOnlyMapping : False
Owner :
PrimaryStatus : OK
Status : The rule was parsed successfully from the store. (65536)
EnforcementStatus : NotApplicable
PolicyStoreSource : PersistentStore
PolicyStoreSourceType : Local
RemoteDynamicKeywordAddresses : {}
PolicyAppId :
Step 3 – Create PSSession
From a local Windows desktop or laptop machine, open PowerShell as Administrator and type the following to connect to your remote server:
$cred = Get-Credential # Enter server credentials
$session = New-PSSession -ComputerName <server_IP> -Credential $cred
You will be prompted for your credentials.
Step 4 – Execute Remote Commands on your Remote Server
You can now manage your remote server from the current shell session.
To test it, try running:
Invoke-Command -Session $session -ScriptBlock { Get-Process }
Method 3: SSH Tunnel (Most Secure)
This method encrypts RDP traffic within an SSH tunnel, making it ideal for untrusted networks. You’ll need SSH access to an intermediary server—typically a jump box (e.g., a Linux server) that can reach your Windows Server. Alternatively, if you have a Linux laptop or Raspberry Pi, you can tunnel directly from there.
Option 1 – Create SSH Tunnel Direct from a Linux Server
If you don’t have OpenSSH installed on your Windows Server, follow these steps:
Step 1 – Install OpenSSH on the Remote Windows Server
By default, SSH is not enabled on Windows Server. To enable it Open PowerShell as an administrator and Run the following command to install OpenSSH:
Add-WindowsCapability -Online -Name OpenSSH.Server~~~~0.0.1.0
Step 2 – Start and Enable SSHD service
Start the SSHD service and configure it to start automatically:
Start-Service sshd
Set-Service -Name sshd -StartupType 'Automatic'
Step 3 – Allow SSH traffic through the Windows firewall
Run this command in PowerShell as an administrator:
New-NetFirewallRule -Name sshd -DisplayName 'OpenSSH Server (sshd)' -Enabled True -Direction Inbound -Protocol TCP -Action Allow -LocalPort 22
Once SSH is set up on your Windows server, follow these steps on your Ubuntu machine to create the tunnel:
Step 4 – Use Terminal to Establish the SSH Tunnel
Open a terminal session on your local Linux Machine.
Use the following command to create the tunnel:
ssh -L 5985:localhost:5985 administrator@my-ip-address
You should get the following output:
ssh -L 5985:localhost:5985 administrator@my-ip-address
The authenticity of host 'my-ip-address (my-ip-address)' can't be established.
ED25519 key fingerprint is SHA256:VM41PWh85b91ZVTgIot0mqn3hCUV0vgJ4Lsut6OCLtc.
This key is not known by any other names
Are you sure you want to continue connecting (yes/no/[fingerprint])? yes
Warning: Permanently added 'my-ip-address' (ED25519) to the list of known hosts.
administrator@my-ip-address's password:

Microsoft Windows [Version 10.0.20348.2527]
(c) Microsoft Corporation. All rights reserved.

administrator@CLOUD-H35V3SGG8 C:\Users\Administrator>hostname
CLOUD-H35V3SGG8

You can now manage the remote server directly from your local terminal.
Option 2 – Create an SSH Tunnel from a Windows Machine via SSH Jumpbox
Step 1 – Install an SSH Client and Configure
Use a client like PuTTY or OpenSSH.
SSH -> Tunnels:
Source Port: 33389
Destination: your_server_IP:3389
Click “Add”
Step 2 – Set Port Forwarding
In your SSH client’s settings, configure a local port (e.g., 33389) to forward to your Windows Server’s IP and port 3389.
Step 3 – Establish SSH Connection
Connect to your intermediary server via SSH.
Step 4 – RDP to Localhost
Open your RDP client and connect to localhost:33389. Traffic will be securely tunneled to your Windows Server.
Troubleshooting
Firewall: Double-check firewall rules on both the Windows Server and any intermediary server (SSH tunnel).
Network: Ensure network connectivity between your local machine, intermediary server (if using), and the Windows Server.
Authentication: Verify you are using the correct credentials.
* This post is for informational purposes only and does not constitute professional, legal, financial, or technical advice. Each situation is unique and may require guidance from a qualified professional.
Readers should conduct their own due diligence before making any decisions.