Table of Contents
Verified and Tested 03/19/2015
Introduction
In this How-To, we will walk you through changing the RDP Port in Windows Server 2012.
Remote Desktop Protocol (RDP) is a protocol that allows you to connect and control another computer via an existing network making it a remote connection. By default, Windows has assigned port 3389 as the default port to connect. To enable RDP on your Windows Server 2012, you can click here for more information.
Prerequisites
– A Server with Windows Server 2012. If you do not have a server already, why not consider Windows VPS Hosting from Atlantic.Net and be up in 30 seconds or less.
Change The RDP Port in Windows 2012
Connect to your server via Remote Desktop
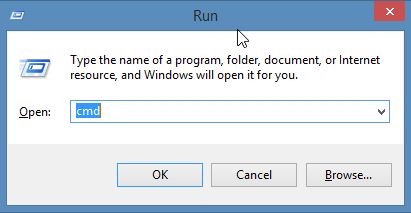
On your keyboard hold down the Windows logo + R buttons which opens the “Run” dialog and execute the “cmd” command and click OK

This is the Run command window in Windows Server 2012
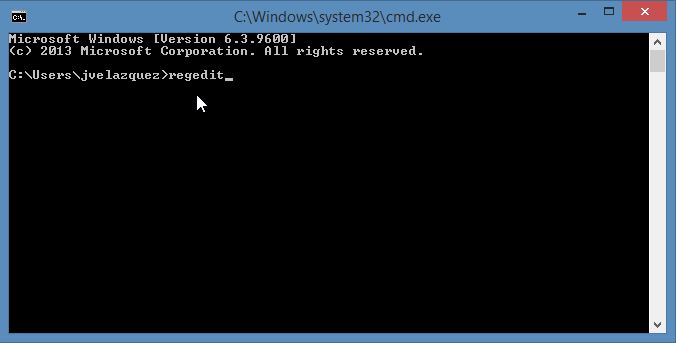
Type “regedit” and click enter

This is the regedit command in Windows Server 2012
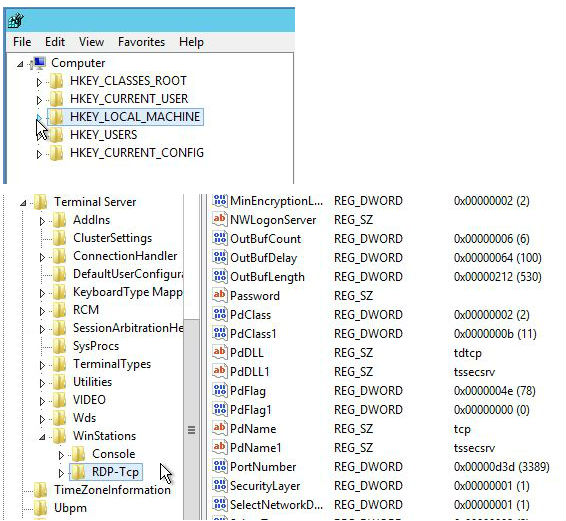
Navigate to the following Registry key
HKEY_LOCAL_MACHINE\System\CurrentControlSet\Control\TerminalServer\WinStations\RDP-Tcp\PortNumber

This is the registry path to change the RDP Port in Windows 2012
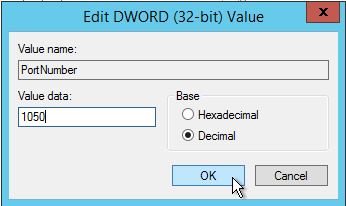
Find the “PortNumber” registry subkey and either right-click or double-click it. A box should pop that says “edit DWORD.” Find the value data (it should say 3389 for standard installations) and change it to the port that you would like. In this example, we chose port 1050.

This is the Port value field in the Windows Server 2012 Registry
Exit the registry editor
IMPORTANT: Before restarting your server, be sure that you have enabled your new RDP port on your Windows firewall. Take a look at our guide if you do not know how to add a custom firewall port “Adding a custom firewall rule.”
Restart your server
To access your server over the new port simply type in your IP followed by :PORT (YOUR.IP.ADD.RESS:PORT / 192.168.10.25:1050)
Congratulations! You have just changed RDP port in Windows Server 2012. Thank you for following along in this How-To, check back with us for any new updates and to learn more about our reliable VPS hosting services.