Redis, which stands for “remote dictionary server,” is a key-value store that stores data as key-value pairs. Redis is a NoSQL database, meaning it does not have tables, rows and columns like in MySQL and Oracle databases. It does not use INSERT, SELECT, UPDATE and DELETE. Instead of this, Redis uses data structures to store data. It uses five primary data structures including Strings, Lists, Sets, Sorted Sets, and Hashes, as well as three extra data structures including bitmaps, hyperloglogs and geospatial indexes. One of the most important features of Redis is that it is an in-memory database, meaning it keeps the data in memory, making it super-fast. However, Redis also has options to write the data to the disk.
In this tutorial, we will show you how to install and secure Redis on Ubuntu 18.04.
Install Redis Server
By default, the Redis package is available in the Ubuntu 18.04 server. You can install it with the following command:
apt-get install redis-server php-redis -y
After installing the Redis server, you will need to configure the Redis server to use the init system for managing Redis as a service. You can configure it by editing redis.conf file:
nano /etc/redis/redis.conf
Find the following line:
supervised no
Replace it with the following line:
supervised systemd
![]()
Save and close the file. Then, restart the Redis service to apply the changes:
systemctl restart redis
You can also check the status of the Redis service with the following command:
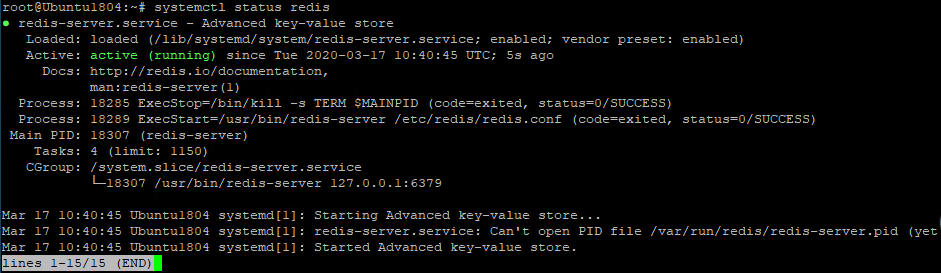
systemctl status redis
You should get the following output:
Verify Redis Server
It is recommended to test whether the Redis server is functioning as expected or not.
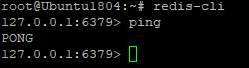
You can test it using the redis-cli command-line utility:
redis-cli
127.0.0.1:6379> ping
If everything is fine, you should get the following output:
PONG
You can now exit from the Redis shell with the following command:
exit
You can also check the version of the Redis with the following command:
redis-cli -v
Output:
redis-cli 4.0.9
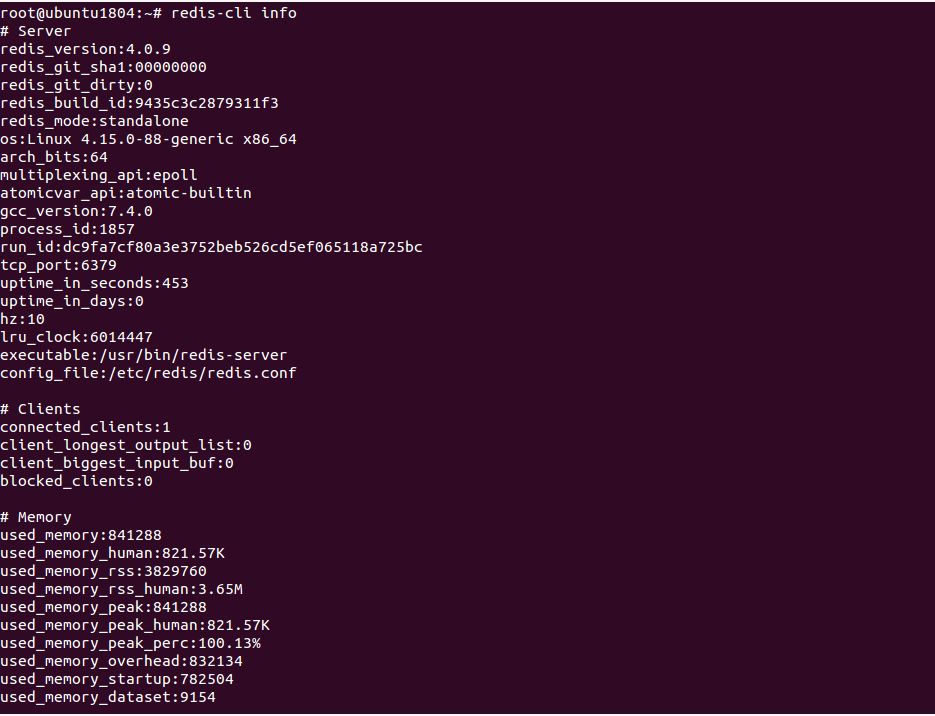
For more information about Redis, run the following command:
redis-cli info
You should see the following screen:
You can also verify the Redis listening port with the following command:
netstat -lnp | grep redis
You should see that Redis server is listening on localhost on port 6379:
![]()
Secure Redis with Password
By default, Redis can be accessed without any password. It is recommended to secure Redis with a password for security reasons.
First, generate a strong password with OpenSSL command as shown below:
openssl rand 60 | openssl base64 -A
You should see the following output (a password like this):
MGDCmmWh2Ot+aZDv7TBr54SY5PueoSAVhX41sApcOLWYBTlPrfe01OT/nqO0YWK/y0ROozsDi9Dw61jR
Now, paste your password in the Redis configuration file /etc/redis/redis.conf:
nano /etc/redis/redis.conf
Find the following line:
# requirepass foobared
Replace it with the following line:
requirepass MGDCmmWh2Ot+aZDv7TBr54SY5PueoSAVhX41sApcOLWYBTlPrfe01OT/nqO0YWK/y0ROozsDi9Dw61jR
Save and close the file. Then, restart the Redis service to apply the changes:
systemctl restart redis
Now, connect to the Redis command-line with the following command:
redis-cli

127.0.0.1:6379>
Now, run the following command to test whether the Redis password works:
127.0.0.1:6379> set test "How Are You"
You will get the following error because didn’t authenticate:
(error) NOAUTH Authentication required.
Now, authenticate Redis with the password as shown below:
127.0.0.1:6379> auth MGDCmmWh2Ot+aZDv7TBr54SY5PueoSAVhX41sApcOLWYBTlPrfe01OT/nqO0YWK/y0ROozsDi9Dw61jR
You should get the following output:
OK
Now, run the previous command again:
127.0.0.1:6379> set test "How Are You"
Output:
OK
Now, get the value of the test:
127.0.0.1:6379> get test
You should see the following output:
"How Are You"
After testing successfully, exit from the Redis command-line with the following command:
127.0.0.1:6379> exit
Rename Dangerous Commands
It is always a good idea to rename some dangerous commands including config, shutdown, flushdb, flushall and rename. These commands can destroy or wipe your data if run by mistake.
You can rename these commands by editing /etc/redis/redis.conf file:
nano /etc/redis/redis.conf
Add the following lines at the end of the file:
rename-command CONFIG ATLANTICCONFIG
rename-command FLUSHDB ATLANTICFLUSHDB
rename-command SHUTDOWN ATLANTICSHUTDOWN
rename-command FLUSHALL ATLANTICFLUSHALL
Save and close the file, then restart Redis service to implement the changes:
systemctl restart redis
To test the above commands, enter the Redis command line:
redis-cli
Now, authenticate Redis with the password as shown below:
127.0.0.1:6379> auth MGDCmmWh2Ot+aZDv7TBr54SY5PueoSAVhX41sApcOLWYBTlPrfe01OT/nqO0YWK/y0ROozsDi9Dw61jR
You should get the following output:
OK
Now, try to run the original CONFIG command as shown below:
127.0.0.1:6379> config get requirepass
You should get the following error:
(error) ERR unknown command 'config'
Now, try again with the renamed command:
127.0.0.1:6379> atlanticconfig get requirepass
You should see the following output:
1) "requirepass"
2) "MGDCmmWh2Ot+aZDv7TBr54SY5PueoSAVhX41sApcOLWYBTlPrfe01OT/nqO0YWK/y0ROozsDi9Dw61jR"
Conclusion
Congratulations! Your Redis server is now installed and secured. This method is compatible with Atlantic.Net VPS Hosting. For more information, you can visit the Redis documentation page.
* This post is for informational purposes only and does not constitute professional, legal, financial, or technical advice. Each situation is unique and may require guidance from a qualified professional.
Readers should conduct their own due diligence before making any decisions.