Table of Contents
Verified and Tested 03/31/2015
Introduction
This How-To will walk you through the Install of Application Server in Windows Server 2012.
Application Server is a feature that allows a combination of business applications for deployments and mode of operation within a network. It is mainly used in businesses that use ASP.NET, .NET Frameworks, and other web applications like IIS.
Installing Application Server on Windows Server 2012
Open the Server Manager from the taskbar.
From Server Manager Dashboard, select Add roles and features. This will launch the Roles and Features Wizard, allowing modifications to be performed on the Windows Server 2012 instance.
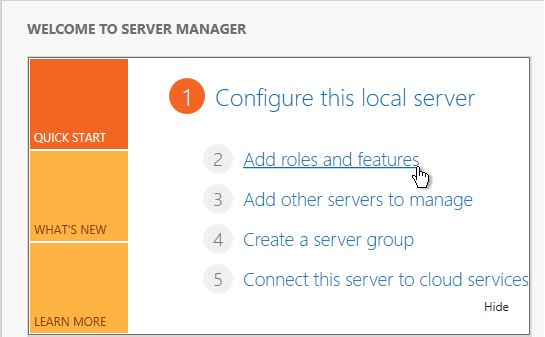
Server Manager
Note: If it is the first time you have entered this wizard, you will get a Before you Begin page. Review it, and you can check the Skip this page by default box, and then click Next.
Select Role-based or feature-based installation on the Installation Type screen and click Next.
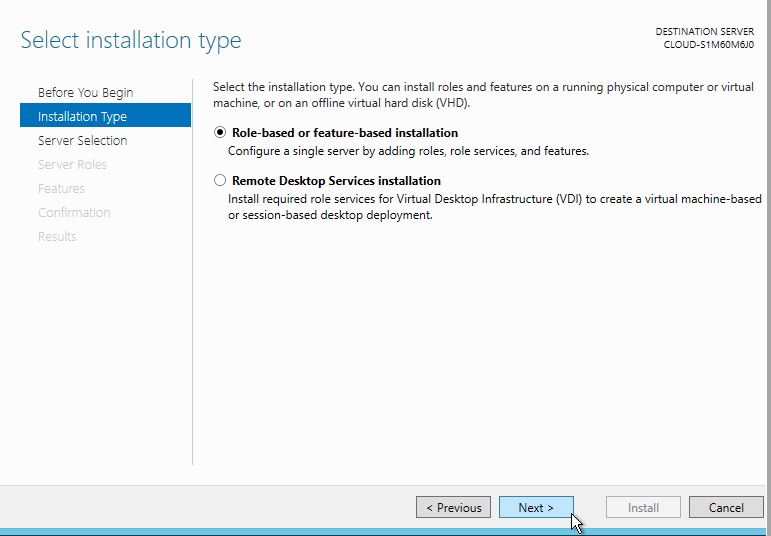
Installation type
You will now have the Select destination server page. Your server will be selected by default, so you can click Next to continue.
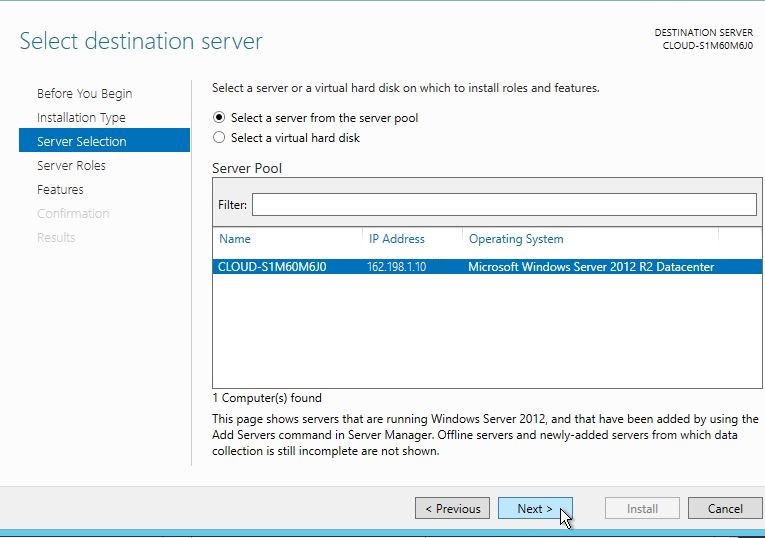
Server Selection
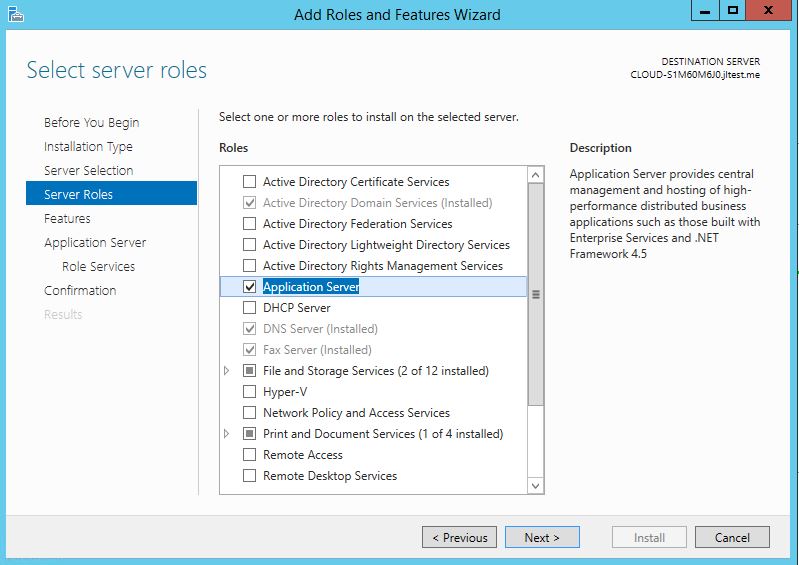
Server Roles
The Select Server Roles page appears. Select the Application Server check box, and then click Next.
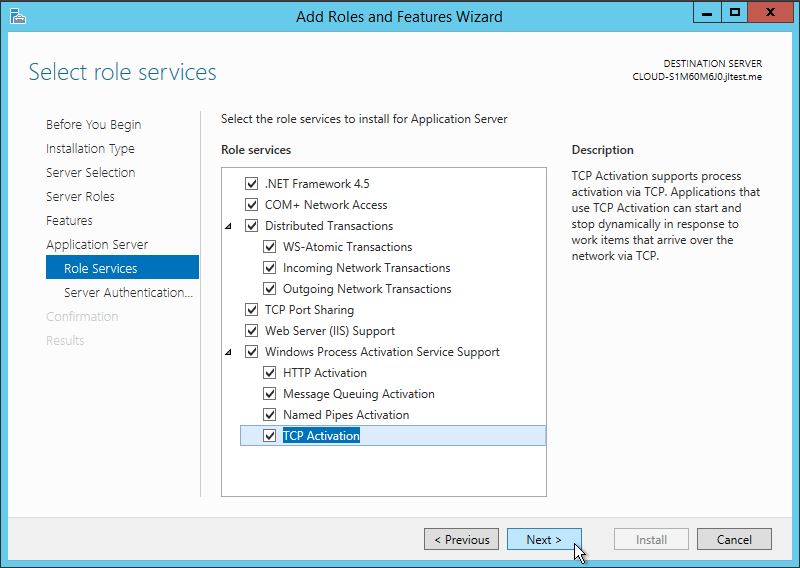
Application server: Role Services
Click Next in the Features Screen/ click Next in the Application Server Screen/ Select any additional Role in the Role Services(I selected all of them just in case I need them later down the road) and click Next.
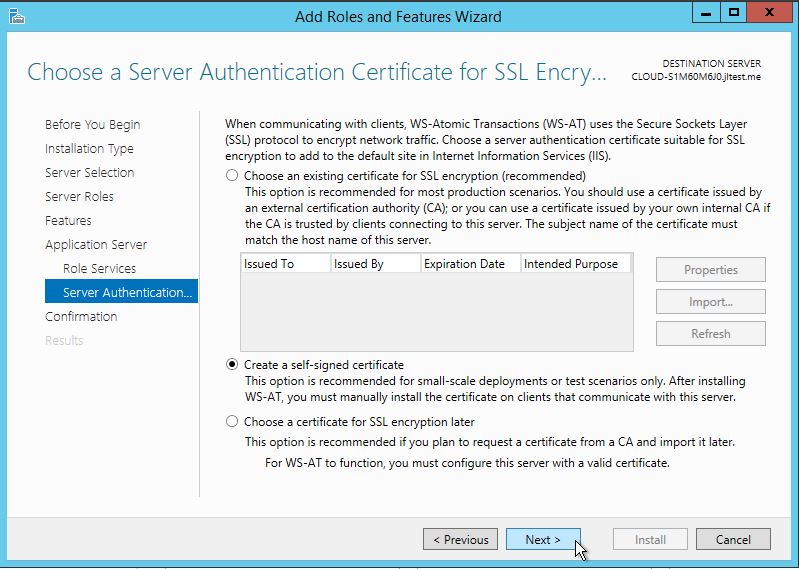
Server Authentication
In the Server Authentication screen, you have three options to choose from. In this case, I will be using the create a self-signed certificate. If you have an existing SSL, select the first option, and if you plan to request one, later on, choose the third option.
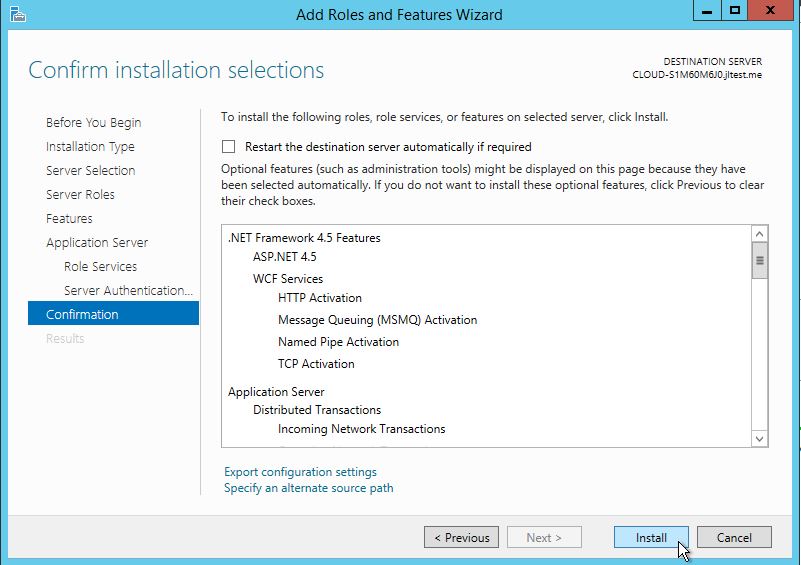
Confirm Installation
Confirm your InstaInstallationclick Install.
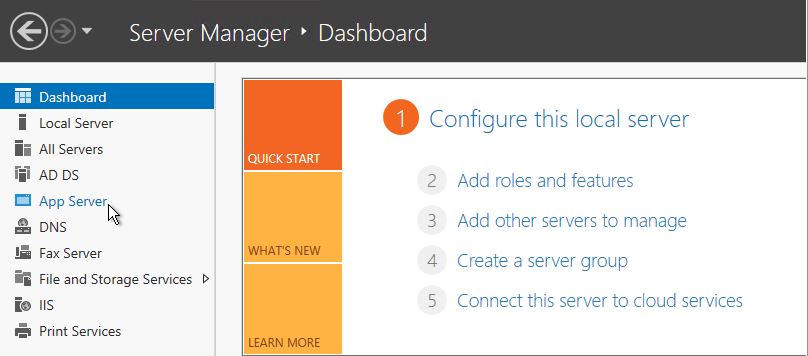
Server Manager
You can now see that the App Server role is currently installed in your Server Manager Screen.
Congratulations! You have just Installed the Application Server in Windows Server 2012. Thank you for reading! Check out more of our exciting Windows-related How-to’s, and learn more about our VPS hosting services and Virtual private servers.