Free and open-source FreePBX is the world’s most popular communications software system for configuring, controlling, and managing Asterisk PBX software. It comes with a graphical user interface that helps beginner users to manage VOIP via a web browser. FreePBX offer includes lots of functionality including VoIP, PBX, Fax, IVR, voice-mail, and email functions. It is designed for application developers, students, hackers, systems integrators, and others who want to create custom solutions with Asterisk.
In this post, we will show you how to install FreePBX on Fedora.
Step 1 – Install Required Dependencies
Before starting, you will need to install some dependencies required to build the FreePBX system. You can install all of them using the following command.
dnf update -y
dnf -y groupinstall  "Development Tools"
dnf install -y  gcc-c++ libedit-devel uuid-devel libuuid-devel autoconf automake libtool ncurses-devel sendmail sendmail-cf newt-devel libxml2-devel libtiff-devel gtk2-devel subversion kernel-devel git crontabs cronie cronie-anacron wget vim sqlite-devel net-tools gnutls-devel unixODBC
Next, you will also need to install the Jansson package on your system. You can compile it with the following command.
git clone https://github.com/akheron/jansson.git
cd jansson
autoreconf -i
./configure --prefix=/usr/
make
make install
Step 2 – Install Asterisk Server
Asterisk is a core part of any VOIP software, so you will need to download and compile it in your system. First, visit the Asterisk official download page and download the latest version of Asterisk using the following command.
wget http://downloads.asterisk.org/pub/telephony/asterisk/asterisk-20-current.tar.gz
Once the download is completed, extract the downloaded file using the following command.
tar xvfz asterisk-20-current.tar.gz
Next, navigate to the Asterisk directory and configure it with the following command.
cd asterisk-20.3.0
./configure --libdir=/usr/lib64
Output:
configure: Menuselect build configuration successfully completed

               .$$$$$$$$$$$$$$$=..
            .$7$7..          .7$$7:.
          .$$:.                 ,$7.7
        .$7.     7$$$$           .$$77
     ..$$.       $$$$$            .$$$7
    ..7$   .?.   $$$$$   .?.       7$$$.
   $.$.   .$$$7. $$$$7 .7$$$.      .$$$.
 .777.   .$$$$$$77$$$77$$$$$7.      $$$,
 $$$~      .7$$$$$$$$$$$$$7.       .$$$.
.$$7          .7$$$$$$$7:          ?$$$.
$$$          ?7$$$$$$$$$$I        .$$$7
$$$       .7$$$$$$$$$$$$$$$$      :$$$.
$$$       $$$$$$7$$$$$$$$$$$$    .$$$.
$$$        $$$   7$$$7  .$$$    .$$$.
$$$$             $$$$7         .$$$.
7$$$7            7$$$$        7$$$
 $$$$$                        $$$
  $$$$7.                       $$  (TM)
   $$$$$$$.           .7$$$$$$  $$
     $$$$$$$$$$$$7$$$$$$$$$.$$$$$$
       $$$$$$$$$$$$$$$$.

configure: Package configured for:
configure: OS type  : linux-gnu
configure: Host CPU : x86_64
configure: build-cpu:vendor:os: x86_64 : pc : linux-gnu :
configure: host-cpu:vendor:os: x86_64 : pc : linux-gnu :
Next, run the following command to install additional modules.
make menuselect
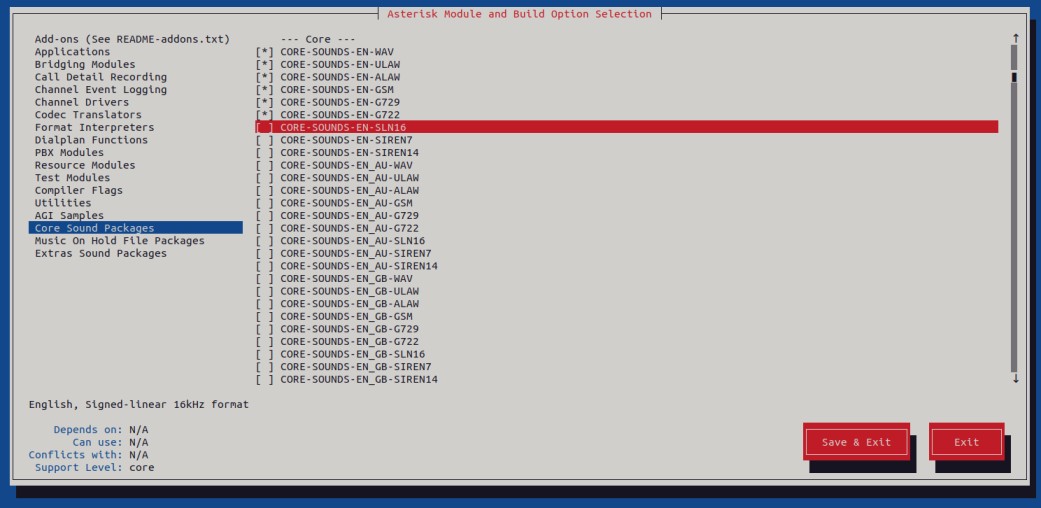
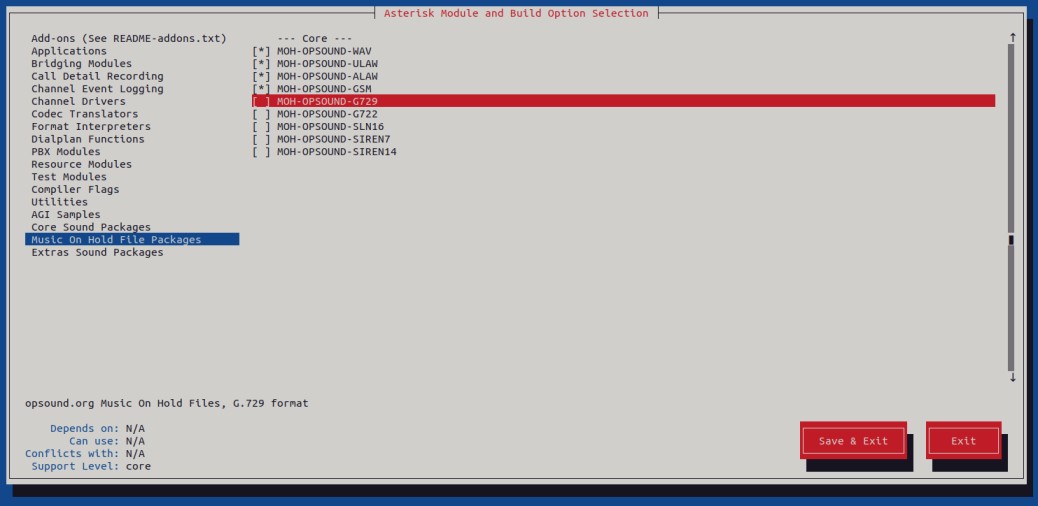
You should see the following screen.
Core Sound Module
MOH Module
Extra Sound Module
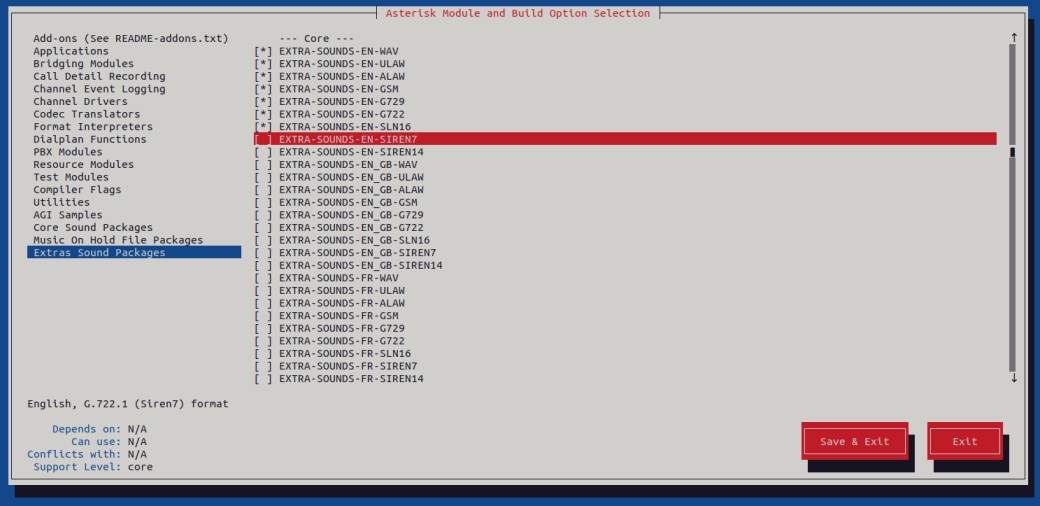
Use the up and down arrow keys to select and install all additional modules. Once you are done, click on the Save and Exit button to save the changes.
Next, run the following command to install other required packages.
./contrib/scripts/install_prereq install
./contrib/scripts/get_mp3_source.sh
Finally, install Asterisk using the following commands.
make
make install
Next, generates an Asterisk configuration file using the following command.
make samples
make config
ldconfig
Step 3 – Configure Asterisk
First, create a dedicated user and group for Asterisk.
groupadd asterisk
useradd -r -d /var/lib/asterisk -g asterisk asterisk
Next, add the Asterisk user to the audio and dialout group.
usermod -aG audio,dialout asterisk
Next, set proper ownership to the Asterisk configuration directories.
chown -R asterisk.asterisk /etc/asterisk /var/{lib,log,spool}/asterisk /usr/lib64/asterisk
Next, edit the Asterisk configuration file.
nano /etc/sysconfig/asterisk
Uncomment and change the following line.
AST_USER="asterisk"
AST_GROUP="asterisk"
Next, edit another configuration file.
nano /etc/asterisk/asterisk.conf
Uncomment and change the following line.
runuser = asterisk ; The user to run as.
rungroup = asterisk ; The group to run as.
Save and close the file, then reload the systemd daemon to implement the changes.
systemctl daemon-reload
Next, start and enable the Asterisk service.
systemctl start asterisk
systemctl enable asterisk
Next, verify the Asterisk connection with the following command.
asterisk -rvv
If everything is fine, you will get the following output.
Asterisk 20.3.0, Copyright (C) 1999 - 2022, Sangoma Technologies Corporation and others.
Created by Mark Spencer <[email protected]>
Asterisk comes with ABSOLUTELY NO WARRANTY; type 'core show warranty' for details.
This is free software, with components licensed under the GNU General Public
License version 2 and other licenses; you are welcome to redistribute it under
certain conditions. Type 'core show license' for details.
=========================================================================
Running as user 'asterisk'
Running under group 'asterisk'
Connected to Asterisk 20.3.0 currently running on freepbx (pid = 112072)
freepbx*CLI>
Now, exit from the Asterisk console.
exit
Step 4 – Install the LAMP Server
Next, you will need to install Apache, MariaDB, and PHP on your server. You can install all of them using the following command.
dnf install mariadb mariadb-server httpd php php-pear php-cgi php-common php-curl php-mbstring php-gd php-mysqlnd php-gettext php-bcmath php-zip php-xml php-json php-process php-snmp
Next, edit the PHP configuration file and define max_upload size.
nano /etc/php.ini
Change the following line.
upload_max_filesize = 20M
Next, modify another PHP configuration using the following command.
sed -i 's/\(^memory_limit = \).*/\1128M/' /etc/php.ini
sed -i 's/^\(User\|Group\).*/\1 asterisk/' /etc/httpd/conf/httpd.conf
sed -i 's/AllowOverride None/AllowOverride All/' /etc/httpd/conf/httpd.conf
sed -i 's/\(^user = \).*/\1asterisk/' /etc/php-fpm.d/www.conf
sed -i 's/\(^group = \).*/\1asterisk/' /etc/php-fpm.d/www.conf
sed -i 's/\(^listen.acl_users = \).*/\1apache,nginx,asterisk/' /etc/php-fpm.d/www.conf
Next, start and enable, Apache, MariaDB, and PHP-FPM services.
systemctl start php-fpm httpd mariadb
systemctl enable php-fpm httpd mariadb
Next, install Node.js and NPM using the following command.
dnf install nodejs npm
Step 5 – Install and Configure FreePBX
First, download the latest version of FreePBX from their official website.
wget http://mirror.freepbx.org/modules/packages/freepbx/freepbx-16.0-latest.tgz
Once the FreePBX is downloaded, extract the downloaded file.
tar vxfz freepbx-16.0-latest.tgz
Next, navigate to the FreePBX directory and stop the Asterisk service.
cd freepbx
systemctl stop asterisk
Next, start the Asterisk service using the following command.
./start_asterisk start
Next, install the FreePBX with the following command.
./install --webroot=/var/www/html -n
You will see the following output.
Setting Permissions...
Setting base permissions...Done in 1 seconds
Setting specific permissions...
 50724 [============================]
Finished setting permissions
Generating default configurations...
Finished generating default configurations
You have successfully installed FreePBX
Next, delete Firewall and install other packages with the following command.
fwconsole ma disablerepo commercial
fwconsole ma installall
fwconsole ma delete firewall
Next, reload and restart the fwconsole with the following command.
fwconsole reload
fwconsole restart
Step 6 – Create a Systemd Service for FreePBX
Next, create a systemd service for FreePBX with the following command.
nano /etc/systemd/system/freepbx.service
Add the following configuration.
[Unit]
Description=FreePBX VoIP Server
After=mariadb.service
[Service]
Type=oneshot
RemainAfterExit=yes
ExecStart=/usr/sbin/fwconsole start -q
ExecStop=/usr/sbin/fwconsole stop -q
[Install]
WantedBy=multi-user.target
Save and close the file, then reload the systemd daemon to apply the changes.
systemctl daemon-reload
Next, start and enable FreePBX with the following command.
systemctl start freepbx
systemctl enable freepbx
You can verify the status of FreePBX using the following command.
systemctl status freepbx
Output.
● freepbx.service - FreePBX VoIP Server
     Loaded: loaded (/etc/systemd/system/freepbx.service; disabled; vendor preset: disabled)
     Active: active (exited) since Mon 2023-06-05 11:56:26 EDT; 6s ago
    Process: 129579 ExecStart=/usr/sbin/fwconsole start -q (code=exited, status=0/SUCCESS)
   Main PID: 129579 (code=exited, status=0/SUCCESS)
        CPU: 19.129s

Jun 05 11:56:23 freepbx runuser[129849]: pam_unix(runuser:session): session closed for user asterisk
Jun 05 11:56:23 freepbx runuser[129860]: pam_unix(runuser:session): session opened for user asterisk(uid=992) by (uid=0)
Jun 05 11:56:24 freepbx runuser[129860]: pam_unix(runuser:session): session closed for user asterisk
Jun 05 11:56:24 freepbx runuser[129887]: pam_unix(runuser:session): session opened for user asterisk(uid=992) by (uid=0)
Jun 05 11:56:24 freepbx runuser[129887]: pam_unix(runuser:session): session closed for user asterisk
Jun 05 11:56:24 freepbx runuser[129919]: pam_unix(runuser:session): session opened for user asterisk(uid=992) by (uid=0)
Jun 05 11:56:25 freepbx runuser[129919]: pam_unix(runuser:session): session closed for user asterisk
Jun 05 11:56:25 freepbx runuser[129942]: pam_unix(runuser:session): session opened for user asterisk(uid=992) by (uid=0)
Jun 05 11:56:26 freepbx runuser[129942]: pam_unix(runuser:session): session closed for user asterisk
Jun 05 11:56:26 freepbx systemd[1]: Finished FreePBX VoIP Server.
Step 7 – Access FreePBX Web UI
Now, open your web browser and access the FreePBX web interface using the URL http://your-server-ip. You should see the FreePBX configuration page.
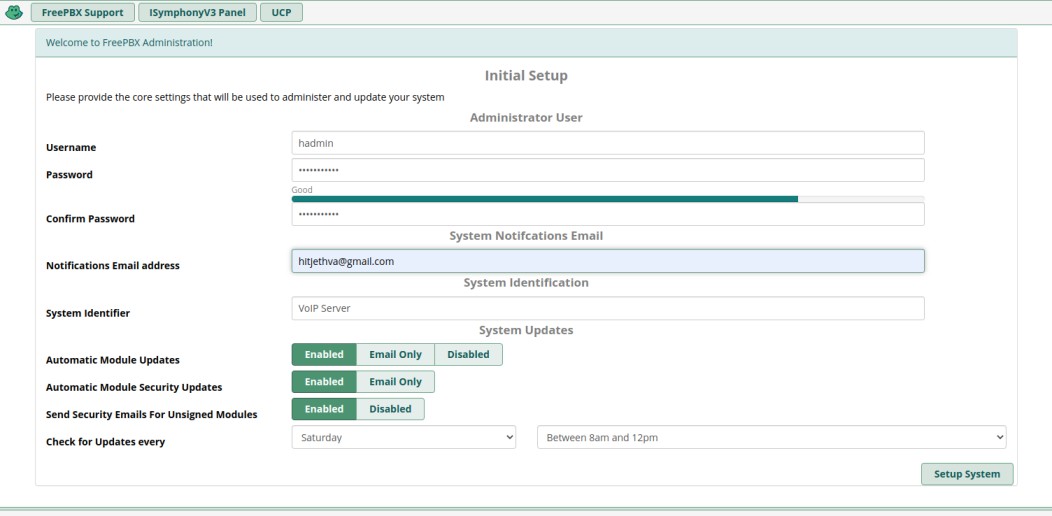
Set your admin user account and click on the Setup System button. You should see the following screen:
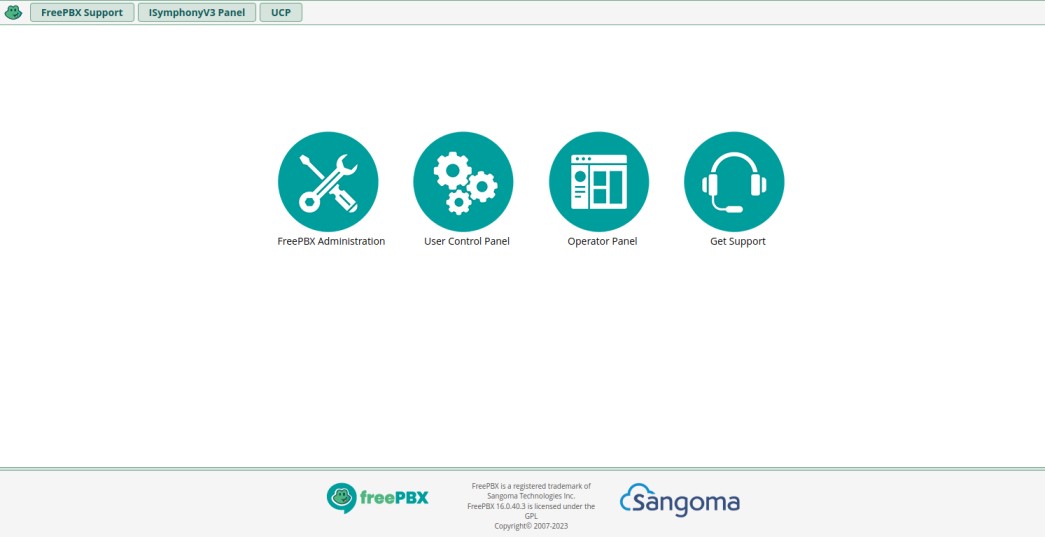
Click on the FreePBX Administration. You should see the FreePBX login screen:
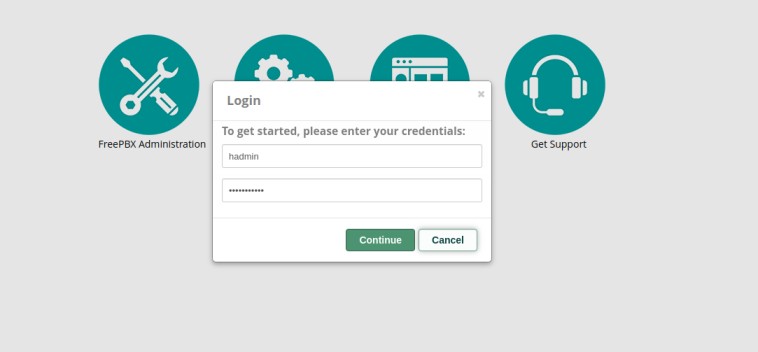
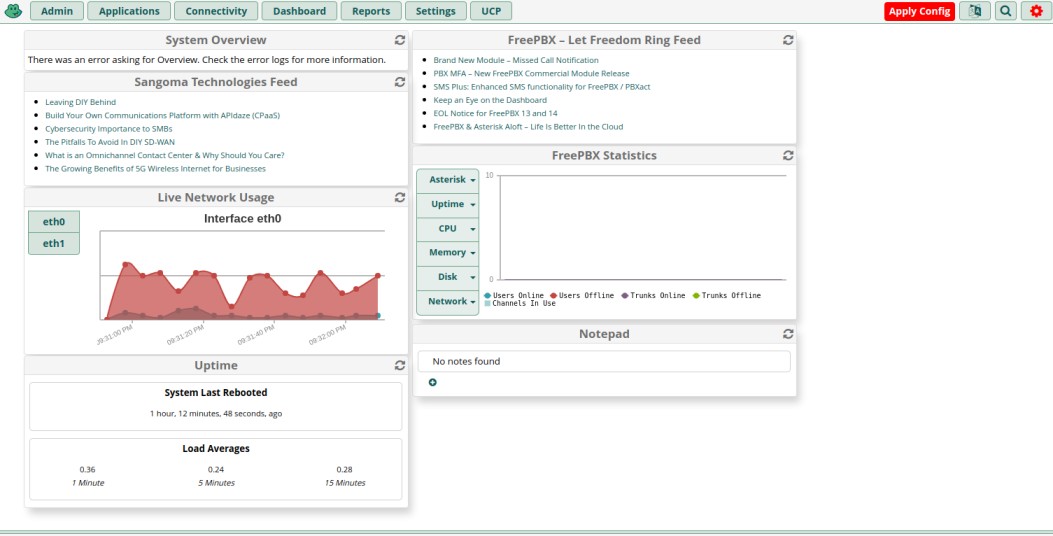
Provide your admin username, password, and click on the Continue button. You should see the FreePBX dashboard on the following screen:
Conclusion
In this guide, we explained how to install FreePBX with Asterisk on Fedora. You can now deploy FreePBX in your local environment, build your own VOIP server, and start making free calls to other users. Try to install and deploy FreePBX on VPS hosting from Atlantic.Net!
* This post is for informational purposes only and does not constitute professional, legal, financial, or technical advice. Each situation is unique and may require guidance from a qualified professional.
Readers should conduct their own due diligence before making any decisions.