phpBB is a free and open-source bulletin board software solution written in the PHP scripting language. It is one of the most popular CMS platforms used by thousands of professionals around the globe. phpBB supports file attachments, full-text search, notifications, and more. Its aim is to connect groups of people to come together to have discussions, share information, and learn from each other.
This post will show you how to install phpBB forum software on Fedora Linux.
Step 1 – Install LEMP Server
First, install the Nginx and MariaDB server using the following command.
dnf install nginx mariadb-server -y
Once installed, add the PHP Remi repo to your system.
dnf install -y http://rpms.remirepo.net/fedora/remi-release-34.rpm
dnf module install php:remi-8.1
Next, install the PHP with other required packages on your server.
dnf install php php-mysqlnd php-fpm php-xml php-cli php-soap php-opcache php-iconv php-pear php-bcmath php-gd php-mbstring php-json php-devel unzip wget -y
yum --enablerepo=remi install php-intl php-sodium php-zip
Once all the packages are installed, edit the PHP configuration file and change some default settings.
nano /etc/php.ini
Change the following lines.
max_execution_time = 180
max_input_time = 90
memory_limit = 256M
upload_max_filesize = 64M
Next, edit the PHP-FPM configuration file and change the user and group from apache to nginx.
nano /etc/php-fpm.d/www.conf
Change the following lines:
user = nginx
group = nginx
Save and close the file. Then, start and enable the Nginx, MariaDB, and PHP-FPM services.
systemctl start nginx mariadb php-fpm
systemctl enable nginx mariadb php-fpm
Step 2 – Create a phpBB Database and User
phpBB uses MariaDB/MySQL as a database backend, so you will need to create a database and user for phpBB.
First, connect to the MariaDB shell.
mysql
Once you are connected, create a database and user for phpBB.
CREATE DATABASE phpbb;
CREATE USER 'phpbbuser'@'localhost' IDENTIFIED BY 'password';
GRANT ALL ON phpbb.* TO 'phpbbuser'@'localhost' IDENTIFIED BY 'password' WITH GRANT OPTION;
Next, flush the privileges and exit from the MariaDB shell.
FLUSH PRIVILEGES;
EXIT;
Step 3 – Download phpBB Software
First, download the latest version of phpBB using the following command.
wget https://download.phpbb.com/pub/release/3.3/3.3.10/phpBB-3.3.10.zip
Once the download is completed, unzip the downloaded file.
unzip phpBB-3.3.10.zip
Then, move the extracted directory to the Nginx web root directory.
mv phpBB3 /var/www/html/phpbb
Next, install the Composer PHP dependency manager using the following command.
dnf install composer
Next, navigate to the phpBB directory.
cd /var/www/html/phpbb
Then, remove the default vendor directory and install other PHP dependencies using Composer.
rm -rf vendor
composer install
Next, change the permission and ownership of the phpBB directory.
chown -R nginx:nginx /var/www/html/phpbb
chmod -R 775 /var/www/html/phpbb
Step 4 – Configure Nginx for phpBB
Next, create an Nginx virtual host configuration file.
nano /etc/nginx/conf.d/phpbb.conf
Add the following configurations:
server {
   listen 80;
   server_name phpbb.example.com;
   root /var/www/html/phpbb;
   index index.php index.html index.htm;

    access_log /var/log/nginx/phpbb-access.log;
    error_log /var/log/nginx/phpbb-error.log;

location / {
	try_files $uri $uri/ @rewriteapp;

	# Pass the php scripts to FastCGI server specified in upstream declaration.
	location ~ \.php(/|$) {
		include fastcgi.conf;
                fastcgi_pass unix:/run/php-fpm/www.sock;
		fastcgi_split_path_info ^(.+\.php)(/.*)$;
		fastcgi_param PATH_INFO $fastcgi_path_info;
		fastcgi_param SCRIPT_FILENAME $realpath_root$fastcgi_script_name;
		fastcgi_param DOCUMENT_ROOT $realpath_root;
		try_files $uri $uri/ /app.php$is_args$args;
		fastcgi_intercept_errors on;
	}

	# Deny access to internal phpbb files.
	location ~ /(config\.php|common\.php|cache|files|images/avatars/upload|includes|(?<!ext/)phpbb(?!\w+)|store|vendor) {
		deny all;
		# deny was ignored before 0.8.40 for connections over IPv6.
		# Use internal directive to prohibit access on older versions.
		internal;
	}
}

location @rewriteapp {
	rewrite ^(.*)$ /app.php/$1 last;
}

# Correctly pass scripts for installer
location /install/ {
	try_files $uri $uri/ @rewrite_installapp =404;

	# Pass the php scripts to fastcgi server specified in upstream declaration.
	location ~ \.php(/|$) {
		include fastcgi.conf;
                fastcgi_pass unix:/run/php-fpm/www.sock;
		fastcgi_split_path_info ^(.+\.php)(/.*)$;
		fastcgi_param PATH_INFO $fastcgi_path_info;
		fastcgi_param SCRIPT_FILENAME $realpath_root$fastcgi_script_name;
		fastcgi_param DOCUMENT_ROOT $realpath_root;
		try_files $uri $uri/ /install/app.php$is_args$args =404;
		fastcgi_intercept_errors on;
	}
}

location @rewrite_installapp {
	rewrite ^(.*)$ /install/app.php/$1 last;
}

# Deny access to version control system directories.
location ~ /\.svn|/\.git {
	deny all;
	internal;
}

 gzip on;
 gzip_comp_level 6;
 gzip_min_length 1000;
 gzip_proxied any;
 gzip_disable "msie6";
 gzip_types
     application/atom+xml
     application/geo+json
     application/javascript
     application/x-javascript
     application/json
     application/ld+json
     application/manifest+json
     application/rdf+xml
     application/rss+xml
     application/xhtml+xml
     application/xml
     font/eot
     font/otf
     font/ttf
     image/svg+xml
     text/css
     text/javascript
     text/plain
     text/xml;

  # assets, media
  location ~* \.(?:css(\.map)?|js(\.map)?|jpe?g|png|gif|ico|cur|heic|webp|tiff?|mp3|m4a|aac|ogg|midi?|wav|mp4|mov|webm|mpe?g|avi|ogv|flv|wmv)$ {
      expires    90d;
      access_log off;
  }

  # svg, fonts
  location ~* \.(?:svgz?|ttf|ttc|otf|eot|woff2?)$ {
      add_header Access-Control-Allow-Origin "*";
      expires    90d;
      access_log off;
  }
}
Save and close the file, then edit the Nginx main configuration file.
nano /etc/nginx/nginx.conf
Add the following line after the http{:
server_names_hash_bucket_size 64;
Save and close the file, then restart the Nginx service to apply the changes.
systemctl restart nginx
Step 5 – Access phpBB Forum
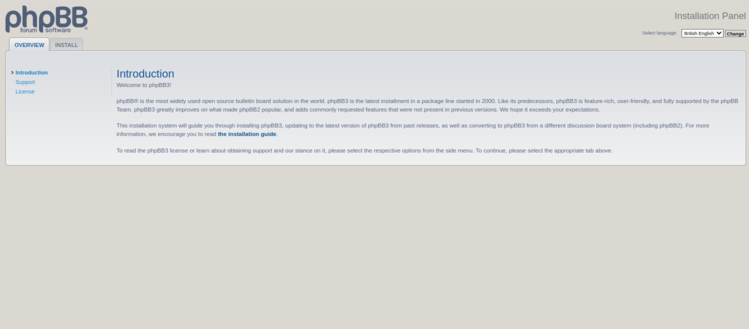
Now, open your web browser and access the phpBB forum using the URL http://phpbb.example.com. You will see the following screen.
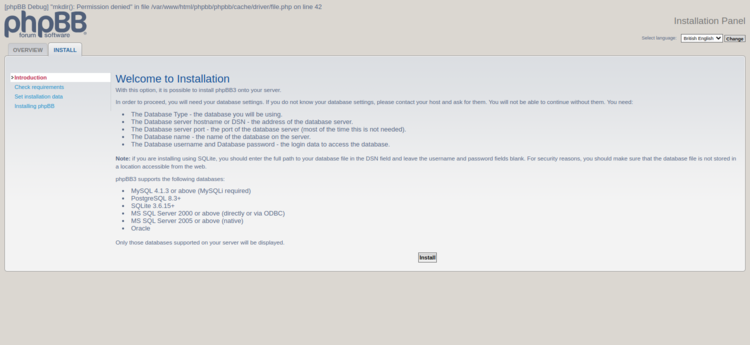
Click on the INSTALL tab. You will see the following screen.
Click on the Install button. You will see the admin user configuration screen.
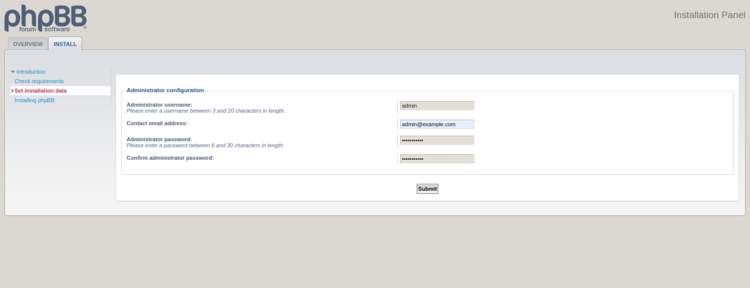
Define your admin username and password and click on the Submit button. You will see the database configuration screen.
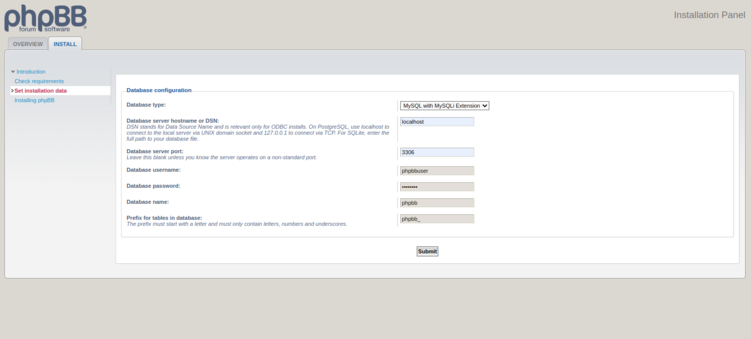
Provide your database configuration and click on Submit. You will see the server configuration screen.
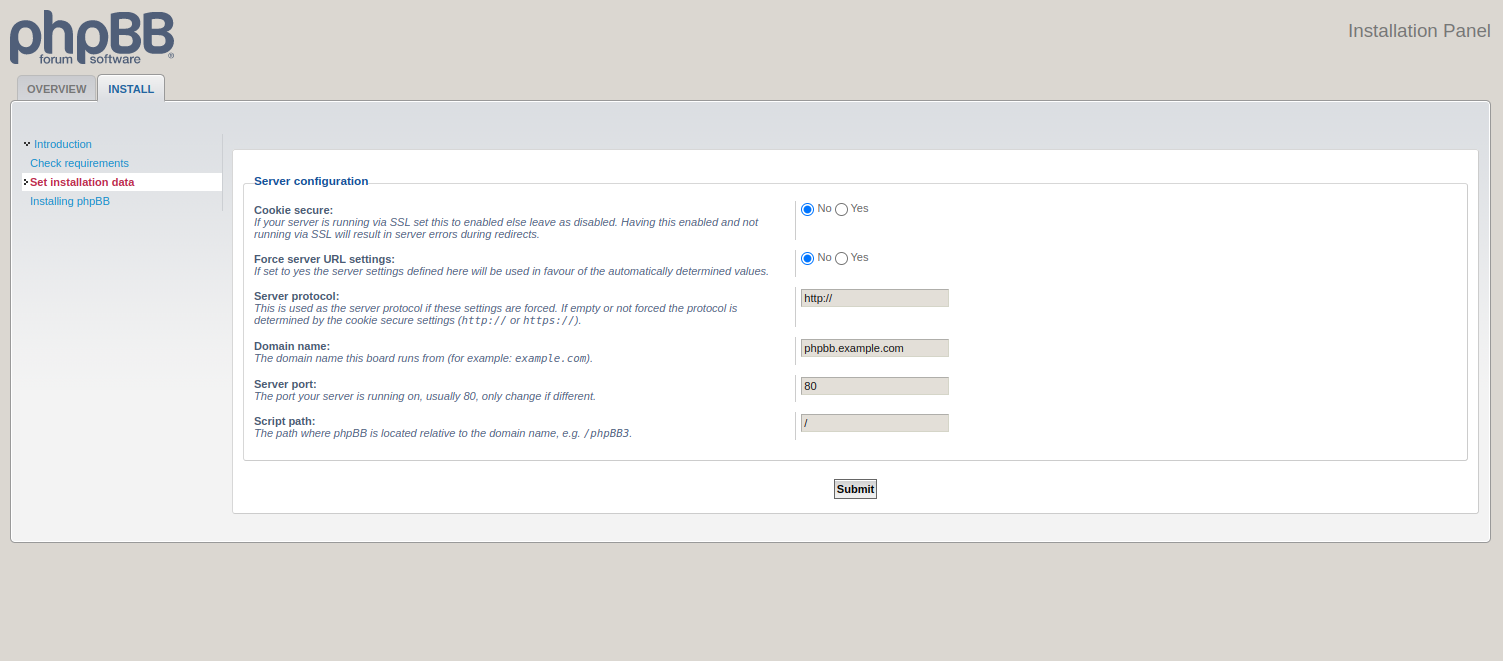
Provide your server URL and protocol and click on Submit. You will see the SMTP configuration screen.
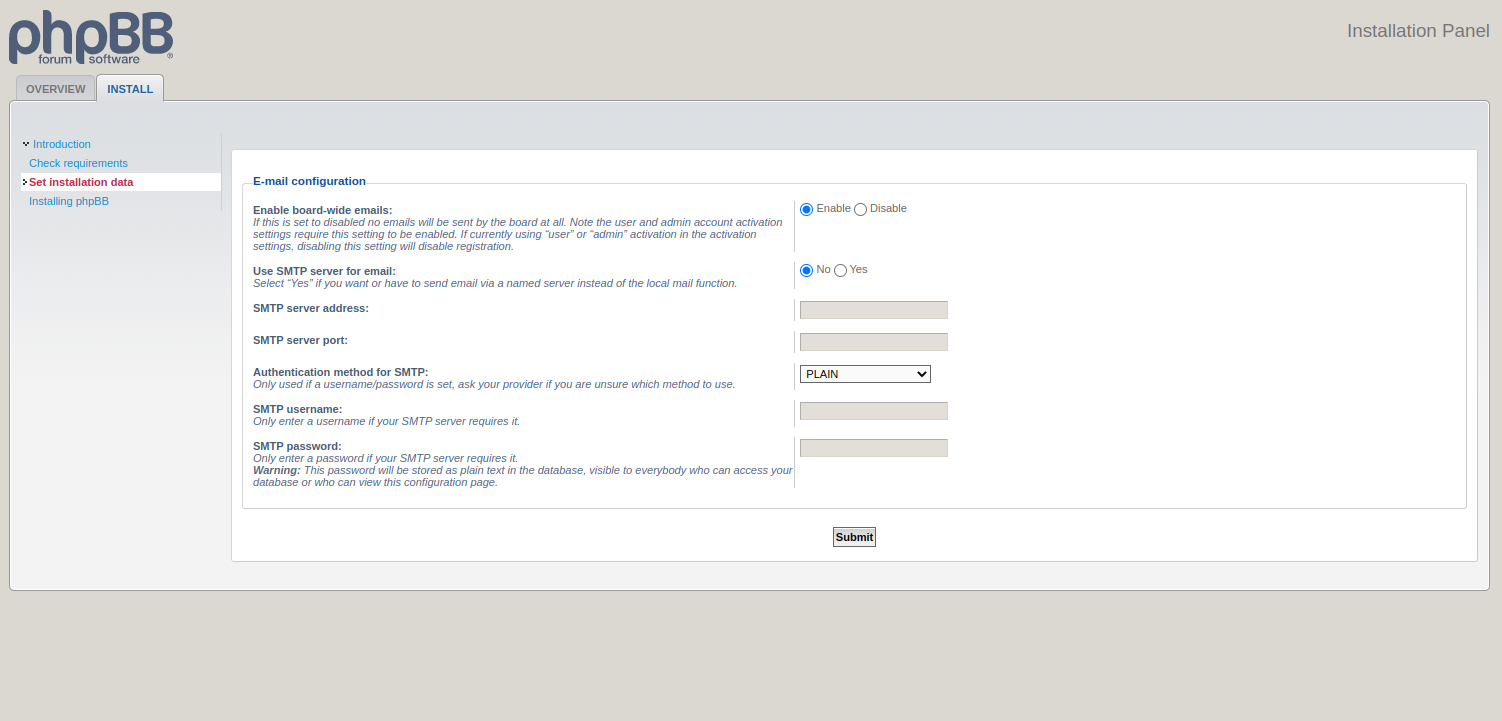
Define your mail server information and click on Submit. You will see the board configuration screen.
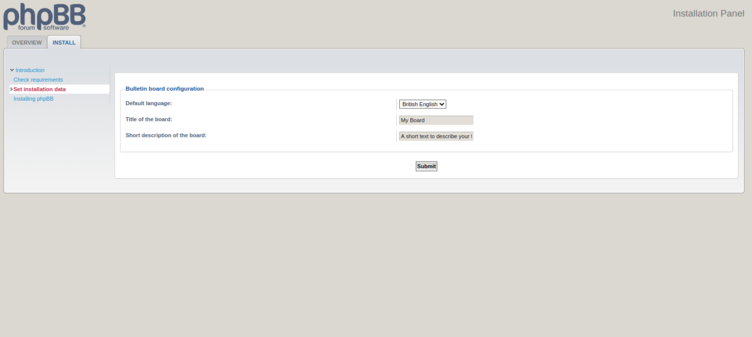
Provide your board information and click on Submit. You will see the following screen.
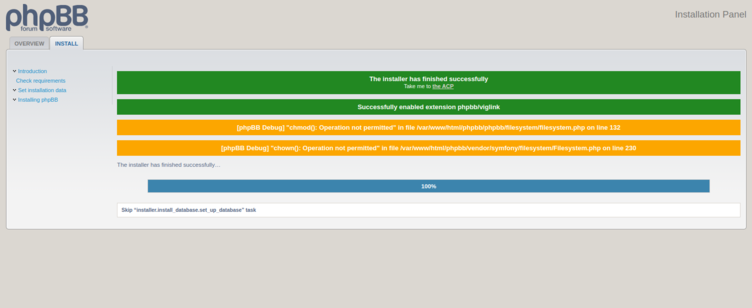
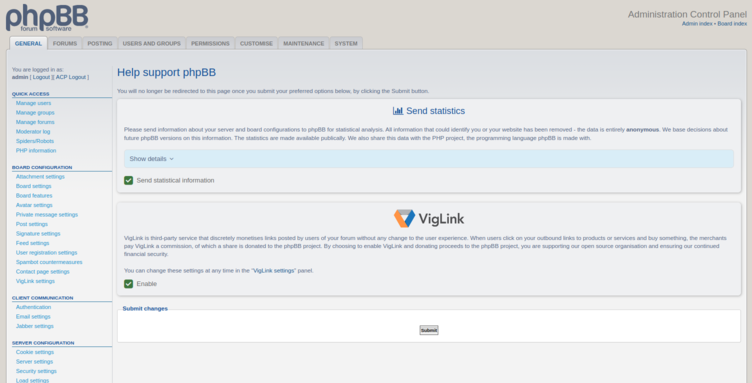
Click on Take me to the ACP. You will see the phpBB on the following screen.
Conclusion
In this post, we explained how to install phpBB forum software on Fedora Linux. You can now explore the phpBB forum, try its features, and implement your own online forum on the web. Try testing the phpBB forum on VPS hosting from Atlantic.Net!
* This post is for informational purposes only and does not constitute professional, legal, financial, or technical advice. Each situation is unique and may require guidance from a qualified professional.
Readers should conduct their own due diligence before making any decisions.