TYPO3 is an open-source and platform-independent content management system that allows users to post and maintain their content on the web. It is based on PHP and used for Web Content Management (WCM) and Enterprise Content Management (ECM). It is compatible with many operating systems like Linux, Windows, macOS, and OS/2. If you are looking for an open-source digital content publishing platform, then TYPO3 is the best option for you.
This post will show you how to install TYPO3 CMS on Fedora Linux.
Step 1 – Install Apache, MariaDB, and PHP
Let’s start with installing the Apache and MariaDB server on your system.
dnf install httpd mariadb-server -y
Next, add the PHP Remi repo to get the latest PHP version.
dnf install -y http://rpms.remirepo.net/fedora/remi-release-34.rpm
dnf module install php:remi-8.1
Next, install PHP with additional PHP extensions using the following command.
dnf install php php-mysqlnd php-fpm php-xml php-cli php-soap php-opcache php-iconv php-pear php-bcmath php-gd php-mbstring php-json php-devel unzip wget -y

yum --enablerepo=remi install php-intl php-zip
Next, edit the PHP configuration file.
nano /etc/php.ini
Change the following values.
memory_limit = 512M
max_execution_time = 300
max_input_vars = 2000

date.timezone = UTC

post_max_size = 30M
upload_max_filesize = 30M
Save and close the file then start and enable the Apache and MariaDB service using the following command.
systemctl start httpd mariadb
systemctl enable httpd mariadb
Step 2 – Create a Database for TYPO3
Now, connect to the MariaDB console using the command given below.
mysql
Once you are connected, create a database and user for TYPO3.
create database typo3cms CHARACTER SET utf8mb4 COLLATE utf8mb4_unicode_ci;
create user 'typo3cms'@localhost identified by 'password';
grant all privileges on typo3cms.* to 'typo3cms'@localhost;
Next, flush the privileges and exit from the MariaDB using the following command.
flush privileges;
exit;
Step 3 – Install TYPO3
First, download the latest version of TYPO3 CMS using the following command.
curl -L -o typo3_src.tgz https://get.typo3.org/12.4.4
Once the download is completed, extract the downloaded file.
tar -xvzf typo3_src.tgz
Next, move the extracted directory to the Apache web root.
mv typo3_src-12.4.4 /var/www/html/typo3
Next, change the ownership of the TYPO3 directory.
chown -R apache:apache /var/www/html/typo3
Step 4 – Configure Apache for TYPO3
Next, create an Apache virtual host configuration file for TYPO3.
nano /etc/httpd/conf.d/typo3.conf
Add the following configurations:
<VirtualHost *:80>
    ServerAdmin [email protected]
    DocumentRoot /var/www/html/typo3/
    ServerName typo3.example.com

    Protocols h2 http/1.1

     <Directory /var/www/html/typo3/>
          Options FollowSymlinks
          AllowOverride All
          Require all granted
     </Directory>

     ErrorLog /var/log/httpd/typo3-error.log
     CustomLog /var/log/httpd/typo3-access.log combined

     <Directory /var/www/html/typo3/>
            RewriteEngine on
            RewriteBase /
            RewriteCond %{REQUEST_FILENAME} !-f
            RewriteRule ^(.*) index.php [PT,L]
    </Directory>
</VirtualHost>
Save and close the file, then restart the Apache service to apply the changes.
systemctl restart httpd
Step 5 – Access TYPO3 CMS
Before accessing the TYPO3 web installation wizard, create a blank file inside the TYPO3 CMS directory.
touch /var/www/html/typo3/FIRST_INSTALL
Next, open your web browser and access the TYPO3 CMS using the URL http://typo3.example.com. You will see the following screen.
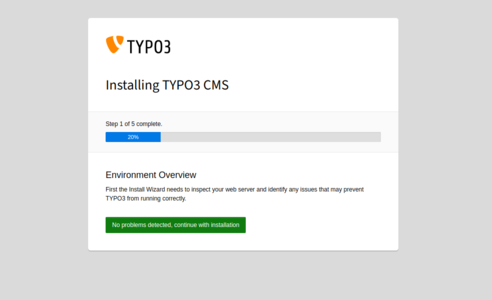
Click on “No problem detected, continue with the installation”. You will see the database setup screen.
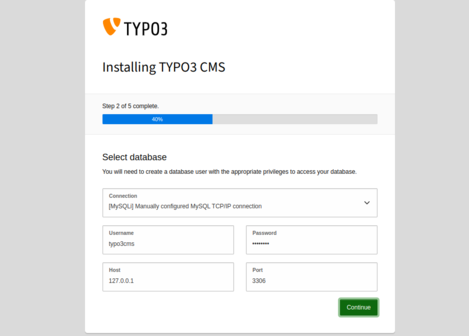
Define your database username and password and click on the Continue button. You will see the following screen.
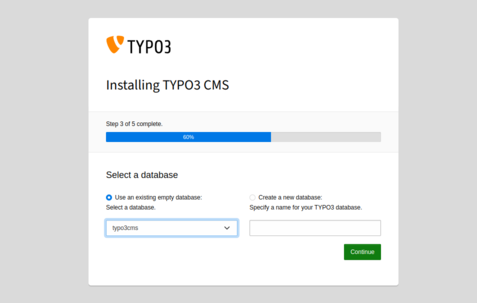
Select your database and click on the Continue button. You will see the TYPO3 account configuration screen.
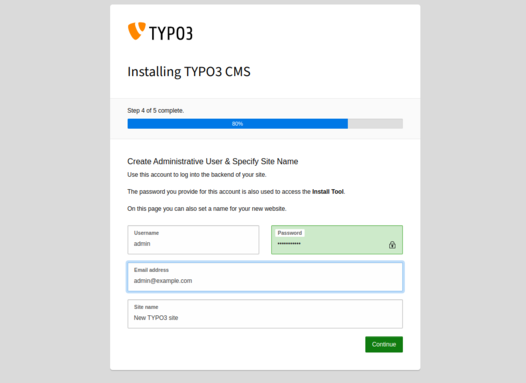
Define your admin username, password, and email, then click on Continue. Once the installation is completed, you will see the following screen.
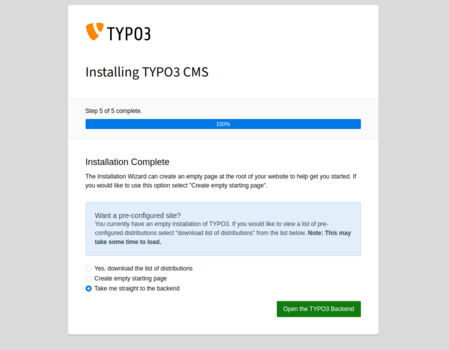
Select Take me to the backend and click on Open the TYPO3 Backend. You will see the TYPO3 CMS login screen.
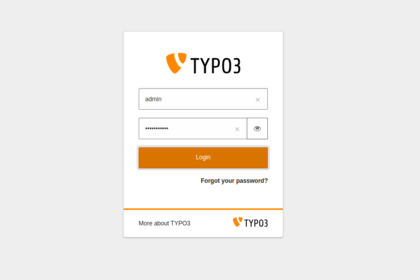
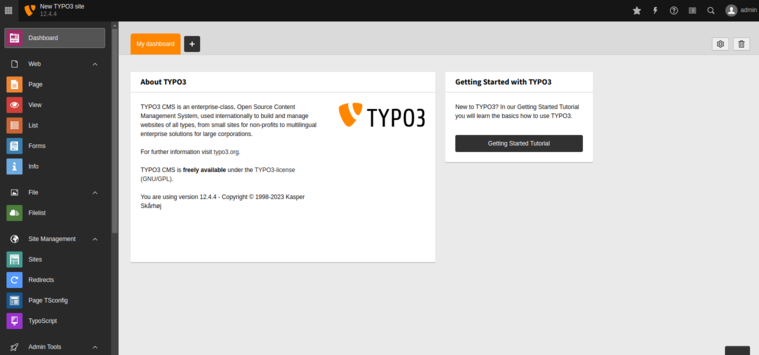
Provide your admin username and password and click on Login. You will see the TYPO3 dashboard on the following screen.
Conclusion
Congratulations! You have successfully installed TYPO3 CMS on Fedora Linux. You can now explore the TYPO3 dashboard, test all its features, and start implementing it in your organization. You can now try TYPO3 CMS on VPS hosting from Atlantic.Net!
* This post is for informational purposes only and does not constitute professional, legal, financial, or technical advice. Each situation is unique and may require guidance from a qualified professional.
Readers should conduct their own due diligence before making any decisions.