Introduction
This tutorial will show you how to make a website on the Vesta Control Panel. Vesta Control Panel is a free open source control panel that is an excellent alternative to cPanel. Creating a website on Vesta is a straightforward process, but it can be cumbersome if you have never done it.
Prerequisites
A server with Vesta Control Panel installed. If you do not have one, you can follow this guide.
If you would like to use a domain name, log in to your registrar’s control panel and point the domain name to your server’s IP. Otherwise, you can use your server’s IP address.
Create a Website on Vesta Control Panel
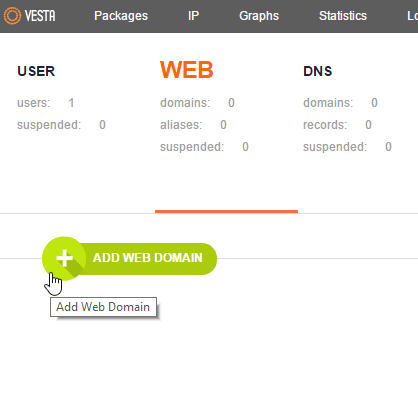
After logging into the Vesta Control Panel, look towards the top of the Vesta dashboard and click the Web link like the picture below.

Note: If this is the first time logging into your Vesta Control Panel, you may see a default web domain. You can delete it if you would like.
To add a new site, click the green plus icon to add a new Domain.

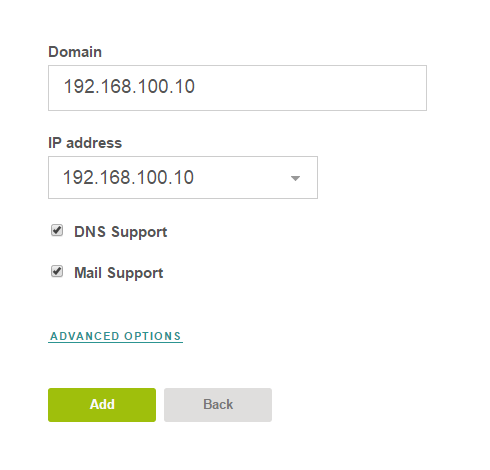
Now you can enter your domain name or your server’s IP address in the domain field. In our example, we are going to use the IP address. Once you have entered your information, click Add.

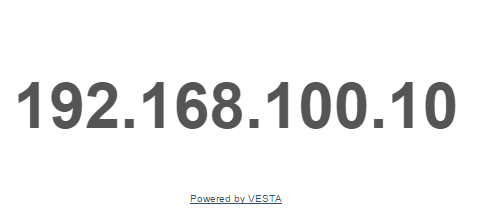
We can now test your new site by going to your browser’s IP address or domain name. You should get a test page similar to the one below.

You can now FTP to your server and add your site to the public_html folder. Your public_html file should be located in the following directory:
/web/your-ip-domain-name/public_html
In our example, it is:
/web/192.168.100.10/public_html
You can get a simple FTP client called Filezilla here if you need one.
Congratulations! You have just created a website on the Vesta control panel. Thank you for following this guide! Be sure to check back here for updates.
Atlantic.Net
Atlantic.Net offers VPS hosting and dedicated server hosting solutions, which include a layer of business-essential managed services to your hosting packages. Contact us today for more information.