Node.js is an open-source, cross-platform, JavaScript runtime environment that can be used to run JavaScript outside the web browser. It is most commonly used to build web applications with real-time, two-way connections, where both the client and server can initiate communication, allowing them to exchange data freely. Node.js uses an event-driven, non-blocking I/O model that makes it perfect for data-intensive applications that run across distributed devices.
In this tutorial, we will install Node.js and configure it to run as a backend server; then, we will configure Apache as frontend proxy server for Node.js.
Step 1 – Install Node.js
By default, the latest version of the Node.js is not available in the CentOS 8, so you will need to add Node.js repository in your system.
You can install the Node.js repository using the following command:
curl --silent --location https://rpm.nodesource.com/setup_18.x | bash -
Once the repository is installed, you can install Node.js by simply running the following command:
dnf install nodejs -y
Once the installation has been completed, you can verify the installed version of Node.js with the following command:
node -v
You should get the following output:
v18.19.0
You can also check the NPM version with the following command:
npm -v
You should get the following output:
10.2.3
Step 2 – Create a Sample Node.js Application
First, let’s create a directory to hold the Node.js application:
mkdir project
Next, change the directory to project and create a sample Node.js application with the following command:
cd project
nano app.js
Add the following contents:
var http = require('http');
http.createServer(function (req, res) {
  res.writeHead(200, {'Content-Type': 'text/plain'});
  res.end('Welcome to Node.js Server');
}).listen(8080, "127.0.0.1");
console.log('Server running at http://127.0.0.1:8080/');
Save and close the file when you are finished.
Your Node.js application is now ready to serve on port 8080. Next, start the application with the following command:
node app.js
You should get the following output:
Server running at http://127.0.0.1:8080/
The above output indicates that your Node.js application is working properly.
Next, press CTRL + C to stop the application.
Step 3 – Install and Configure PM2 to Manage Node.js Application
PM2 is a process manager for the Node.js application. It allows you to keep Node.js application alive forever, to manage Node.js, to reload Node.js without downtime, and to facilitate common system admin tasks.
You can install it using the NPM as shown below:
npm i -g pm2
After installing PM2, change the directory to the project and start the Node.js application with PM2 as shown below:
pm2 start app.js
Once the application has been started successfully, you should get the following output:
                        -------------

__/\\\\\\\\\\\\\____/\\\\____________/\\\\____/\\\\\\\\\_____
 _\/\\\/////////\\\_\/\\\\\\________/\\\\\\__/\\\///////\\\___
  _\/\\\_______\/\\\_\/\\\//\\\____/\\\//\\\_\///______\//\\\__
   _\/\\\\\\\\\\\\\/__\/\\\\///\\\/\\\/_\/\\\___________/\\\/___
    _\/\\\/////////____\/\\\__\///\\\/___\/\\\________/\\\//_____
     _\/\\\_____________\/\\\____\///_____\/\\\_____/\\\//________
      _\/\\\_____________\/\\\_____________\/\\\___/\\\/___________
       _\/\\\_____________\/\\\_____________\/\\\__/\\\\\\\\\\\\\\\_
        _\///______________\///______________\///__\///////////////__


                          Runtime Edition

        PM2 is a Production Process Manager for Node.js applications
                     with a built-in Load Balancer.

                Start and Daemonize any application:
                $ pm2 start app.js

                Load Balance 4 instances of api.js:
                $ pm2 start api.js -i 4

                Monitor in production:
                $ pm2 monitor

                Make pm2 auto-boot at server restart:
                $ pm2 startup

                To go further checkout:
                http://pm2.io/

                        -------------

[PM2] Spawning PM2 daemon with pm2_home=/root/.pm2
[PM2] PM2 Successfully daemonized
[PM2] Starting /root/project/app.js in fork_mode (1 instance)
[PM2] Done.

┌─────┬────────┬─────────────┬─────────┬─────────┬──────────┬────────┬──────┬───────────┬──────────┬──────────┬──────────┬──────────┐
│ id  │ name   │ namespace   │ version │ mode    │ pid      │ uptime │ ↺    │ status    │ cpu      │ mem      │ user     │ watching │
├─────┼────────┼─────────────┼─────────┼─────────┼──────────┼────────┼──────┼───────────┼──────────┼──────────┼──────────┼──────────┤
│ 0   │ app    │ default     │ N/A     │ fork    │ 1437     │ 0s     │ 0    │ online    │ 0%       │ 31.1mb   │ root     │ disabled │
└─────┴────────┴─────────────┴─────────┴─────────┴──────────┴────────┴──────┴───────────┴──────────┴──────────┴──────────┴──────────┘
Next, enable the Node.js application to start at boot time with the following command:
pm2 startup
This command will create a systemd service file for the Node.js application and enable it to start after system reboot as shown below:
[PM2] Init System found: systemd
Platform systemd
Template
[Unit]
Description=PM2 process manager
Documentation=https://pm2.keymetrics.io/
After=network.target

[Service]
Type=forking
User=root
LimitNOFILE=infinity
LimitNPROC=infinity
LimitCORE=infinity
Environment=PATH=/usr/local/sbin:/usr/local/bin:/usr/sbin:/usr/bin:/root/bin:/bin:/usr/local/sbin:/usr/local/bin:/usr/sbin:/usr/bin
Environment=PM2_HOME=/root/.pm2
PIDFile=/root/.pm2/pm2.pid
Restart=on-failure

ExecStart=/usr/lib/node_modules/pm2/bin/pm2 resurrect
ExecReload=/usr/lib/node_modules/pm2/bin/pm2 reload all
ExecStop=/usr/lib/node_modules/pm2/bin/pm2 kill

[Install]
WantedBy=multi-user.target

Target path
/etc/systemd/system/pm2-root.service
Command list
[ 'systemctl enable pm2-root' ]
[PM2] Writing init configuration in /etc/systemd/system/pm2-root.service
[PM2] Making script booting at startup...
[PM2] [-] Executing: systemctl enable pm2-root...
Created symlink /etc/systemd/system/multi-user.target.wants/pm2-root.service → /etc/systemd/system/pm2-root.service.
[PM2] [v] Command successfully executed.
+---------------------------------------+
[PM2] Freeze a process list on reboot via:
$ pm2 save

[PM2] Remove init script via:
$ pm2 unstartup systemd
You can also list your active application with the following command:
pm2 list
You should get the following output:
┌─────┬────────┬─────────────┬─────────┬─────────┬──────────┬────────┬──────┬───────────┬──────────┬──────────┬──────────┬──────────┐
│ id  │ name   │ namespace   │ version │ mode    │ pid      │ uptime │ ↺    │ status    │ cpu      │ mem      │ user     │ watching │
├─────┼────────┼─────────────┼─────────┼─────────┼──────────┼────────┼──────┼───────────┼──────────┼──────────┼──────────┼──────────┤
│ 0   │ app    │ default     │ N/A     │ fork    │ 1437     │ 104s   │ 0    │ online    │ 0.1%     │ 39.7mb   │ root     │ disabled │
└─────┴────────┴─────────────┴─────────┴─────────┴──────────┴────────┴──────┴───────────┴──────────┴──────────┴──────────┴──────────┘
Step 4 – Configure Apache as a Frontend Proxy for Node.js
Next, you will need to install and configure the Apache webserver as a frontend server to access the Node.js application.
First, install the Apache webserver with the following command:
dnf install httpd -y
Next, create an Apache virtual host configuration file for Node.js application with the following command:
nano /etc/httpd/conf.d/example.conf
Add the following lines:
<VirtualHost *:80>
        ServerAdmin [email protected]
        ServerName node.example.com
        ErrorLog /var/log/httpd/error.log
        CustomLog /var/log/httpd/access.log combined
        ProxyRequests On
        ProxyPass / http://localhost:8080
        ProxyPassReverse / http://localhost:8080
</VirtualHost>
Save and close the file when you are finished. Then, start the Apache webserver and enable it to start at reboot with the following command:
systemctl start httpd
systemctl enable httpd
Step 5 – Access Node.js Application
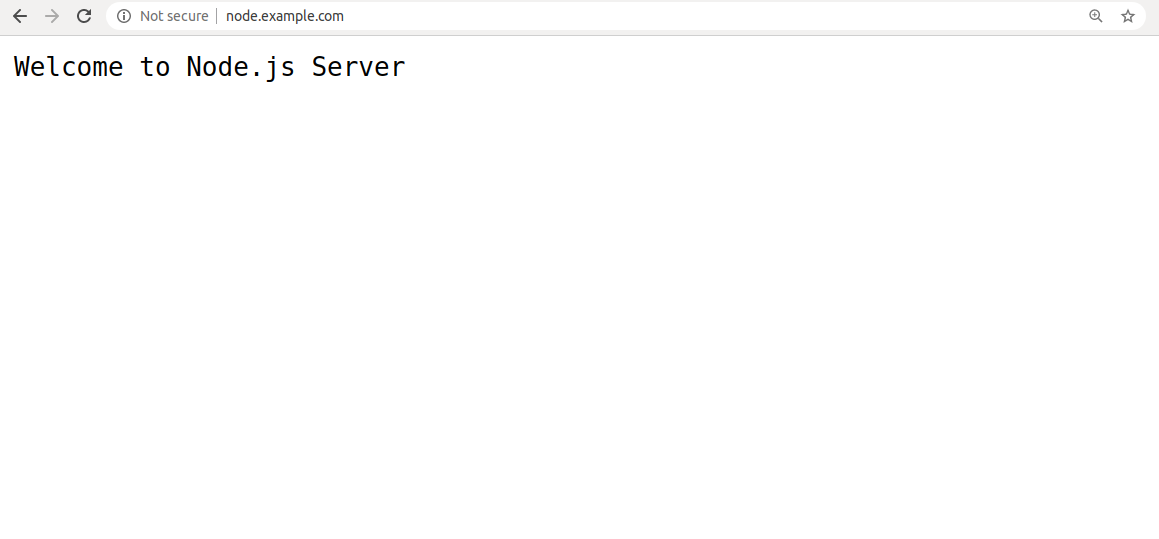
At this point, the Apache webserver is configured to access the Node.js application. Next, open your web browser and type the URL http://node.example.com. You will be redirected to the Node.js application page as shown below:
Conclusion
Congratulations! You have successfully deployed Node.js application with Apache as a frontend server. You can now start building your Node.js application for the production environment – try it on VPS hosting from Atlantic.Net!
