Table of Contents
- Install Netstat
- List All Connection
- List Only TCP Connections
- List Only UDP Connections
- List All Listening Connections
- List Only TCP Listening Connections
- List Only UDP Listening Connections
- List Only Unix Listening Connection
- List All Connections with PID and Process Name
- Display Service Name with PID and UID
- Display Interface Statistics
- Display Routing Information
- Display IPv4 and IPv6 information
- Disable Hostname Lookup
- Display Help Information
- Conclusion
Netstat, which stands for “network statistics,” is a network command-line utility that displays network connections, routing tables, network interface and network protocol statistics. It is very useful for checking your network configuration and activity. You can also get detailed information of which services are listening on which port and the details of any connections currently made to them. This tool is available in most versions of Windows, Linux, Unix, Solaris and BSD. Netstat helps a system administrator troubleshoot network-related problems and determine network traffic performance.
In this tutorial, we will show you some useful netstat command-line tips and tricks.
Install Netstat
By default, the netstat utility comes pre-installed in most Linux operating systems. If not installed, you can install it by running the following command:
apt-get install net-tools -y
List All Connection
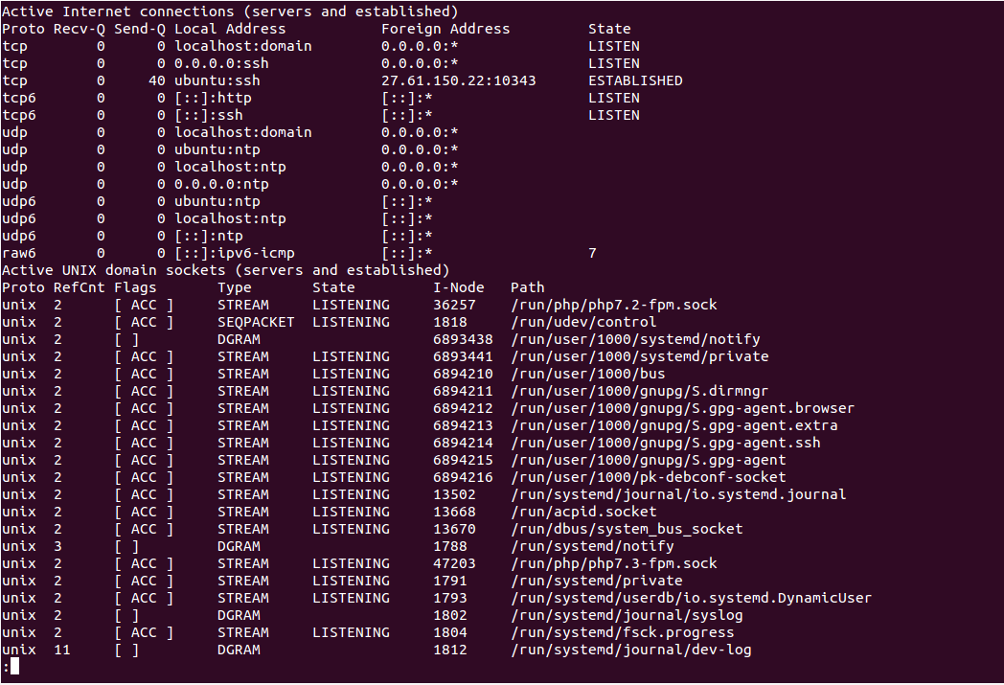
You can list all TCP and UDP connections with listening and non-listening ports by using the option -a:
netstat -a
You should see the following screen:
List Only TCP Connections
To list only TCP connections, use the option -at as shown below:
netstat -at
You should see the following screen:
List Only UDP Connections
To list only UDP connections, use the option -ut as shown below:
netstat -ut
You should see the following screen:
List All Listening Connections
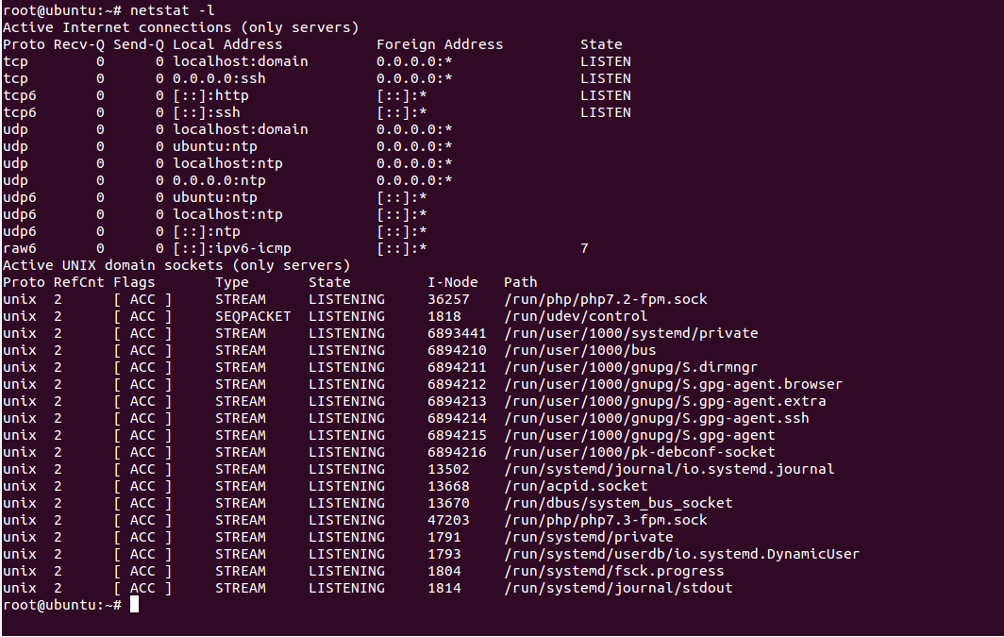
You can print only listening connections using the option -l as shown below:
netstat -l
You should see the following screen:
List Only TCP Listening Connections
To list only active TCP connections, use the option -lt as shown below:
netstat -lt
You should see the following screen:
List Only UDP Listening Connections
To list only active UDP connections, use the option -lu as shown below:
netstat -lu
You should see the following screen:
List Only Unix Listening Connection
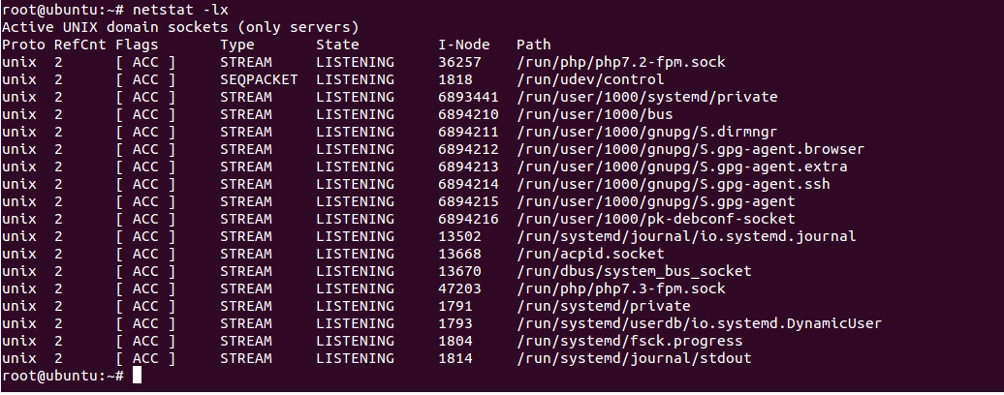
To list only listening UNIX Ports, use the option -lx as shown below:
netstat -lx
You should see the following screen:
List All Connections with PID and Process Name
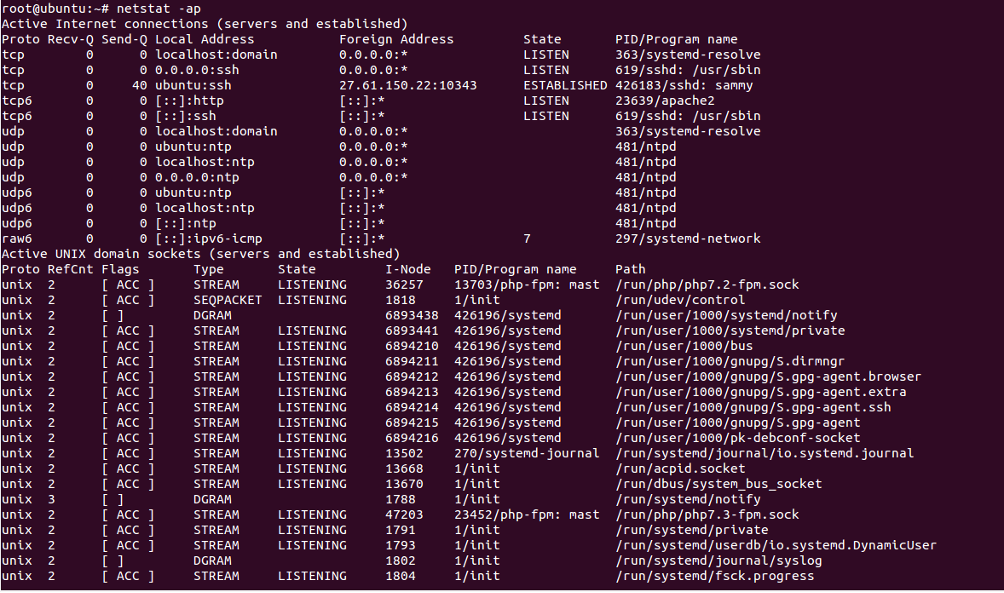
If you want to get a list of all connections with PID and process name, use the option -ap as shown below:
netstat -ap
You should see the following screen:
Display Service Name with PID and UID
To display service name with PID and UID, use the option -tp as shown below:
netstat -nlpt
You should see the following screen:
Display Interface Statistics
To display statistics about the network interface, use option -i as shown below:
netstat -i
You should see the following screen:
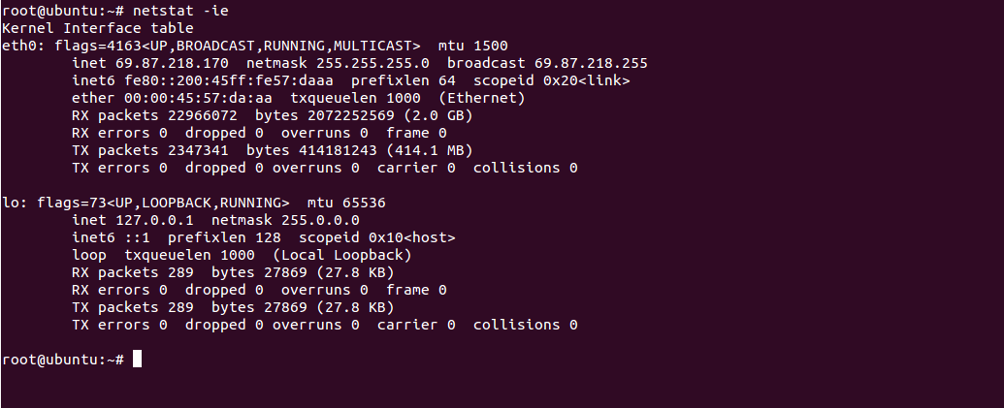
You can also print information about your network interface using the option -ie as shown below:
netstat -ie
You should see the following screen:
Display Routing Information
To display information about network routing, use the option -r as shown below:
netstat -r
You should see the following screen:
Display IPv4 and IPv6 information
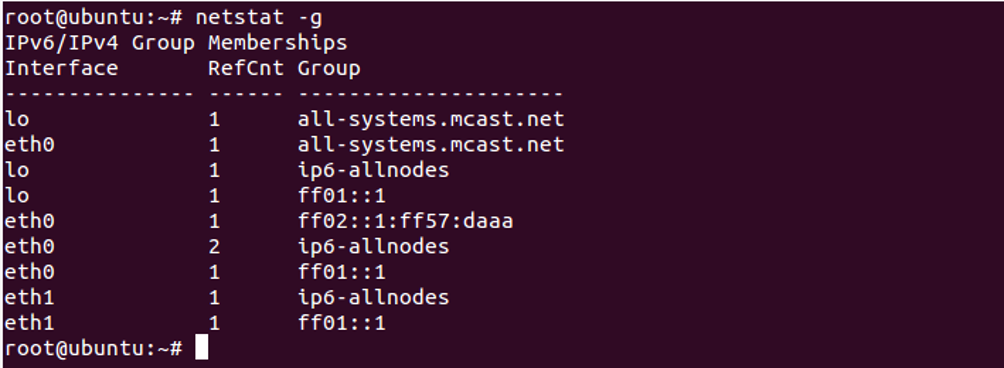
To display multicast information for both IPv4 and IPv6 protocols, use the option -g as shown below:
netstat -g
You should see the following screen:
Disable Hostname Lookup
When you run a netstat command, it will try to find the hostname of each connection. This will slow down your output. You can disable hostname lookup and display only IP address by running the following command:
netstat -ant
You should see the following screen:
Display Help Information
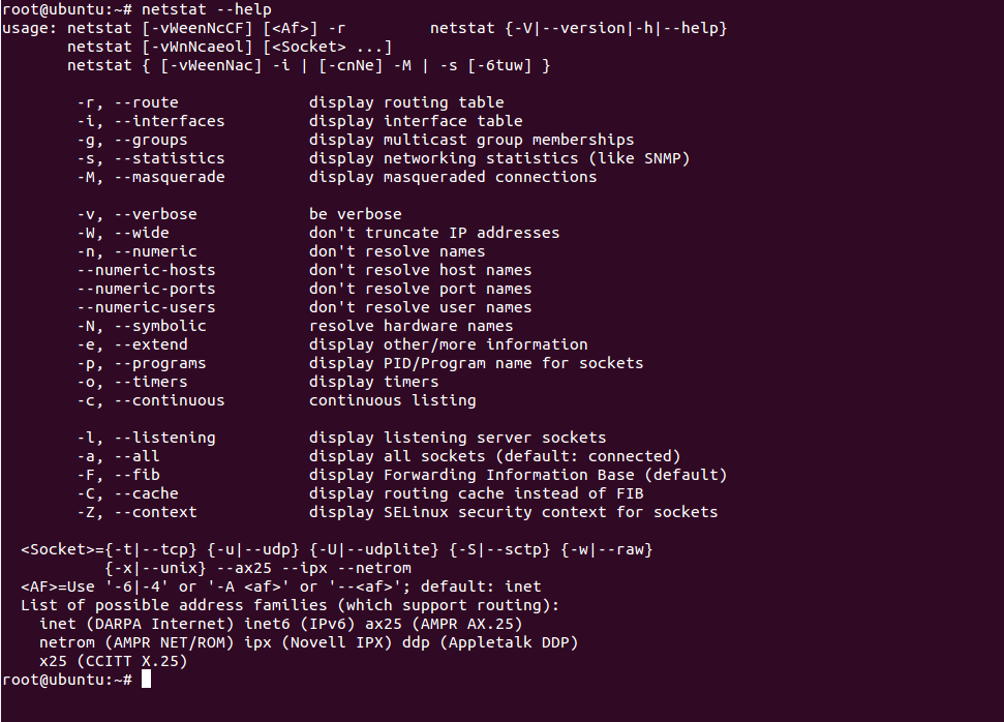
You can display all options available with netstat utility using the following command:
netstat --help
You should see the following screen:
Conclusion
In the above guide, you learned how to use netstat command to find active and inactive connections with TCP and UDP ports. This can help you to troubleshoot network related problems. Try netstat today on your VPS hosting account from Atlantic.Net.
