This guide streamlines the setup and usage of ChainML and Council-ai for developing generative AI applications. This procedure was tested on the Atlantic.Net Cloud Platform, using Ubuntu on a Cloud VPS with 32GB RAM.
Council-AI is an open-source platform designed to rapidly develop and deploy customized generative AI applications. It utilizes teams of agents built in Python to achieve this.
Council enhances AI development tools, providing greater control and management capabilities for AI agents. It allows users to build complex AI systems that behave consistently through its robust control features.
ChainML is a deep learning framework for building and training deep learning models. It is built on top of TensorFlow and provides a number of features that make it easier to build and train deep learning models, such as automatic differentiation, eager execution, and a high-level API.
In short, ChainML is a deep learning framework, while Council is an open-source platform for developing and deploying generative AI applications.
In this procedure, we will be focusing on using Council-AI to create Chains.
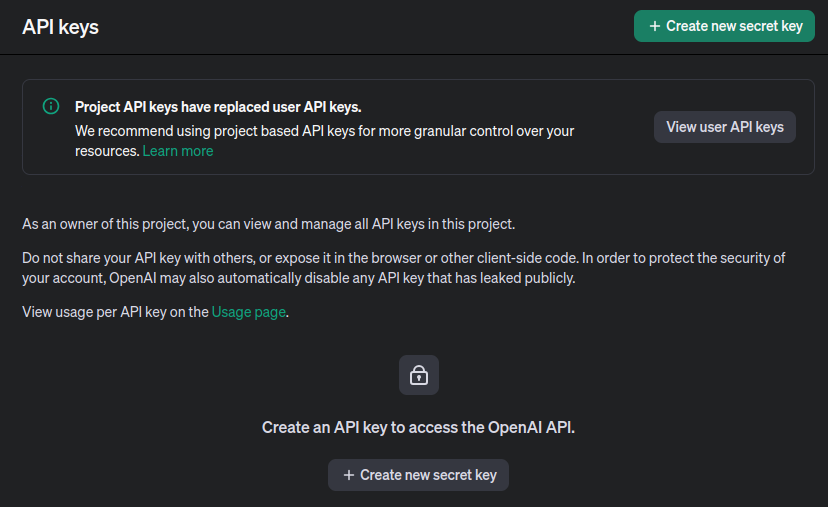
Create OpenAI API Key (Mandatory)
To use this procedure, you will need a paid license to interact with the OpenAI API. You can also use AzureLLM or GoogleLLM, but again, a paid license is needed.
If you already have your own Project API key you can skip this step. Otherwise, you must complete this step to integrate Council-AI with a Language Model.
- Go to the OpenAI website and Create an Account (or log in if you already have one)
https://platform.openai.com/signup
- Navigate to the Project API Keys Sections by clicking here:
https://platform.openai.com/api-keys
- Click on Create New Secret Key
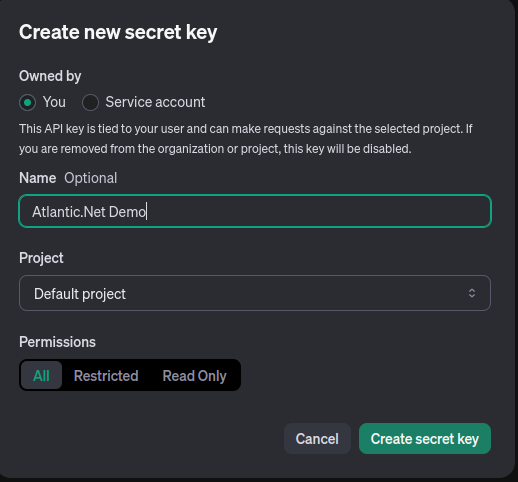
- Follow the instructions and give your Key a Name and a Project. I will be using the default project in this example.
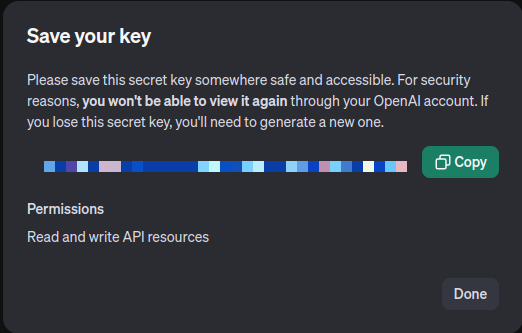
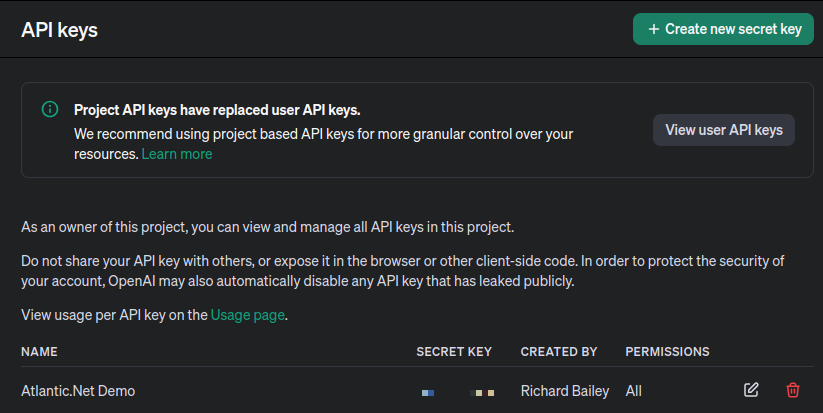
- IMPORTANT: Make a note of your KEY. You will need it later. This is the only chance you get to save the key in its entirety. Click done when ready.
Part 1: Using Council-AI with Jupyter Notebooks on Ubuntu
Prerequisites
- Ubuntu 22.04: I will be using Ubuntu 22.04 throughout this demo. You can install your Ubuntu server in under 30 seconds from the Atlantic.Net Cloud Platform Console.
- Basic Python Knowledge: Familiarity with Python and virtual environments is helpful.
- ChatGPT Pro Licence: Recent changes from OpenAI mean that you need to have a paid account to use the OpenAI API (OpenAILLM)
Step 1 – Install Python
Jupyter Lab requires Python. You can install it using the following commands:
apt install python3 python3-pip -y
Next, install the Python virtual environment package.
pip install -U virtualenv
Step 2 – Install Jupyter Lab
Now, install the Jupyter Lab using the pip command.
pip3 install jupyterlab
This command installs Jupyter Lab and its dependencies. Next, edit the .bashrc file.
nano ~/.bashrc
Define your Jupyter Lab path as shown below; simply add it to the bottom of the file:
export PATH=$PATH:~/.local/bin/
Reload the changes using the following command.
source ~/.bashrc
Next, test run the Jupyter Lab locally using the following command to make sure everything starts.
jupyter lab --allow-root --ip=0.0.0.0 --no-browser
Check the output to make sure there are no errors. Upon success you will see the following output:
[C 2023-12-05 15:09:31.378 ServerApp] To access the server, open this file in a browser:
http://ubuntu:8888/lab?token=aa67d76764b56c5558d876e56709be27446
http://127.0.0.1:8888/lab?token=aa67d76764b56c5558d876e56709be27446
Press the CTRL+C to stop the server.
Step 3 – Configure Jupyter Lab
By default, Jupyter Lab doesn’t require a password to access the web interface. To secure Jupyter Lab, generate the Jupyter Lab configuration using the following command.
jupyter-lab --generate-config
Output:
Writing default config to: /root/.jupyter/jupyter_lab_config.py
Next, set the Jupyter Lab password.
jupyter-lab password
Set your password as shown below:
Enter password:
Verify password:
[JupyterPasswordApp] Wrote hashed password to /root/.jupyter/jupyter_server_config.json
You can verify your hashed password using the following command.
cat /root/.jupyter/jupyter_server_config.json
Output:
{
"IdentityProvider": {
"hashed_password": "argon2:$argon2id$v=19$m=10240,t=10,p=8$zf0ZE2UkNLJK39l8dfdgHA$0qIAAnKiX1EgzFBbo4yp8TgX/G5GrEsV29yjHVUDHiQ"
}
}
Make a note of this information, as you will need to add it to your config.
Next, edit the Jupyter Lab configuration file.
nano /root/.jupyter/jupyter_lab_config.py
Define your server IP, hashed password, and other configurations as shown below:
c.ServerApp.ip = 'your-server-ip'
c.ServerApp.open_browser = False
c.ServerApp.password = 'argon2:$argon2id$v=19$m=10240,t=10,p=8$zf0ZE2UkNLJK39l8dfdgHA$0qIAAnKiX1EgzFBbo4yp8TgX/G5GrEsV29yjHVUDHiQ'
c.ServerApp.port = 8888
Make sure you format the file exactly as above. For example, the port number is not in brackets, and the False boolean must have a capital F.
Save and close the file when you are done.
Step 4 – Create a Systemctl Service File
Next, create a systemd service file to manage the Jupyter Lab.
nano /etc/systemd/system/jupyter-lab.service
Add the following configuration:
[Service]
Type=simple
PIDFile=/run/jupyter.pid
WorkingDirectory=/root/
ExecStart=/usr/local/bin/jupyter lab --config=/root/.jupyter/jupyter_lab_config.py --allow-root
User=root
Group=root
Restart=always
RestartSec=10
[Install]
WantedBy=multi-user.target
Save and close the file, then reload the systemd daemon.
systemctl daemon-reload
Next, start the Jupyter Lab service using the following command.
systemctl start jupyter-lab
You can now check the status of Jupyter Lab service using the following command.
systemctl status jupyter-lab
Jupyter Lab is now started and listening on port 8888. You can verify it with the following command.
ss -antpl | grep jupyter
Output:
LISTEN 0 128 104.219.55.40:8888 0.0.0.0:* users:(("jupyter-lab",pid=156299,fd=6))
Step 5 – Access Jupyter Lab
Now, open your web browser and access the Jupyter Lab web interface using the URL http://your-server-ip:8888. You will see the Jupyter Lab on the following screen.
Provide the password you set during the installation and click on Log in. You will see Jupyter Lab dashboard on the following screen:
Step 6 – Start the Python3 Notebook and Run the following Code
This part of the procedure uses examples provided by ChainML.
This guide aims to transform your social media presence with an AI-powered marketing assistant! Share your post idea, and this tool will identify the perfect platform and generate tailored content for maximum impact. Whether you’re an influencer, marketer, or developer, this tutorial will showcase how Agents, Chains, and Skills can streamline your content creation process. using X (formerly Twitter), LinkedIn, or Discord.
Install Council-AI
!pip install council-ai
!pip install --upgrade jupyter ipywidgets
Import Modules
# Import required modules. This block imports all the required libraries for our project.
# Each one serves a specific function in creating our Council AI agent.

import dotenv
import os
import logging

from council.chains import Chain
from council.skills import LLMSkill
from council.filters import BasicFilter
from council.llm import OpenAILLM
from council.controllers import LLMController
from council.evaluators import LLMEvaluator
from council.agents import Agent
Set Your OpenAI API KEY
# Setup environment variables
dotenv.load_dotenv()
os.environ['OPENAI_API_KEY'] = 'sk-None-123456789-123456789-123456789'
os.environ['OPENAI_LLM_MODEL'] = 'gpt-3.5-turbo-0125'
os.environ['OPENAI_LLM_TIMEOUT'] = '90'
Initialize the LLM
# Initialize OpenAI LLM (Large Language Model)
# Here, we create an instance of OpenAILLM, which is a wrapper around the OpenAI language model,
# configured based on our environment variables.


openai_llm = OpenAILLM.from_env()
Create Your Chains
# Create the short content 'XorTwitter' Skill and Chain
prompt_XorTwitter = "You are a social media influencer with millions of followers on Twitter because of your short humorous social media posts that always use emojis and relevant hash tags."
XorTwitter_skill = LLMSkill(llm=openai_llm, system_prompt=prompt_XorTwitter)
XorTwitter_chain = Chain(name="XorTwitter", description="Responds to a prompt, which is a short sarcastic and humorous post idea.", runners=[XorTwitter_skill])

# Create a professional content 'LinkedIn' Skill and Chain
prompt_LinkedIn = "You are a social media influencer with millions of followers on LinkedIn because of your compelling short professional business posts that generate lots of engagement."
LinkedIn_skill = LLMSkill(llm=openai_llm, system_prompt=prompt_LinkedIn)
LinkedIn_chain = Chain(name="LinkedIn", description="Responds to a prompt, which is a post idea, written in formal businesss language using big words.", runners=[LinkedIn_skill])

# Create a longer 'Discord' Skill and Chain
prompt_Discord = "You are a social media influencer with millions of followers on Discord because of your compelling short social media posts."
Discord_skill = LLMSkill(llm=openai_llm, system_prompt=prompt_Discord)
Discord_chain = Chain(name="Discord", description="Responds to a prompt, which is a post idea, as an expert Discord influencer and generates a Discord post.", runners=[Discord_skill])
Create Controller & Evaluator
# Create Controller
controller = LLMController(chains=[XorTwitter_chain, LinkedIn_chain, Discord_chain], llm=openai_llm, response_threshold=5)

# Create Evaluator
evaluator = LLMEvaluator(llm=openai_llm)

# Create Filter
filter = BasicFilter()
Create the Agent
# Create Agent
agent = Agent(controller=controller, evaluator=evaluator, filter=filter)
Create a Context
result = agent.execute_from_user_message("Open Data Conference")

#for message in result.messages:
print("\n" + result.best_message.message)

#OpenAI models may time-out due to high traffic, retry this step immediately or try this step later

#for message in result.messages:
print("\n" + result.best_message.message)
Examples
Here are some example inputs to invoke the 3 different chains:
- For the ‘XorTwitter’ Skill: Prompt: “What is the sum of two and three”
- For the ‘LinkedIn’ Skill: Prompt: “Job Search”
- For the ‘Discord’ Skill: Prompt: “Game Night Announcement”
Try the same questions in ChatGPT directly and note the different responses. Now try your own input text.
Part 2: Using Council-AI Direct From the Ubuntu Console
Prerequisites
- Ubuntu 22.04: Ensure you have Ubuntu 22.04 installed. You can quickly set up an Ubuntu server using cloud platforms like Atlantic.Net.
- Basic Python Knowledge: Familiarity with Python and virtual environments is helpful.
- ChatGPT Pro Licence: Recent changes from OpenAI mean that you need to have a paid account to use the OpenAI API (OpenAILLM)
Step 1 Update OS and Install Pre-Requisites
I will be using Ubuntu 22.04 throughout this demo. You can install your Ubuntu server in under 30 seconds from the Atlantic.Net Cloud Platform Console.
Open a terminal and run:
apt-get update -y
apt-get install python3 python3-pip git python3.10-venv python3-dotenv
-y
Explanation:
This command updates package lists and installs Python (version 3), pip (package manager), Git (version control), Python virtual environment tools, and dotenv (for managing environment variables)
Step 2 – Create and Activate a Python Virtual Environment
Using a Python virtual environment to run Council AI (or any Python project, really) is highly recommended. Virtual environments help to:
- Isolate Dependencies: Each project gets its own set of packages, avoiding conflicts between different projects that might require different versions of the same libraries.
- Keep Your System Clean: You won’t clutter your global Python installation with project-specific packages.
- Make Sharing and Deployment Easier: Virtual environments create a self-contained setup for your project, making it easier to share with others or deploy.
python3 -m venv council-env
source council-env/bin/activate
Explanation:
- The first command creates a virtual environment named “council-env”.
- The second command activates the virtual environment, isolating your project dependencies.
Step 3 – Install Council AI using PyPi
Install Council AI.
pip install council-ai
Wait for the installation to complete. Pip will download and install the Council AI package and its dependencies.
Validate the installation by typing:
pip show council-ai
Step 4 – Set Up Your Local .env File
Create a .env File:
- In your project directory (or within your virtual environment), create a new file named .env.
- Note: The .env file is a common way to store sensitive information like API keys. It is usually ignored by version control systems like Git to prevent accidental exposure.
nano .env
Add Your API Key:
Open the .env file in a text editor and add the following line, replacing your_actual_openai_api_key with your actual key:
OPENAI_API_KEY=your_actual_openai_api_key
Step 5 – Start Council AI and Run Your First Chain
All code must be executed inside a python script. If you run this against the shell it will simply error and not know what to do.
First, create a blank python script:
nano council_script.py
Add the following script block:
from council.chains import Chain
from council.skills import LLMSkill
from council.llm import OpenAILLM

import dotenv
import os

dotenv.load_dotenv()
print(os.getenv("OPENAI_API_KEY", None) is not None)

openai_llm = OpenAILLM.from_env()
prompt = "You are responding to every prompt with a short poem titled hello world"
hw_skill = LLMSkill(llm=openai_llm, system_prompt=prompt)
hw_chain = Chain(name="Hello World", description="Answers with a poem titled Hello World", runners=[hw_skill])
prompt = "You are responding to every prompt with an emoji that best addresses the question asked or statement made"
em_skill = LLMSkill(llm=openai_llm, system_prompt=prompt)
em_chain = Chain(name="Emoji Agent", description="Responds to every prompt with an emoji that best fits the prompt",
runners=[em_skill])

from council.controllers import LLMController

controller = LLMController(chains=[hw_chain, em_chain], llm=openai_llm, response_threshold=5)

from council.evaluators import LLMEvaluator

evaluator = LLMEvaluator(llm=openai_llm)

from council.filters import BasicFilter
from council.agents import Agent

agent = Agent(controller=controller, evaluator=evaluator, filter=BasicFilter())

result = agent.execute_from_user_message("hello world?!")
print(result.best_message.message)

result = agent.execute_from_user_message("Represent with emojis, council a multi-agent framework")
print(result.best_message.message)


